Why is my espresso sour fix: Quick Guide to Balanced Shots

That sharp, wince-inducing sourness in your espresso? It’s the tell-tale sign of under-extraction.
Think of it this way: the water blasted through your coffee puck so quickly that it only managed to grab the first things it could dissolve—the bright, tangy acids. It completely missed out on the deeper, sweeter compounds that balance everything out. It’s a super common hurdle for home baristas, but thankfully, it’s entirely fixable.
Your Immediate Sour Espresso Fix Checklist
When you're pulling your hair out wondering why your espresso is sour, the fix almost always comes down to a few key variables. That sour taste is a direct signal that your brew time was too short, probably because your grind was too coarse. Your mission, should you choose to accept it, is to slow that water down.
This is a widespread challenge. While the British Coffee Association notes that around 80% of UK households still buy instant coffee, there's a huge wave of people diving into the world of speciality coffee at home. Getting a handle on variables like grind size is the key to unlocking great flavour. For espresso, a shot time between 25-30 seconds is the sweet spot we’re aiming for.
Core Variables to Adjust
To nail this, we need to focus on the fundamentals. The magic happens in the relationship between your grind, your dose (the amount of coffee), and your yield (the liquid espresso in the cup). Getting these three in harmony controls the extraction time and, ultimately, the flavour.
Here’s your game plan, in order of importance:
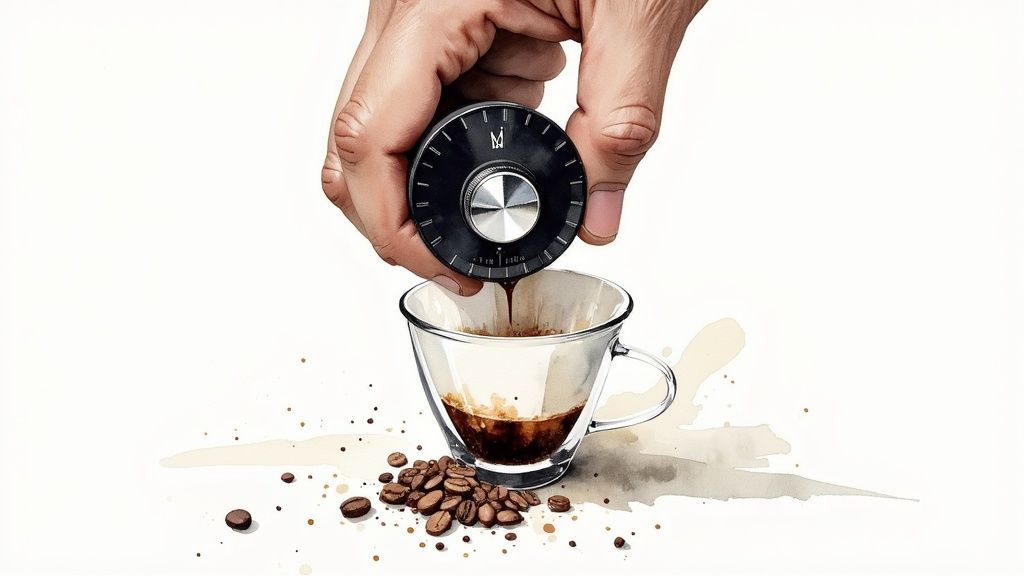
- Grind Size: This is your number one tool. Grinding your coffee finer creates more resistance for the water, forcing it to slow down and spend more time extracting all those lovely flavours.
- Dose: This is simply the amount of coffee you put in your portafilter basket. Bumping the dose up a little can also increase resistance and slow the shot down.
- Yield & Time: This is your target output and the time it takes to get there. A brilliant starting point is the classic 1:2 ratio—for example, 18g of ground coffee in, aiming for 36g of liquid espresso out, all in about 25-30 seconds.
This diagram gives you a quick visual guide for what to do when your shot is running way too fast and tasting sour.
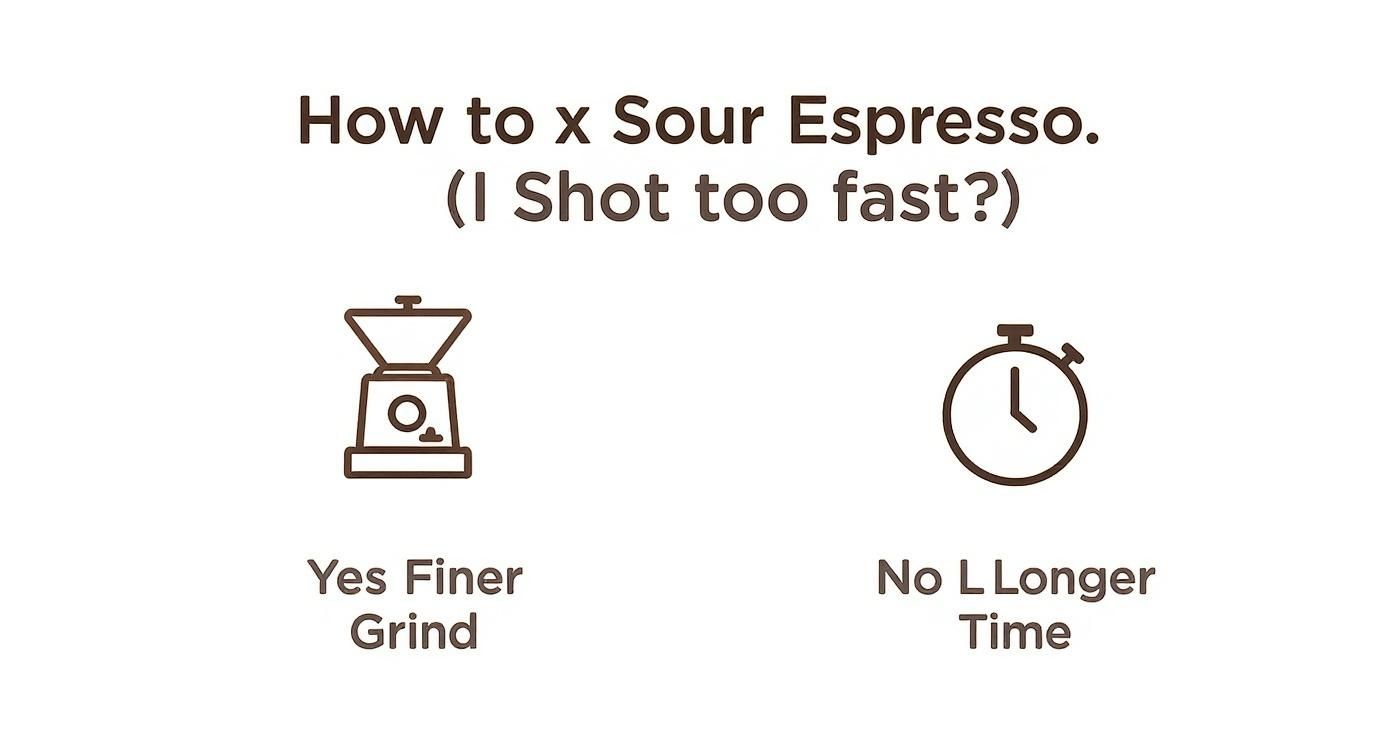
As you can see, a gushing, fast shot is the usual suspect behind sourness. The most direct fix? Grind finer. It’s that simple.
The most impactful change you can make to fix a sour espresso is to grind your coffee finer. This single adjustment increases the water's contact time with the coffee grounds, allowing for the extraction of sweeter compounds that balance out the initial acidic notes.
Once you’ve dialled in a balanced shot, a whole world of different types of espresso drinks opens up. But first things first—let’s get that perfect shot. To make things easier and way more consistent, a good set of coffee scales is non-negotiable. They take all the guesswork out of measuring your dose and yield, giving you repeatable results every time.
Dialling In Your Grind for a Balanced Extraction
If your espresso consistently tastes sharp and sour, your coffee grinder is the first piece of equipment you need to get friendly with. Nine times out of ten, a grind setting that’s too coarse is the culprit behind under-extraction—the technical term for that wince-inducing sourness.
Think of your ground coffee like a pile of tiny pebbles. If they’re large and coarse, water will just rush straight through the gaps with almost no resistance. This super-fast flow means the water simply doesn't get enough contact time to dissolve all the delicious sugars and oils locked away inside the coffee, leaving you with a cup full of nothing but the fast-extracting, sour-tasting acids.
By making the grind finer, you’re essentially breaking those pebbles down into much smaller particles. This simple change dramatically increases the total surface area available for extraction and creates a denser, more compact bed of coffee in your portafilter. The water now has to work a lot harder to push its way through, slowing the whole process down. This gives it the precious extra seconds it needs to pull out those sweet, balancing flavours that make espresso so good.
Making Small, Methodical Adjustments
The real key to dialling in your grind is to make small, incremental changes. Drastically shifting from a coarse setting to a super-fine one will likely just swing the pendulum from a sour shot to a bitter, over-extracted one. The goal is to find that perfect sweet spot right in the middle.
Imagine your grinder has settings from 1 to 30. If your shot is gushing out in 15 seconds, don't just jump from setting 15 all the way down to 5. Instead, try moving just one or two steps finer—maybe to setting 13—and pull another shot. This methodical approach is the most reliable way to fix a sour espresso.
A quality grinder with plenty of adjustment steps is an absolute game-changer here. A versatile and precise machine like the Sage Smart Grinder Pro, for instance, gives you the fine control needed to make these micro-adjustments, taking most of the guesswork out of the process.
Crucial Tip: Always purge a small amount of coffee after changing your grind setting. Most grinders retain a few grams of coffee between the burrs from the previous setting. If you don't grind out and discard this old coffee, your next shot will be a mix of two different grind sizes, giving you an inaccurate result and sending you down the wrong path.
Understanding Coffee Density and Its Impact
Not all coffee beans are created equal. The roast level and origin of your coffee have a huge impact on its density and how it behaves in the grinder. This is a common stumbling block when people switch to a new bag of beans and suddenly wonder, "why is my espresso sour?"
Let's look at a real-world scenario:
- Dark Roasts: These beans are roasted for longer, making them more porous, brittle, and less dense. Because they break apart so easily, they often require a slightly coarser grind setting to achieve a balanced shot.
- Light Roasts: Roasted for a shorter time, these beans are much harder and denser. To properly extract their complex, often fruity and acidic notes, you’ll need to grind them significantly finer to create enough resistance for the water.
If you switch from a dark, Italian-style blend to a light-roast single-origin from Ethiopia without touching your grinder, your shot will almost certainly run incredibly fast and taste overwhelmingly sour. You have to "dial in" again for every new coffee you use. To get a better handle on the theory, you can dive deeper with our complete coffee grind size guide, which breaks down the nuances for different brew methods.
By treating your grinder as your number one tool for controlling extraction, you can systematically eliminate sourness. Remember to make one small adjustment at a time, purge between settings, and always be prepared to recalibrate for a new bag of beans. This patient and precise approach is the foundation of consistently delicious, balanced espresso.
Mastering Your Dose and Puck Preparation
Once you've got your grind setting in the right ballpark, how you prepare the coffee in your portafilter—your puck preparation—is the next major battleground in the fight against sour espresso. The relationship between your dose (the weight of your coffee) and how you tamp it is absolutely vital for a consistent, even extraction. In fact, a badly prepped puck will ruin a shot, even if the grind is perfect.
A common trap for home baristas is thinking they need to tamp the coffee down as hard as humanly possible. The truth is, consistency and creating a perfectly level, evenly compacted coffee bed matter far more. The goal is simple: ensure water flows through the entire puck at the same rate.
If the coffee is uneven or full of clumps, the pressurised water will simply exploit the weakest points. It carves out little pathways of least resistance, a problem we call channelling. These tiny rivers of water bypass most of the coffee, leading to pockets of severe under-extraction. The result? A confusing shot that's both sour (from the under-extracted channels) and potentially bitter (from the over-extracted dense spots), and ultimately, completely unbalanced.
Dialling In Your Dose Weight
Your dose is simply the weight of dry coffee grounds you use, and it must be right for the size of your basket. Using the wrong amount of coffee is an incredibly common cause of sourness. Every portafilter basket is designed for a specific range, say 18-20 grams.
Imagine this scenario: you've only used 16g of coffee in a basket designed to hold 20g. This creates way too much headspace—the gap between the tamped coffee and the shower screen. When you start the shot, this excess space lets water pool on top of the puck, destroying its structure and leading to a soupy, uneven extraction that tastes thin and sour.
The fix for your sour espresso might be as simple as changing your dose. Weighing your coffee with digital scales accurate to 0.1g is non-negotiable for consistency. As a starting point, aim for the dose recommended for your basket size.
Increasing your dose slightly, maybe from 17g to 18g, can be a really effective way to slow down a fast, sour shot. A larger dose creates a deeper, more compact coffee bed, adding resistance and forcing the water to work harder for a more thorough extraction.
Achieving an Even and Consistent Tamp
With your dose sorted, the focus shifts to distribution and tamping. Your aim is a totally uniform bed of coffee, free from clumps and air pockets. This is where a few simple, affordable tools can make a massive difference.
Here’s what you need to do for effective puck prep:
- Break Up Clumps: Grab a Weiss Distribution Technique (WDT) tool—it’s basically a set of fine needles—and rake it through the grounds. This breaks up clumps from the grinder and distributes the coffee evenly across the basket.
- Settle and Level: Give the portafilter a gentle tap on the counter to settle the grounds into a flat bed. A distribution tool is also great here for levelling the surface before you tamp.
- Tamp Levelly: When you tamp, being level is everything. A wonky tamp compresses one side more than the other, creating a blatant invitation for channelling. A calibrated tamper, which provides consistent pressure every time, is a fantastic upgrade for ensuring shot-to-shot reliability.
Upgrading your basic kit to precision baskets and tampers can dramatically improve your consistency. Precision baskets have perfectly uniform holes, promoting a much more even flow of water than the standard stock baskets. When you combine these tools with good technique, you start to eliminate the variables that lead to channelling and under-extraction. For a more detailed walkthrough, our puck prep guide on WDT and distribution offers a deeper dive into perfecting your technique.
Optimising Your Brew Ratio and Temperature
With your grind dialled in and your puck prep down to a fine art, the final pieces of the puzzle are time and temperature. These two elements work hand-in-hand to determine exactly which flavour compounds are pulled from your coffee. Getting them right is the last major step in turning a sharp, unpleasant shot into a rich, balanced one.
Many home baristas get fixated on a 25-30 second shot time, and while that's an excellent guideline, it doesn't tell the whole story. The far more reliable measure of a successful extraction is your brew ratio—the direct relationship between the weight of your dry coffee grounds (your dose) and the weight of the liquid espresso in your cup (your yield).
This shift in focus from time alone to the dose-to-yield ratio is what separates good espresso from great espresso. It gives you a repeatable, data-driven target that helps you systematically nail down what’s causing that sourness.
Aiming for the Classic 1 to 2 Brew Ratio
The most common and effective starting point for any new coffee is the classic 1:2 brew ratio. This simply means you want your final liquid espresso to weigh twice as much as your dry coffee dose. It’s the industry standard for a reason: it almost always produces a balanced, full-bodied shot.
Here’s how that looks in practice:
- Dose: You start with 18 grams of finely ground coffee in your portafilter.
- Yield: You aim for 36 grams of liquid espresso in your cup.
- Time: You want this to happen within that 25-30 second window.
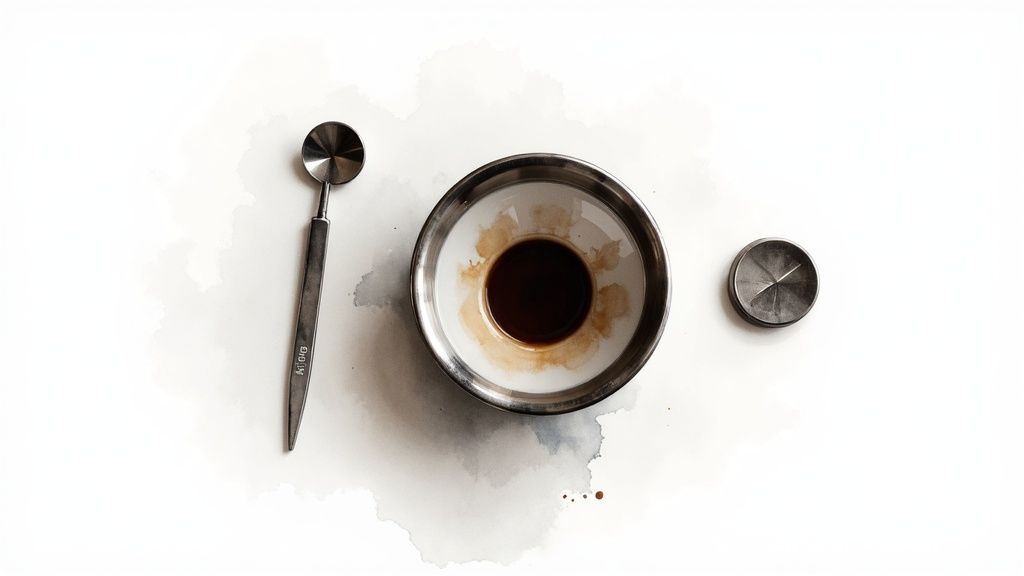
To do this, you absolutely need a good set of coffee scales that measure to 0.1g. Place your cup on the scales, tare it to zero, and start your shot. As soon as the display hits your target yield (36g in this case), stop the machine. Only then should you check the time. If it took 15 seconds, you know you need to grind finer to slow it down. If it took 45 seconds, you need to grind a little coarser.
By focusing on hitting a consistent yield first, you turn time into a diagnostic tool rather than the ultimate goal. This methodical approach is the fastest way to solve issues with sourness.
The Critical Role of Brew Temperature
Alongside your brew ratio, water temperature is a powerful variable that directly impacts flavour. Think of it like cooking: cooler water just doesn't have the same energy as hotter water to dissolve the sugars and deeper flavour compounds in your coffee.
If your brew water is too cool (typically below 90°C), it will struggle to extract anything beyond the fast-dissolving acids. The result is a thin, weak, and distinctly sour shot—a common problem when brewing lighter roasts, which are denser and require more energy to extract properly.
Conversely, water that is too hot (above 96°C) can scorch the coffee grounds, leading to a harsh, bitter flavour. Finding the sweet spot is key. For an in-depth exploration, our article on the best water temperature for coffee provides a detailed breakdown of how temperature affects different brewing methods.
Managing temperature varies hugely depending on your machine:
- Single Boiler Machines: These often require a technique called "temperature surfing." This involves running hot water through the group head to cool the boiler down from its steam temperature to a more suitable brew temperature before pulling your shot.
- Dual Boiler or PID Machines: These offer much greater stability. A machine with a PID (Proportional-Integral-Derivative) controller allows you to set and maintain an exact temperature, giving you incredible control and shot-to-shot consistency.
If you suspect low temperature is the cause of your sour espresso, try increasing it by one or two degrees. For light roasts, brewing hotter (around 94-95°C) is often necessary to unlock their sweetness and complexity, properly balancing their natural acidity.
Checking Your Beans and Machine Health
So, you’ve meticulously dialled in your grind, nailed your puck prep, and your brew ratio is spot on, but that sour tang just won’t quit. What now? It’s time to shift your focus from technique to two other crucial players in the game: the coffee beans themselves and the health of your machine. Even with perfect form, stale beans or a grubby machine can completely throw off your shot, leaving you with that same frustrating, under-extracted flavour.
Freshly roasted, high-quality coffee isn't just a nice-to-have for good espresso; it’s a must. As coffee gets older, it begins to stale. The delicate compounds that give us those lovely sweet and complex notes start breaking down, and the beans lose the CO2 that's essential for a good extraction. This makes your shots unpredictable, often causing them to gush out too fast and taste disappointingly hollow and sour, no matter how fine you grind.
It’s also really important to know the difference between unwanted sourness and deliberate acidity. A lightly roasted single-origin from Kenya, for example, is celebrated for its bright, almost wine-like acidity. If you’re more accustomed to darker, chocolatey blends, you might mistake this vibrant character for sourness. It all comes down to knowing what flavour notes to expect from the beans in your hopper.
Is It Sourness or Acidity?
Knowing whether you're tasting a flaw or a feature is half the battle. One is a sign of a brewing mistake, while the other is a desirable quality in certain coffees.
Sourness is a one-dimensional, sharp taste, a bit like biting into an unripe lemon. It zings the sides of your tongue and makes you pucker your lips. Acidity, on the other hand, is a pleasant, complex brightness—think of the crisp snap of a green apple. It gives the coffee life and structure.
Figuring this out will tell you whether you need to tweak your brewing recipe or perhaps just explore a different roast profile that’s more suited to your taste.
Sourness vs Acidity: What Is In Your Cup?
It's easy to confuse the sharp, unpleasant taste of sourness with the bright, desirable quality of acidity. This table will help you identify what you're actually tasting, so you can decide whether you've got a brewing problem to fix or you're simply experiencing the intended character of your coffee.
| Flavour Note | Sour (Under-Extracted) | Acidic (Well-Balanced) |
|---|---|---|
| Sensation | Sharp, puckering, aggressive attack on the sides of the tongue. | Bright, crisp, lively sensation across the palate. |
| Taste Profile | Reminiscent of unripe fruit, like a sour lemon or green grape. | Reminiscent of ripe fruit, like a green apple or citrus zest. |
| Aftertaste | Lingering, unpleasant tartness. | Clean, refreshing, and often leaves a sweet finish. |
| Complexity | One-dimensional and flat. | Adds structure and vibrancy, revealing complex layers of flavour. |
Being able to tell these two apart is a game-changer. It stops you from "fixing" a perfectly good shot and helps you better appreciate the incredible diversity of flavour that coffee has to offer.
Keeping Your Machine in Top Condition
Beyond the beans, the cleanliness of your espresso machine is absolutely non-negotiable. Over time, a nasty trio of coffee oils, old grounds, and mineral scale builds up inside your machine, and it will directly sabotage your shots. A dirty group head or a clogged shower screen messes with the water flow, causing channelling and—you guessed it—under-extraction, which is a fast track to sour coffee.
Even more sneaky is the limescale build-up from hard water. It can coat your machine's heating elements and block the narrow water paths, making your brew temperature unstable. This is a massive problem, as temperature swings are a prime cause of sour espresso. A dirty machine just can't deliver the consistent temperature and pressure you need for a great extraction.
A simple, regular cleaning routine is your best line of defence.
- Daily: After your last shot of the day, do a quick backflush with plain water. This will clear out any loose grounds from the group head.
- Weekly: Use a proper espresso machine cleaner to backflush the group head. This stuff dissolves the stubborn, oily gunk that water can't touch.
- Every Month or Two: Descale your machine following the manufacturer's guide. This gets rid of the mineral build-up that kills water flow and messes with your temperature. For a full rundown, check out our guide on how to descale a coffee machine, which takes you through it step-by-step.
By giving your beans and machine the same care you give your technique, you’ll eliminate those last hidden roadblocks. If you want to dive deeper into how your gear affects your brew, this comprehensive espresso machine buying guide for home baristas is a fantastic resource. A bit of knowledge here can make all the difference in turning that sour shot into something consistently delicious.
Common Questions About Fixing Sour Espresso
Even when you've got the main variables dialled in, a few nagging questions can still pop up. Let's tackle those common head-scratchers with some quick, clear answers to help you solve any lingering issues and perfect your technique for good.
Can My Water Make My Espresso Taste Sour?
It absolutely can. It's easy to forget, but your espresso is over 98% water, so its mineral makeup has a massive say in the final taste. If your water is too soft, it simply lacks the minerals like magnesium and calcium needed to pull all the good stuff out of the coffee grounds. The result is often a shot that tastes disappointingly thin, hollow, and sour.
On the flip side, really hard water is packed with minerals. This is a problem because it builds up as limescale inside your machine, messing with water flow and causing the temperature to swing unpredictably—both of which are classic culprits for under-extraction and those dreaded sour shots.
The key is finding a happy medium. Using filtered water with a balanced mineral composition is vital for both incredible flavour and the health of your machine. A quality water filter jug designed for coffee can be a simple but game-changing upgrade to your setup.
Why Does My Dark Roast Espresso Taste Sour?
This is a really common point of confusion, so you're not alone in asking. While it’s true that dark roasts are naturally lower in acidity than their lighter cousins, they will still taste unpleasantly sour if they're significantly under-extracted. The root cause is exactly the same: water is rushing through the coffee puck too quickly to do its job.
This almost always points back to your grind being too coarse, your dose being too low, or your tamp being too light. Dark roasts are more brittle and porous than light roasts, which means they dissolve more easily and naturally offer less resistance to the water.
To fix this, you often need to grind a dark roast even finer than you'd expect to create enough resistance for a proper 25-30 second extraction. If your dark roast is tasting sour, the very first thing you should check is your grind setting.
I Fixed The Sourness, But Now My Espresso Is Bitter. Why?
This is the classic sign of over-correction, and honestly, it’s a great problem to have because it means you're incredibly close! You’ve just swung the pendulum from under-extraction (sour) all the way to over-extraction (bitter). When you made your last adjustment—most likely grinding much finer—you just pushed the extraction a little too far.
Now, the water is spending too much time with the coffee, pulling out the harsh, bitter compounds that are the last things to dissolve. The fix is simply to make smaller, more incremental changes.
If your shot goes from sour to bitter in one adjustment, just dial your grind back a step or two coarser. Dialling in is all about finding that delicious sweet spot right in the middle, and you’re just one tiny tweak away from it.
What If I Just Prefer a Less Acidic Coffee?
It’s entirely possible that your technique is spot on, but the coffee you're using just has a bright, acidic flavour profile that isn't quite your cup of tea. Lightly roasted single-origin coffees from places like Kenya or Ethiopia are celebrated for their vibrant, almost wine-like acidity. If you prefer more traditional chocolatey notes, this brightness can easily be mistaken for sourness.
If you consistently find speciality coffees too sharp for your liking, you might simply enjoy beans that are naturally lower in acidity. Exploring different origins and roast levels is one of the most exciting parts of the coffee journey!
For anyone who wants that rich, satisfying flavour without the zesty kick, our guide to low acid coffee brands is the perfect place to start looking for your next favourite bag. It can help you find beans that naturally align with what you love to taste in your cup.
At Seven Sisters Coffee Co, we believe everyone deserves a delicious, perfectly balanced cup. Explore our range of freshly roasted coffee beans, from rich and chocolatey blends to exciting single origins, all roasted to bring out their best flavour. Find your perfect coffee and say goodbye to sour shots for good.