End channelling in espresso how to stop: Fast, simple fixes

Ever pulled a shot that looked the part, only for the first sip to be a confusing mess of thin, sour, and bitter notes all fighting for attention? If that sounds familiar, you've almost certainly been a victim of espresso channelling. It's one of the most common frustrations in home espresso, but thankfully, it's also one you can fix.
What Is Espresso Channelling and Why It Ruins Your Coffee
At its heart, channelling is simply a sign that your coffee bed isn't perfect. When you pull a shot, you’re forcing hot water through finely-ground coffee under immense pressure—usually around nine bars. For that magical, balanced extraction we're all chasing, the water must saturate and flow through the entire puck of coffee evenly.
When channelling happens, the water gets lazy. It finds a shortcut, a path of least resistance, and blasts its way through a weak spot in the puck instead of flowing through the whole thing. These weak points could be tiny cracks, clumps of grounds that weren't broken up, or an uneven surface from a wonky tamp.
This process torpedoes your coffee in two distinct ways:
- Over-extraction: The grounds sitting directly in the path of these high-pressure jets get absolutely hammered with water. All the delicate, sweet flavours are stripped away, quickly followed by harsh, bitter compounds.
- Under-extraction: Meanwhile, the rest of the dense coffee puck is left high and dry, barely touched by the water. All the potential sweetness and complexity locked inside those grounds never gets a chance to dissolve, leaving you with a sour, acidic taste.
The end result is a shot that's the worst of both worlds. It has the aggressive bitterness of over-extraction and the sharp sourness of under-extraction, with none of the syrupy body or rich flavour you were hoping for. You've essentially brewed two terrible coffees into one cup. Getting a handle on how to make an espresso that truly sings is all about mastering the steps to prevent this.
The Visual Signs of a Channelled Shot
Diagnosing this problem becomes infinitely easier with a bottomless (or naked) portafilter. It’s like pulling back the curtain on your extraction, giving you a front-row seat to see exactly what’s happening under the hood.
Instead of seeing those beautiful, syrupy "tiger stripes" converge into a single, steady stream in the centre, you’ll spot the classic signs of trouble. Look out for erratic jets of espresso squirting out sideways, or watery, blonde streaks appearing far too early in the shot. These are dead giveaways.
Even with a standard spouted portafilter, you might notice the shot starts flowing way too fast. After you're done, inspect the spent puck in the basket. If you see tiny pinholes or little craters on the surface, that's the physical evidence of where the water drilled its way through.
Why It's a Common Challenge
Don’t feel bad if this is happening to you—channelling is a rite of passage for every home barista. It’s a technical hurdle that stands between you and cafe-quality coffee. Here in the UK, the standards for a great coffee have skyrocketed, and as of 2025, it's thought that 15% of adults will be grabbing a coffee out-of-home every week. This trend has pushed home brewers to up their game, too.
The good news is that it’s almost always fixable. With a bit of attention to your puck prep—specifically your grinding, distribution, and tamping—you can eliminate those weak spots and force the water to do its job properly. Let's get into how.
Mastering Your Puck Prep to Prevent Channelling
To stop channelling in your espresso, you have to get things right long before you even think about locking the portafilter into your machine. Flawless puck preparation is your first and most effective line of defence. It’s the meticulous, almost ritualistic process of turning a pile of ground coffee into a perfectly uniform, dense disc ready for extraction.
The journey to a perfect puck starts with precision. Weighing your dose isn't just a quirky habit for coffee nerds; it's a fundamental step for shot-to-shot consistency. Using the exact same amount of coffee every single time eliminates a major variable, which means you can make targeted adjustments elsewhere in your routine.
But the real magic happens during distribution. When coffee grounds drop from the grinder, they’re often clumpy and piled unevenly in the basket. If you just go ahead and tamp that messy mound, you create hidden pockets of high and low density—basically an open invitation for water to find the path of least resistance and channel straight through.
The Power of Distribution Tools
The whole point of distribution is to create a homogenous, fluffy, and level bed of coffee. This is where a few key tools become indispensable. Forget the old cafe trick of swiping a finger across the grounds; modern techniques offer far greater precision and repeatability.
The most celebrated method is the Weiss Distribution Technique (WDT). This involves using a tool with very fine needles, like this WDT Tool from ADS Coffee Supplies, to rake through the grounds, breaking up every single clump and evenly distributing the coffee particles throughout the entire basket. A good WDT tool doesn't just shuffle the top layer; it works from the bottom up, ensuring a uniform density that is absolutely crucial for stopping espresso channelling.
This sequence shows the direct consequence of a poorly prepped coffee puck, illustrating how it leads straight to a bad cup.
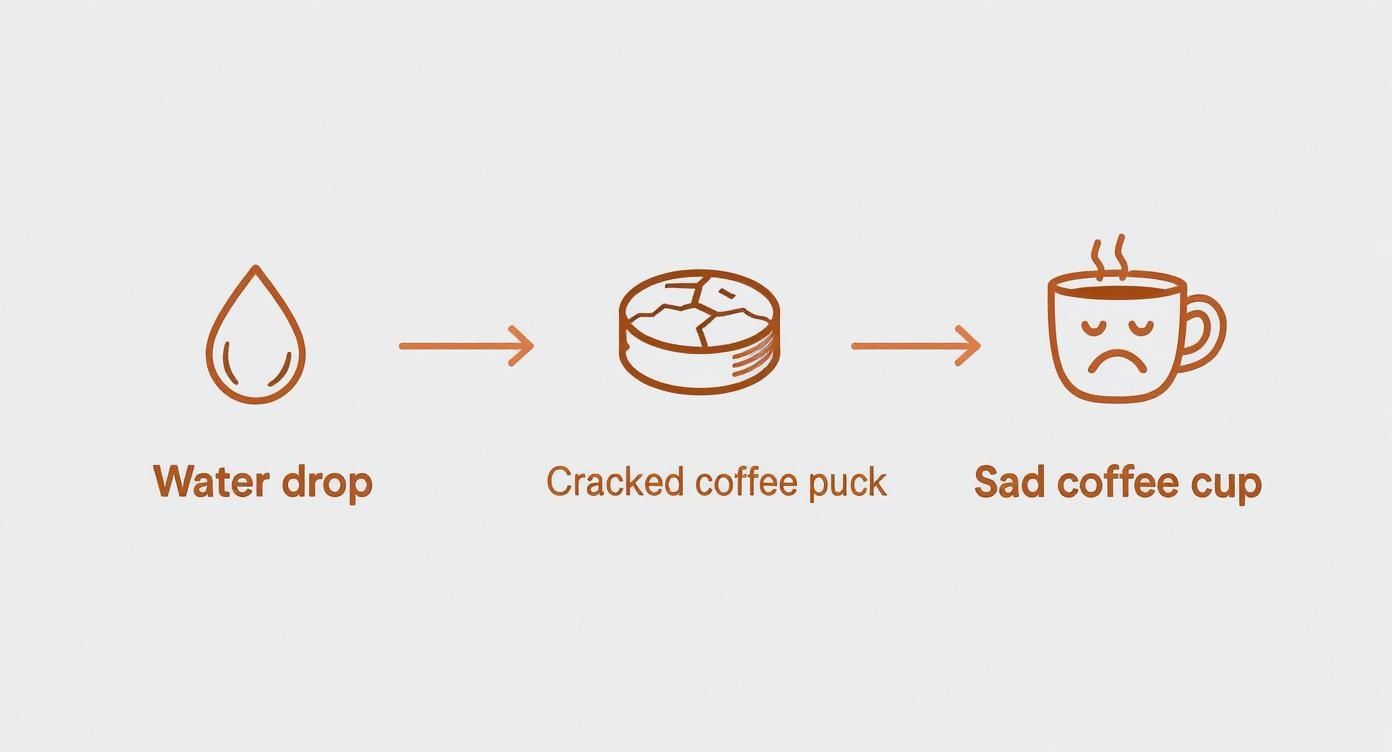
The flow is clear: when pressurised water hits an uneven puck, the result is a poor extraction and a disappointing flavour in your cup.
Building Your Puck Prep Workflow
Creating a repeatable workflow is the secret to consistency. While every barista develops their own rhythm, a solid puck prep routine generally involves a few core actions performed in a specific order. This removes the guesswork and builds muscle memory.
Here’s a practical workflow to get you started:
- Grind and Dose: Grind your freshly weighed beans directly into your portafilter. Using a dosing funnel here is a game-changer for preventing messy spills and ensuring all your precious coffee makes it into the basket.
- Distribute with WDT: Use your WDT tool to rake through the grounds. Start with deep circles at the bottom of the basket and gradually work your way to the top. Finish with a few shallow circles on the surface to leave it relatively flat.
- Settle the Grounds: Give the portafilter a firm, single tap downwards on a tamping mat. This collapses any large air pockets and helps settle the grounds into a more compact bed. Whatever you do, avoid tapping the side of the portafilter, as this can cause grounds to pull away from the basket walls, creating a prime spot for channels.
- Level the Surface: Some baristas like to use a distribution tool or leveller at this stage. These tools rest on the rim of the basket and have a small blade that skims the surface of the coffee, creating a perfectly level plane before tamping. This ensures your tamper makes even contact across the entire puck.
Building a methodical puck preparation routine is the single most impactful change you can make to improve shot quality. It’s not about speed; it’s about precision and consistency.
Common Puck Prep Mistakes to Avoid
Even with all the right tools, small errors in technique can completely undermine your efforts. Being mindful of these common pitfalls will help you refine your process and achieve that elusive, perfect extraction. To dive deeper into the nuances, you can explore a detailed puck prep guide covering WDT and distribution for some extra insights.
One of the most frequent mistakes is aggressive or random stirring with a WDT tool. The goal is methodical de-clumping, not just creating a stir. Rake gently and with purpose. Another common issue is inconsistent tamping pressure, but we’ll get into the art of the perfect tamp in the next section.
For now, just focus on creating that flawless foundation. By making meticulous puck preparation a non-negotiable part of your routine, you are directly addressing the root cause of most channelling issues. You're setting the stage for a sweet, balanced, and delicious espresso, every single time.
The Importance of a Perfect Tamp Every Time
Once your coffee grounds are perfectly distributed, the next critical moment is the tamp. Let's clear something up right away: forget the old-school advice to tamp with all your might. The goal isn't brute force. Instead, you need to focus on two things above all else: consistency and levelness.
An uneven tamp is a direct invitation for channelling. It essentially creates a landscape of dense hills and loose valleys inside the puck, and water under nine bars of pressure is ruthlessly efficient at finding the path of least resistance. A level, consistent tamp forces the water to saturate the entire coffee bed evenly, which is the only way to get a balanced extraction.
Mastering Your Tamping Technique
Getting your tamping ergonomics right is more about posture and control than raw strength. A solid, repeatable technique is the cornerstone of great espresso because it minimises the chance of an uneven press.
Here’s how to get it right, every single time:
- Hold the Tamper Correctly: Grip it like you would a doorknob. Your index finger and thumb should guide the base, giving you maximum control and feel for what's happening.
- Use Your Body Weight: Stand with your tamping arm bent at a 90-degree angle. Apply pressure downwards from your shoulder and elbow, not just your wrist. This makes it far easier to keep the tamp perfectly level and apply the same pressure shot after shot without straining yourself.
- Finish with a Gentle Polish: After the main compression, give the tamper a very slight, gentle twist without pushing down any further. This smooths, or "polishes," the surface of the puck and helps break the static seal between the tamper and the coffee.
The whole motion should be smooth and deliberate. You're aiming to create a compact, level surface that offers uniform resistance to the water. Nailing these fundamentals is a huge part of your journey towards pulling the perfect espresso at home.
Common Tamping Mistakes That Cause Channelling
Even with the best intentions, tiny errors in technique can create big problems. A momentary lapse in concentration can undo all your careful distribution work, leading straight back to a sour, channelled shot.
One of the most common mistakes is accidentally tilting the tamper, even slightly. This compresses one side of the puck more than the other, creating a weak spot where water will inevitably rush through. Another classic error is the "double tamp"—tamping, knocking the side of the portafilter, and then tamping again. This fractures the compacted puck and often creates a tiny gap between the coffee and the basket wall, which is basically a superhighway for channels.
A level tamp is far more important than a hard tamp. A puck that is perfectly level but tamped with moderate pressure will always perform better than a puck that is heavily tamped but slightly uneven.
Upgrading Your Tamper for Ultimate Consistency
While your technique is vital, your equipment can either help you or hold you back. If you're struggling with consistency, investing in a modern tamper can be a game-changer, eliminating variables and improving your shots almost immediately.
- Precision Tampers: A tamper that fits your basket snugly (for example, a 58.5mm tamper for a standard 58mm basket) prevents untamped grounds from being left around the edges. This is a very common cause of side-channelling.
- Calibrated Tampers: These tools have a spring mechanism that clicks or gives way when you reach a specific pressure (say, 30 lbs). This is brilliant for ensuring you apply the exact same force every single time.
- Self-Levelling Tampers: This is probably the most effective upgrade you can make. These calibrated tampers from ADS Coffee Supplies have a built-in collar that rests on the rim of the portafilter basket. This clever design forces the tamper base to be perfectly parallel to the basket, guaranteeing a level puck no matter what.
By investing in a tool that guarantees a level surface, you remove one of the most common points of failure in making espresso. This frees you up to focus on other variables, like your grind setting.
Dialling In Your Grinder to Eliminate Channelling
Let's be honest: your grinder is the most important piece of kit in your entire espresso setup. Forget the shiny machine for a second. Your grinder is your true partner in crime for pulling that perfect, syrupy shot, and it plays an outsized role in whether you're plagued by channelling.
The relationship between your grind size and how water flows through the coffee bed is a delicate dance. If you get it wrong, your puck's integrity is shot before you've even locked in the portafilter.
If the grind is too coarse, water will just blast through the big gaps between the coffee particles, carving out easy paths and creating channels. Go too fine, though, and the immense pressure from your machine can literally fracture the dense puck, which ironically creates the exact same problem. This section is all about getting that grinder dialled in to stop channelling for good.
Finding the Grind Sweet Spot
"Dialling in" is just the term we use for making small, deliberate tweaks to your grinder to find the perfect setting for your specific beans, machine, and dose. It’s not a one-time thing; it’s more like an ongoing conversation between you and your coffee.
A bottomless portafilter is your best friend for this. It gives you a direct, unfiltered view of what's happening. If the grind is too coarse, you'll see the shot gush out, blond and watery, almost right away. Too fine, and the machine will choke up, maybe letting out a few pathetic drips before the pressure finds a weak spot and blasts through in a channelled mess.
The sweet spot? That’s when the shot starts with slow, syrupy drips that merge into a single, steady stream right in the centre of the basket. A great starting point is aiming for a 2:1 ratio—for example, 18g of ground coffee yielding 36g of liquid espresso—in about 25-30 seconds. This is just a benchmark, but it’s a rock-solid one for figuring out if your grind is the problem.
Getting your head around grind size is fundamental to pretty much every aspect of coffee brewing. If you want a deeper dive, our detailed coffee grind size guide breaks down how particle size affects flavour across all different methods.
Why Grind Uniformity Is Non-Negotiable
This is where the quality of your grinder really makes itself known. A proper espresso grinder is engineered to produce coffee particles that are incredibly uniform in size. That consistency is what creates a coffee bed with predictable, evenly distributed resistance for the water to push through.
Cheaper grinders, especially the blade-style ones, are a recipe for disaster. They create a chaotic mix of big chunks ('boulders') and super-fine dust ('fines').
- Boulders leave massive gaps, basically giving the water an open invitation to bypass everything else.
- Fines have a nasty habit of migrating through the puck and clogging up certain areas, forcing the water to violently find a way around them.
The result is a totally unpredictable mess. Water rushes through the channels created by the boulders and completely avoids the dense spots clogged by the fines. Seriously, investing in a high-quality espresso grinder that gives you a consistent particle size is one of the single most effective things you can do to beat channelling.
Reading the Signs of a Grind Problem
Learning to interpret what your shot is telling you is a skill you'll develop over time. A classic sign that your grind is the issue is a shot that starts off looking beautiful—dark and rich with crema—but then suddenly turns blond and gushes. That’s the puck's structure collapsing mid-extraction, and an inconsistent grind is often the prime suspect.
Here’s a quick troubleshooting routine:
- Shot runs way too fast (under 20 seconds): Your grind is too coarse. Nudge the setting a little finer.
- Shot chokes the machine or runs too slow (over 35 seconds): You’ve gone too fine. Back it off and go a bit coarser.
- Shot starts slow, then gushes: This screams channelling. While it could be your puck prep, your first port of call should always be the grinder. An inconsistent grind is the most likely culprit.
Just remember to make only one small adjustment at a time. If you change your grind, your dose, and your tamp all at once, you’ll have no idea what actually fixed the problem. By methodically dialling in your grinder, you're building the perfect foundation for a channel-free shot, allowing all your careful puck prep and tamping to finally pay off.
How Your Equipment Can Cause or Cure Channelling
Perfecting your technique is a huge part of the puzzle, but sometimes your espresso gear is the real culprit. If you’ve nailed your puck prep and dialled in your grinder but still see those dreaded spurts, it’s time to take a hard look at your hardware. Some equipment issues can set you up for failure before you even pull the shot.
Even with flawless puck prep, your efforts can be completely undone by equipment that encourages an uneven flow of water. Luckily, a few targeted upgrades or simple maintenance routines can solve these frustrating hardware-related issues for good.
The Portafilter Basket Matters More Than You Think
Your portafilter basket is where all the magic happens, yet it’s so often overlooked. The standard stock baskets that come with many machines can be a real letdown, often suffering from inconsistently sized or unevenly drilled holes. This manufacturing variance creates built-in weak spots, forcing water through certain parts of the puck more aggressively, no matter how perfect your distribution and tamp are.
Upgrading to a precision basket is one of the most cost-effective changes you can make to your setup. These are engineered with laser precision, ensuring every single hole is identical in size and perfectly spaced. This creates uniform resistance across the entire coffee bed, giving you the best possible chance for a balanced, channel-free extraction.
The Overlooked Culprit A Dirty Group Head
Another common hardware issue has nothing to do with upgrades and everything to do with basic maintenance. Your machine’s group head and shower screen are responsible for delivering a gentle, even flow of water to the puck. Over time, coffee oils and fine particles build up, clogging the tiny holes in the screen.
When this happens, water can’t spray out evenly. Instead of a gentle shower, you get an erratic, high-pressure spray that drills into some parts of the puck while leaving others dry. This is a guaranteed recipe for channelling. A simple weekly backflush and a regular deep clean of your shower screen with a specialised cleaning brush will keep the water flowing as it should.
A clean machine is a consistent machine. If your shots are suddenly channelling for no apparent reason, the first thing to check is your shower screen. It’s often the simplest fix.
Your Machine’s Secret Weapon Pre-Infusion
Finally, let’s talk about how your machine itself can be a secret weapon against channelling. Pre-infusion is the process of gently soaking the puck with low-pressure water for a few seconds before the full nine bars of pressure kicks in. This simple step helps to settle the coffee bed, swell the grounds, and seal any tiny dry pockets or micro-cracks left over from tamping.
This gentle pre-soak ensures the puck is fully saturated and stable, making it far more resistant to fracturing when the high pressure arrives. This feature is a key reason many people upgrade their machines, especially as 58.1% of UK consumers are trying to replicate coffee shop quality at home. In fact, machines with good pre-infusion can cut channelling defects by over 40% compared to basic models without it. For those weighing their options, understanding the differences between an espresso machine vs a bean-to-cup model can be a vital first step.
Your Espresso Channelling Troubleshooting Checklist
Let's pull all this together into a practical game plan. When you spot those tell-tale spurts or a watery, sour shot, the absolute key is not to change everything at once. That’s a recipe for confusion. Instead, work through this checklist logically to find and fix the real culprit.
You’ll want to start with the easiest and most common fixes first—things in your workflow like puck prep—before you start fiddling with your grinder or questioning your gear. Think of this as your go-to reference for whenever a shot goes sideways.
Start with Puck Preparation
Honestly, this is where over 90% of channelling problems live, and thankfully, it's the area you have the most control over.
- Is Your Distribution Genuinely Even? Are you using a WDT tool properly to break up every last clump, working from the bottom of the basket right up to the top? A quick, shallow stir just won't cut it.
- Are You Tamping Level? An uneven tamp is a guaranteed channel. Make sure you’re applying firm, consistent pressure and keeping the tamper perfectly parallel to the basket. If you're struggling, a self-levelling tamper can completely eliminate this variable.
- Did You Tap the Portafilter? Tapping the side of the portafilter after you've tamped is a classic mistake. It can easily break the seal between the puck and the basket wall, creating a superhighway for water to rush through.
Think of your puck prep as laying the foundation of a house. Any cracks or weak spots here will compromise the entire structure, no matter how amazing your beans or your machine are.
Review Your Grind and Dose
If your puck prep is flawless, it’s time to look at your grind settings and dose.
- Is Your Dose Consistent? You have to weigh your beans every single time. A gram here or there makes a huge difference, and without that consistency, you’ll never be able to diagnose other problems accurately.
- Is Your Grind Size Right? If the shot gushes out in under 20 seconds, your grind is definitely too coarse. If it’s choking the machine and taking over 35 seconds, it’s too fine. The key is to make one small adjustment at a time. A quality grinder from a reputable supplier like ADS Coffee Supplies makes this process so much easier by giving you consistent, reliable grounds.
Check Your Equipment and Maintenance
Okay, so your technique is solid and your grind is dialled in. The final step is to give your hardware a quick inspection.
- Is Your Shower Screen Clean? Over time, coffee oils and fine grounds clog up the holes, causing water to hit the puck unevenly. A quick clean can often be the magic fix, especially if channelling appeared out of nowhere.
- Are You Using a Precision Basket? The standard baskets that come with many machines can have unevenly punched holes, which is a hidden cause of channelling. Upgrading to a precision basket ensures water flows uniformly across the entire coffee bed.
Got Questions About Channelling? We’ve Got Answers
Even with the best advice, a few persistent questions always pop up when home baristas are wrestling with channelling. Let's tackle some of the most common ones you might be facing on your espresso journey.
Will a Bottomless Portafilter Actually Stop Channelling?
In a word, no. But it’s the single best diagnostic tool you can own. Think of a bottomless (or naked) portafilter as an X-ray for your espresso puck; it won't fix the problem on its own, but it shows you exactly where the fractures are.
Without it, you're just guessing. With it, you get priceless visual feedback. You can see precisely where those little jets or 'spurts' are forming, which helps you pinpoint the root cause. A channel blasting from the side? That often points to an uneven tamp. Multiple tiny streams everywhere? Your distribution is likely the culprit. It turns a frustrating guessing game into a clear, solvable problem. You can find a range of bottomless portafilters at ADS Coffee Supplies to fit most popular machines.
Does the Freshness of My Coffee Beans Really Matter?
It absolutely does. In fact, it can be a make-or-break factor. Beans that are too fresh and haven't had enough time to degas (release trapped CO2) can be a nightmare to work with. That excess gas creates high-pressure pockets inside the puck, forcing water to blow through weak spots and cause channelling.
For the best results, you want to be in that sweet spot between 7 and 21 days after the roast date. On the flip side, very old, stale beans can cause issues that look like channelling but are actually something else. They offer so little resistance that the shot just gushes through too fast, which is a different problem altogether.
I've Tried Everything and I'm Still Getting Channels. What Now?
Okay, so you’ve perfected your puck prep, and your grind is dialled in, but those pesky channels persist. It’s time to look beyond the puck and at your machine itself. First things first, give your group head and shower screen a deep clean. Even one blocked hole can disrupt the water flow and destroy a perfectly prepared puck.
If cleaning doesn't solve it, your basket could be the weak link. Upgrading to a high-quality precision basket from a specialist like ADS Coffee Supplies can make a shocking amount of difference.
Finally, check your brew pressure. If your machine is pushing out water at a pressure that’s spiking too high (anything over 10 bars is suspect), it can physically fracture the puck, no matter how well you've prepped it. Some machines allow you to adjust this, and taming that pressure could be the final piece of the puzzle.