Your Ultimate Guide to the V60 Coffee Brewer
If you’ve ever wondered what makes that simple cone-shaped dripper so special in the world of coffee, you're in the right place. The V60 is a pour-over brewer celebrated for its ability to produce an exceptionally clean, bright, and nuanced cup of coffee. Its design isn't just for show; it gives you complete control over your brew, which is why it’s a firm favourite among home baristas and coffee pros alike.
Why the V60 Is a Modern Coffee Icon
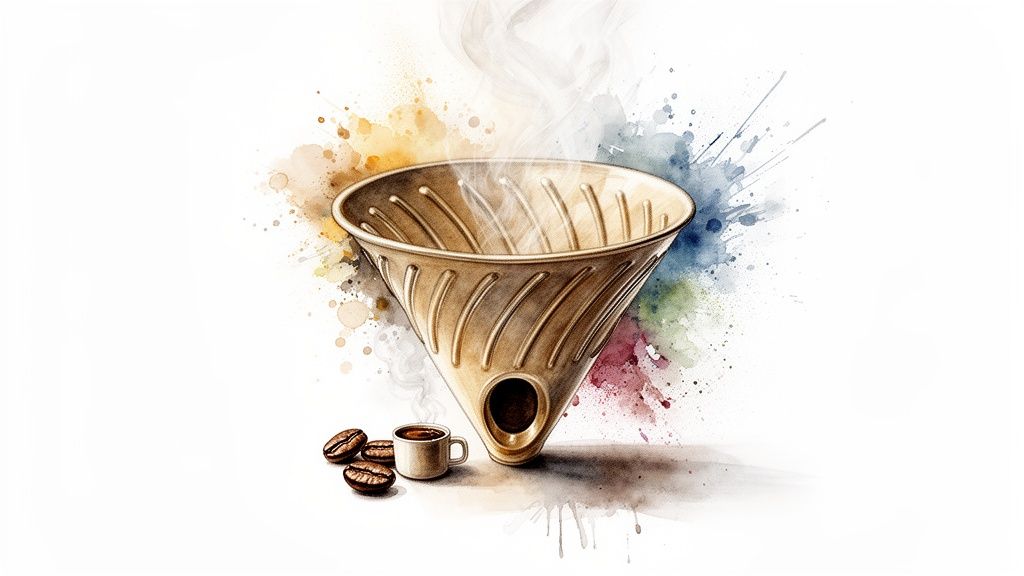
So, what's the big deal with this little cone? The magic of the V60 lies in an elegant design where three simple features work in perfect harmony to create a remarkable cup.
It all starts with the name. The "V" is for its iconic cone shape, and the "60" represents its precise 60-degree angle. This steep slope encourages water to flow down towards the centre of the grounds, extending the contact time just enough to pull out a deeper, more satisfying extraction of flavour.
The Genius in the Design
Look inside the cone, and you'll spot prominent spiral ribs that guide the water on its journey downwards. These aren't just for aesthetics; they create a crucial air gap between the paper filter and the brewer's walls. This space allows the coffee to expand, or "bloom," when you add hot water, releasing trapped CO2 and setting the stage for a beautifully even extraction.
The final piece of this puzzle is the large, single hole at the bottom. Unlike brewers with lots of little holes that restrict flow, this open design puts you in charge. Your pouring speed and grind size directly shape the final taste, turning the whole process into a hands-on, rewarding ritual. It’s this level of control that truly connects you to every nuance of your coffee.
The V60 puts you in the driver's seat. By changing your pouring speed, you can directly alter the body and flavour of the coffee, making each cup a unique creation.
From Japan to Your Kitchen
First crafted by the Japanese company Hario back in 2005, the V60 quickly became a staple in speciality coffee shops around the world. Its simplicity and the fine-tuned control it offered resonated with baristas and coffee lovers who were keen to perfect their craft.
This isn't just a niche trend. The UK coffee machine market is booming, and drip filter methods like the V60 claimed a massive 55.51% revenue share in 2022. This just goes to show that even with all the high-tech options out there, the hands-on ritual of manual brewing remains at the heart of UK coffee culture.
The V60 has truly earned its place as a modern icon, bridging the gap between professional brewing and the home kitchen. Curious how it stacks up against other popular methods? Have a look at our detailed comparison of the French Press, AeroPress, and V60.
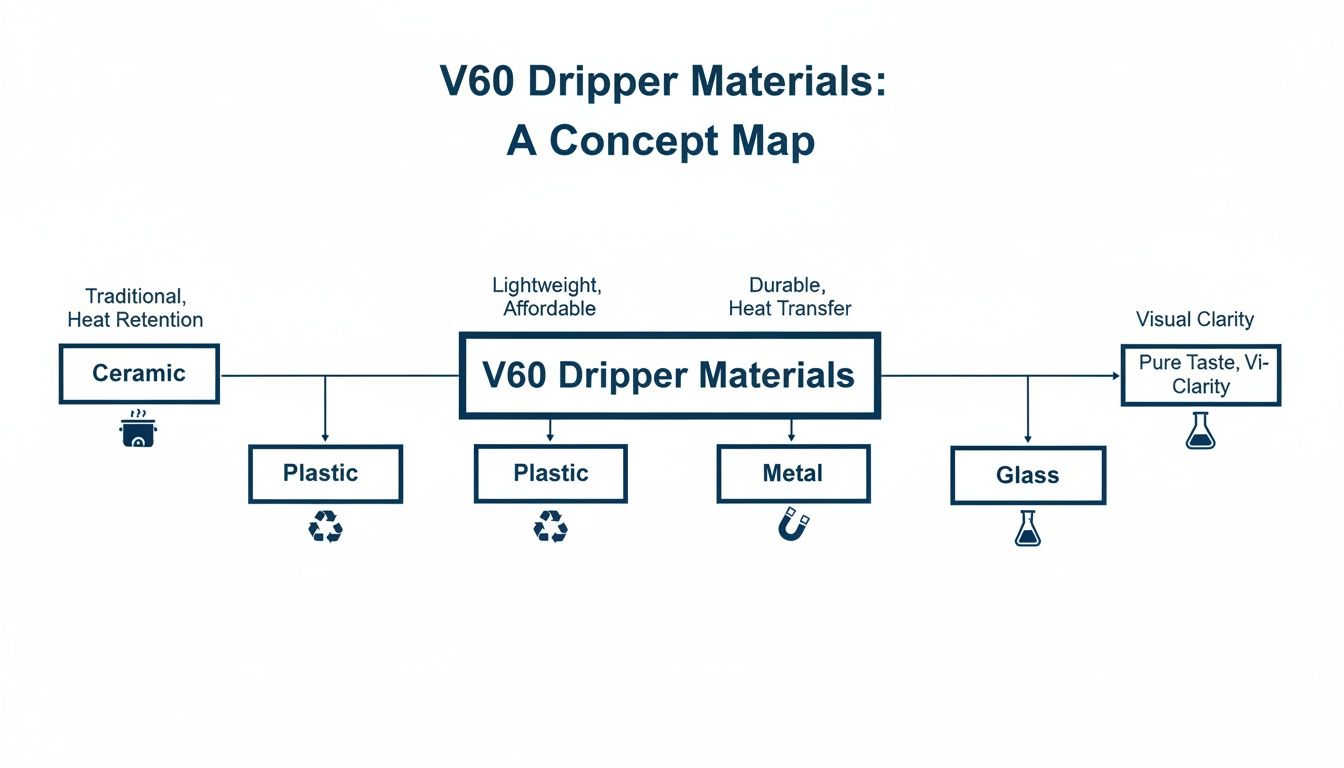
Choosing the Right V60 Material and Size
Once you’ve decided to jump into the world of V60 brewing, you’ll quickly realise they aren’t all created equal. The first choice you'll face is the material it's made from, and this decision has a bigger impact on your daily ritual than you might think, influencing everything from heat management to how well it survives a tumble.
Understanding how each material behaves is the key to matching a brewer to your lifestyle and coffee goals. It affects how consistently your water temperature stays put and whether you can toss it in a travel bag without a second thought.
A Guide to V60 Materials
The V60 comes in four main materials: plastic, ceramic, metal, and glass. Each one brings a unique blend of heat retention, toughness, and style to the table, catering to different brewers and budgets. Let's break down what makes each one special.
Plastic: Often unfairly overlooked, the plastic V60 is a seriously practical bit of kit. It actually offers the best heat stability of all the models because it doesn’t suck much warmth away from your water, leading to a more consistent brew temperature. On top of that, it's lightweight, nearly indestructible, and the most affordable of the bunch—perfect for beginners and travellers alike. For a reliable choice that won't break the bank, the Hario V60 Size 02 in white plastic is a brilliant all-rounder.
Ceramic: The classic ceramic V60 is probably the one you picture in your head. It’s fantastic at holding onto heat once you've properly preheated it, which really helps with thermal stability through the whole brew. It has a satisfying weight in the hand and comes in a range of colours to match your kitchen. The only downside? It's more fragile than plastic or metal.
Metal: If you need something bomb-proof, look no further than a stainless steel or copper V60. These are virtually indestructible, making them another fantastic option for travel or a bustling café. Metal brewers are light and conduct heat very well, though they can also lose that heat to the air just as quickly. A thorough preheat is non-negotiable here.
Glass: The glass V60 is all about elegance. It's beautiful to look at and lets you watch the entire brewing process unfold. Being chemically inert, it won’t impart any unwanted flavours into your coffee. While stunning, its heat retention is moderate, and just like ceramic, it's the most fragile of the lot and needs a gentle touch.
Your choice of material really comes down to what you prioritise. If you value consistent temperature and durability for travel, plastic is a surprisingly strong contender. But if you'd rather have a brewer with a satisfying heft and a classic look for your home coffee bar, ceramic is a timeless choice.
Choosing the right material for your V60 can feel like a big decision, but it's all about matching the brewer's properties to your needs. This table breaks down the pros and cons of each to help you find your perfect match.
V60 Material Comparison Guide
| Material (Link to Product) | Heat Retention | Durability | Price Point | Best For |
|---|---|---|---|---|
| Plastic | Excellent | Very High | £ | Beginners, Travellers, Consistency |
| Ceramic | Good (with preheating) | Low | ££ | Home brewers, Aesthetics |
| Metal | Fair | Excellent | £££ | Travel, Cafés, Durability |
| Glass | Moderate | Low | ££ | Visual appeal, Flavour purity |
Ultimately, there's no single "best" material—just the best one for you. Whether you're after the practicality of plastic or the classic feel of ceramic, your choice will shape your daily brewing experience.
Finding Your Perfect V60 Size
Beyond the material, the V60 comes in three standard sizes: 01, 02, and 03. This isn't just about how big it looks; it's about matching the brewer to the amount of coffee you plan to make. Using the wrong size can mess with your coffee bed depth, leading to an uneven extraction and a disappointing cup.
Here’s a simple guide to what each size means for your daily brew:
- Size 01: Ideal for brewing a single cup, typically up to 300ml. It’s designed for smaller doses of coffee (around 12-18g), creating the right bed depth for a perfect solo extraction.
- Size 02: This is the most popular and versatile size by far. It’s perfect for one large mug or two smaller cups, comfortably handling up to 500ml of coffee (using 20-30g of grounds). It's the go-to for most home brewers.
- Size 03: The largest option in the family, built for brewing bigger batches of up to 800ml. This is your best bet if you're regularly making coffee for three or four people at once.
The Four Pillars of V60 Brewing
Getting the hang of a V60 isn't about memorising one perfect recipe. It’s more about understanding the four key pillars that come together to create a brilliant cup: grind size, coffee-to-water ratio, water temperature, and your pouring technique. Think of them like the basic building blocks of brewing—once you get a feel for them, you can start building your own perfect coffee.
Nailing these fundamentals is what turns a simple morning routine into a genuinely rewarding craft. We’re seeing this more and more across the UK, where the love for a quality brew is booming. In fact, a massive 70.1% of coffee bought out-of-home is freshly roasted, not instant, which shows just how much we value a well-made cup.
Pillar One: Grind Size
Of all the things you can control, the size of your coffee grounds might just be the most important. It’s easy to see why. If you tried to brew with whole beans, the water would just rush straight past them. On the other hand, if you used a fine powder like flour, the water would get stuck, leaving you with a bitter, sludgy mess. The sweet spot for a V60 is somewhere in the middle.
Think of it like sand on a beach. A coarse grind is like pebbles, letting water flow through really fast, which often results in a weak, sour, and "under-extracted" coffee. A fine grind is more like soft sand, slowing the water right down and leading to a harsh, bitter, or "over-extracted" taste.
For the V60, you're aiming for a medium-fine consistency, something similar to the texture of table salt. This creates just enough resistance for the water to pull out all those sweet, vibrant flavours without hanging around long enough to extract any bitterness.
Getting this right takes a bit of practice, but it's the bedrock of a great pour-over. If you fancy a deeper dive, check out our complete guide to coffee grind sizes.
Pillar Two: Coffee-to-Water Ratio
Your coffee-to-water ratio—or "brew ratio"—is simply what determines the strength of your final cup. Feel free to experiment, but the speciality coffee world has landed on a "golden ratio" that works as a fantastic starting point for any V60 brew.
That ratio is 1 part coffee to 16 parts water (1:16). So, for every gram of coffee, you’ll use 16 millilitres of water (since 1ml of water conveniently weighs 1g).
- For a single cup: A good start is 15g of coffee to 240g of water.
- For a larger mug: You might go for 20g of coffee to 320g of water.
This ratio hits a beautiful balance, producing a cup that’s neither too strong nor too weak, letting the unique character of the beans really come through. A simple set of digital scales is your best friend for keeping this consistent.
As you can see, the material your brewer is made from matters. Plastic is great for keeping the temperature stable, while ceramic has that classic, solid feel. This choice directly leads us to the next pillar…
Pillar Three: Water Temperature
Water temperature is what kicks off the whole extraction process. If your water is too cool, it won't have enough energy to dissolve all the good stuff, leaving you with a flat, sour-tasting coffee. But if it’s boiling hot, it can scorch the grounds and pull out some really unpleasant, bitter flavours.
The ideal zone for V60 brewing is between 90-96°C.
A great rule of thumb is to bring your kettle to a boil and then just let it sit with the lid off for about 30-60 seconds before you pour. That’ll usually land you right in the sweet spot. As a general tip, lighter roasts tend to do better with hotter water, while darker roasts are a bit more forgiving with slightly cooler temperatures.
Pillar Four: Pouring Technique
Finally, we get to the pour. This is where the V60’s hands-on magic really comes to life. A steady, controlled pour is key to saturating all the coffee grounds evenly, which leads to a much more balanced extraction. It’s the main reason a gooseneck kettle is so highly recommended—it gives you that crucial control.
The most important part of your pour is the "bloom." This is your very first pour, where you add just enough water (roughly twice the weight of your coffee) to wet all the grounds. You’ll see them bubble up and expand as trapped CO2 gas escapes.
Let it bloom for 30-45 seconds. This little step wakes the coffee up and prepares it for the main extraction, making a huge difference to the final flavour. After the bloom, continue pouring in slow, gentle circles, working your way from the inside out and back again. Try to avoid pouring directly onto the paper filter to keep the extraction even and your final cup delicious.
Step-By-Step V60 Brewing Recipes
Alright, theory is one thing, but it’s time to put what you’ve learned into practice. With a handle on the fundamentals, we can get down to the best part: brewing some incredible coffee with your V60.
These recipes are your starting point. Think of them as a reliable launchpad into the world of pour-over. We’ll kick things off with a classic, straightforward method that’s designed to deliver a consistently delicious cup, every single time.
This first recipe is your new daily driver. It’s a simple approach that nails the basics: a proper bloom followed by a single, steady pour. It's perfect for your morning routine when you just want a balanced, clean, and flavourful coffee that lets the beans do the talking.
Before you start, get your gear ready. You’ll need your V60 brewer, a filter paper, a gooseneck kettle for precision, digital scales, a mug or server, and of course, your favourite Seven Sisters coffee beans.
The Classic Single-Pour Recipe
This method is all about simplicity and consistency. By using a single, continuous pour after the bloom, you create a very stable brewing environment that helps with an even extraction. It’s an excellent way to get a true taste of a coffee for the first time.
What You'll Need:
- Coffee: 20g of medium-fine ground coffee.
- Water: 320g of water at 93°C.
- Total Brew Time: Aim for 2:45 – 3:15 minutes.
Step-By-Step Instructions:
- Prepare Your Setup: Pop a paper filter into your V60 and give it a good rinse with hot water. This does two things: it gets rid of any paper taste and, just as importantly, preheats your brewer and server. Don’t forget to chuck out the rinse water!
- Add Your Coffee: Tip your 20g of ground coffee into the filter and give it a gentle shake to create a flat, level bed. Place the whole setup on your scales and tare it to zero.
- The Bloom (0:00 – 0:45): Hit start on your timer and pour 60g of water over the grounds, making sure every particle gets wet. Give the brewer a gentle swirl to mix everything together, then let it sit and "bloom" for 45 seconds. You’ll see the coffee bed puff up and bubble as it releases CO2 gas.
- The Main Pour (0:45 – 1:45): Now, begin your main pour in a slow, controlled, circular motion. Start in the centre, spiral your way outwards, and then back again, keeping the water level steady. Keep pouring until your scales hit 320g.
- Let It Draw Down (1:45 – 2:45+): Once all the water is in, just let the coffee drain completely through the filter. Ideally, this whole process should wrap up somewhere between 2 minutes 45 seconds and 3 minutes 15 seconds.
- Serve and Enjoy: Lift the V60 brewer off, give your freshly brewed coffee one last swirl to mix all the flavours, and enjoy your perfect cup.
The Advanced 4:6 Method
Once you've got the classic pour down, you might be ready for something a bit more hands-on. Developed by World Brewers Cup champion Tetsu Kasuya, the 4:6 method is a fascinating technique that splits the brew into two distinct phases, giving you a huge amount of control.
The first 40% of the water you pour dictates the coffee's sweetness and acidity. The final 60% is all about controlling its strength. By changing the number and size of your pours within these two phases, you can tweak the final taste profile with incredible precision.
The 4:6 method is a perfect example of the V60's versatility. It turns brewing from a rigid set of instructions into a creative process, letting you fine-tune each cup to your exact liking.
This recipe uses the same 1:16 ratio but breaks the water up into five separate pours.
What You'll Need:
- Coffee: 20g of coffee, ground slightly coarser than your usual V60 setting.
- Water: 320g of water at 93°C.
- Total Brew Time: Aim for around 3:30 minutes.
Step-By-Step Instructions:
- Rinse and Prepare: Just like before, rinse your filter paper and preheat everything. Add 20g of your slightly coarser grounds and level the coffee bed.
- First Pour (40% – Sweetness): Start your timer and pour 60g of water. Let it drain completely. This first pour is all about setting the sweetness.
- Second Pour (40% – Acidity): At around the 0:45 mark, pour another 60g of water (for a total of 120g so far). If you make this second pour a little larger, you’ll end up with a more balanced cup. Let it drain.
- Third, Fourth, and Fifth Pours (60% – Strength): Now it’s time to add the remaining 200g of water. Split this into three equal pours of about 67g each. Wait for the water to drain almost completely before starting the next pour. These final pours are what control the final strength of your coffee.
- Final Drawdown: After your last pour, let all the remaining water drain through. Your total brew time will be a bit longer with this method, usually finishing up around the 3:30 mark.
These two recipes really show off just how adaptable the V60 coffee brewer is. Whether you’re after a reliable daily brew or a playground for creative experiments, it all starts with mastering these techniques. And don't forget, the filter paper you choose can also make a difference to the flavour; you can learn more by exploring the differences between bleached vs. unbleached filter papers in our detailed guide.
Troubleshooting Your V60 Brew
Even the most seasoned coffee pros brew a disappointing cup now and then. Don't worry, it happens to us all. The good news is that every bad brew is a lesson in disguise. When your V60 coffee tastes off, it’s sending you clues about what went wrong during extraction, and learning to read those signals is the key to mastering your technique.
Think of this as your quick-start guide to diagnosing and fixing the usual suspects. Whether your coffee is unpleasantly bitter, sharply sour, or just disappointingly weak, there’s always a logical reason—and a simple fix. By tasting the problem, we can trace it back to the cause and make a small adjustment for the next round.
My Coffee Tastes Bitter or Astringent
Bitterness is probably the most common hurdle when you’re getting started with a V60 coffee brewer. It’s that harsh, drying feeling at the back of your tongue, and it’s the classic sign of over-extraction. This simply means the water hung around with the coffee grounds for too long, pulling out all the good stuff and then starting on the unwanted bitter compounds.
The main culprits are nearly always:
- Grind Size is Too Fine: A powdery, fine grind creates a dense coffee bed that water struggles to get through, massively extending the brew time and leading to bitterness.
- Brew Time is Too Long: If your brew is dragging on past the 3:30 minute mark, you’re almost certainly over-extracting.
- Water is Too Hot: Using water that’s just off the boil can actually scorch the coffee grounds, scalding out harsh, bitter notes.
The Quick Fix: To dial back bitterness, the easiest and most effective change is to coarsen your grind. Just one or two clicks coarser on your grinder will let the water flow through a bit faster, shortening the brew time and reducing overall extraction. Aim for that 3-minute sweet spot.
My Coffee Tastes Sour or Acidic
At the other end of the scale is sourness. If your coffee has a sharp, acidic tang that makes you pucker up—think unripe fruit—it’s a dead giveaway for under-extraction. This happens when water zips through the grounds too quickly, failing to dissolve enough of the delicious, sweet flavour compounds we’re after.
The usual suspects include:
- Grind Size is Too Coarse: A chunky, coarse grind offers very little resistance, letting water rush straight through without enough contact time.
- Brew Time is Too Short: If your brew is all done in under two and a half minutes, the water simply hasn't had enough time to work its magic.
- Water is Too Cool: Water below 90°C just doesn't have the energy to properly extract all the good stuff, leaving you with a cup dominated by sour flavours.
- Uneven Pouring: If you're not wetting all the grounds evenly, some parts will be under-extracted, adding to that sour taste.
To fix a sour brew, you need to increase extraction. The most direct fix is to make your grind finer to slow down the water flow. Also, double-check your water temperature is in that ideal 90-96°C range and focus on a slow, controlled, circular pour with your gooseneck kettle.
My Coffee Tastes Weak or Watery
A weak, hollow, or watery cup of coffee just feels empty and lacks character. This problem can sometimes be confused with under-extraction, but it often boils down to a more fundamental issue: your coffee-to-water ratio.
If your brew tastes thin, check these things first:
- Incorrect Coffee-to-Water Ratio: You might simply not be using enough coffee for the amount of water you're pouring. It's an easy mistake to make.
- Poor Water Quality: The mineral content in your water plays a massive role in pulling flavour out of the coffee. Very soft water, for instance, can lead to a flat and uninteresting cup. We dive deep into this in our guide to the best water for coffee in the UK.
- Channelling: This happens when water finds a weak spot and carves a little "channel" through the coffee bed. It bypasses most of the grounds, leading to a weak and unevenly extracted brew.
Your first move should be to check your ratio. Make sure you’re using a reliable starting point, like 1 part coffee to 16 parts water (for example, 20g of coffee for 320g of water). If that’s spot on, then focus on your pouring technique to prevent channelling—a nice level coffee bed before you start and a gentle, even pour are your best defences.
V60 Troubleshooting Cheat Sheet
To help you diagnose your brew at a glance, we've put together this quick reference table. Just find the taste you're experiencing, and it will point you to the likely cause and the simplest fix.
| Problem (Taste) | Likely Cause | How to Fix It |
|---|---|---|
| Bitter, harsh, dry | Over-extraction | Grind coarser. Shorten brew time. Use slightly cooler water. |
| Sour, sharp, tangy | Under-extraction | Grind finer. Increase brew time. Use hotter water (90-96°C). |
| Weak, watery, hollow | Incorrect ratio or channelling | Check your ratio (1:16 is a great start). Improve pouring technique for even saturation. |
With a little practice, troubleshooting becomes second nature. Each cup is a chance to learn, so don't be discouraged! Just make one small adjustment at a time, and you'll be brewing incredible coffee consistently before you know it.
Building Your Complete V60 Brewing Kit
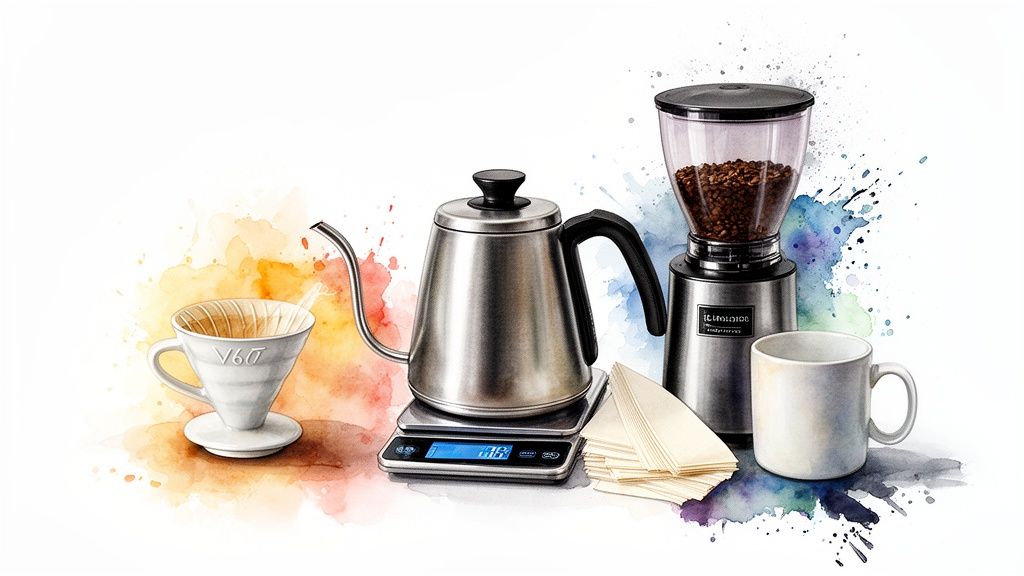
While the V60 dripper is the star of the show, the supporting cast of accessories is what turns a good brew into a truly great one. Fantastic coffee is never an accident; it’s the result of a complete system where every single piece plays its part in delivering that perfect flavour and consistency.
Assembling your toolkit is a genuinely rewarding process, putting you in the driver’s seat for every cup you make. It’s also something UK coffee lovers clearly understand, with spending on quality grinders and scales often outpacing sales of the dripper itself. This tells us there's a real shift towards building a proper, high-quality brewing station at home.
The Essential Accessories for V60 Success
To really unlock what your V60 coffee brewer can do, there are four key pieces of kit that I’d consider non-negotiable. Each one tackles a specific variable, taking the guesswork out of the equation and paving the way for repeatable, delicious coffee.
1. Gooseneck Kettle
This might just be the most important accessory you’ll buy. A gooseneck kettle’s slender, curved spout gives you incredible control over the speed and placement of your water. This precision is essential for evenly wetting all the coffee grounds and achieving a balanced extraction.
Without one, a standard kettle’s gushing pour can carve channels right through your coffee bed, leading to a weak, watery, and uneven brew.
2. Digital Scales
Consistency is king in the coffee world, and digital scales are your greatest ally. They let you accurately measure both your coffee grounds and your water, meaning you can hit that perfect coffee-to-water ratio every single time. Measuring by volume with scoops is notoriously all over the place, but weighing your ingredients guarantees precision.
A great set of digital scales removes the single biggest source of inconsistency in brewing. It's the difference between hoping for a good cup and knowing you can make one every morning.
3. Burr Grinder
There’s no substitute for freshly ground coffee if you want vibrant flavour, and a quality burr grinder is the only tool for the job. Unlike blade grinders that just smash beans into uneven bits, burr grinders crush them between two revolving surfaces to create a uniform particle size.
This consistency is vital for an even extraction, helping you dodge the bitter and sour notes that come from a messy mix of fine dust and large chunks.
4. Filter Papers
Finally, don’t overlook the official Hario V60 filter papers. They’re specifically designed to fit the brewer’s cone shape perfectly and have a texture that promotes a clean, sediment-free cup.
Just remember to give the paper a quick rinse with hot water before you start brewing to get rid of any papery taste. For those looking to complete their setup or find the perfect present, explore some dedicated gifting ideas for coffee lovers and baristas, as they often feature these essential accessories.
Have a Few More Questions About the V60?
Even the most detailed guides can leave a few questions unanswered when you're getting to grips with a new way of brewing. To help you feel more confident and clear up any lingering doubts, we’ve put together some of the most common queries we hear about the V60 coffee brewer.
What Is the Best Coffee Grind Size for a V60?
For a V60, you’re aiming for a medium-fine consistency. A great way to eyeball it is to feel it between your fingers – it should be similar to table salt. This texture strikes the perfect balance, giving the water just enough resistance to extract flavour without stalling.
Ultimately, your taste buds are the best judge. If your coffee is coming out bitter and the brew is dragging on for more than three and a half minutes, your grind is probably too fine. On the flip side, if it tastes sour or watery and finishes in under two and a half minutes, it’s a sign you’ve gone too coarse. Just start with that medium-fine setting on your burr grinder and tweak it one click at a time until you hit that sweet spot.
Can I Use Pre-Ground Coffee in My V60?
You can, but if you’re chasing that incredible flavour the V60 is known for, we’d really advise against it. Most pre-ground coffee is milled for a generic drip machine, which isn’t quite right for a V60 and often leads to a weak, unsatisfying brew.
The bigger issue, though, is freshness. Coffee starts losing its amazing aromatic compounds almost the second it's ground. To get those lively, nuanced flavours that make the V60 so special, using freshly ground beans is a must. The difference is night and day.
Using freshly ground beans is like cooking with fresh herbs instead of dried ones—the vibrancy and depth of flavour are on another level entirely.
Do I Really Need a Gooseneck Kettle?
Honestly, for consistently brilliant results with a V60, a gooseneck kettle is a total game-changer. The success of the whole method hangs on your ability to pour slowly, steadily, and precisely to make sure all the coffee grounds are evenly saturated.
Trying to do that with a standard kettle is nearly impossible; the wide spout sends water gushing out, leading to an uneven and messy extraction. A gooseneck kettle, like this Bonavita Inter Kettle, gives you total command over the most important step in the process. Think of it as an investment in consistency and, most importantly, flavour.
How Should I Clean My V60 Brewer?
Good news: keeping your V60 clean is incredibly simple. After each brew, just chuck the used paper filter and grounds in the compost and give the brewer a good rinse under hot water. That's it for daily care.
To get rid of any sneaky coffee oils that can build up over time, give it a deeper clean with a soft sponge and a little washing-up liquid. This quick step stops any old, stale flavours from creeping into your next delicious brew. Most ceramic, glass, and metal models are also perfectly happy on the top rack of your dishwasher.
Ready to pair that new V60 with beans that are roasted to perfection? At Seven Sisters Coffee Co, we source and roast our coffee to bring out the very best in every bean, making it the perfect partner for your brewing adventures.
Explore our range of exceptional single-origin and blended coffees today.