Puck Prep Guide WDT Distribution: Master Espresso at Home

Ever wondered why your home-brewed espresso is so hit-and-miss? One day it's perfect, the next it’s bitter, sour, or just completely flat. The answer, more often than not, is hiding in your puck prep. This puck prep guide WDT distribution will show you how a few simple moments of care can transform your coffee from inconsistent to incredible, every single time.
Why Puck Prep Is Your Secret To Better Espresso
If you've gone to the trouble of buying great coffee, you deserve to taste its full potential. The journey from freshly ground beans to a rich, balanced espresso is surprisingly delicate, and those few seconds before you lock the portafilter into the machine are arguably the most crucial. Without proper preparation, you’re basically just leaving flavour extraction to chance.
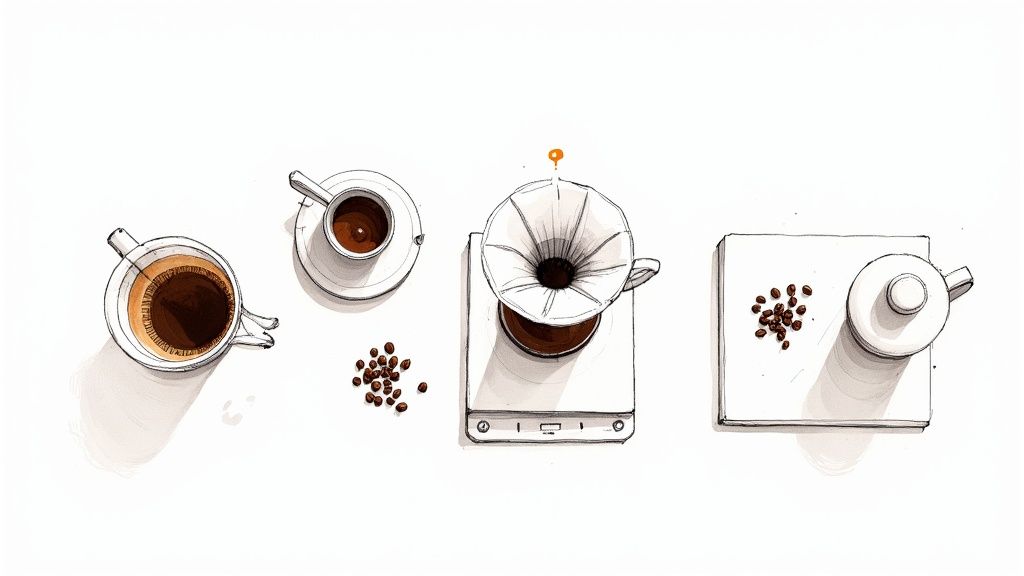
The whole point of puck prep is to create a perfectly uniform and level bed of coffee grounds. Get this right, and the hot water from your machine is forced through the coffee evenly. But if the coffee bed is lumpy or has gaps, the water gets lazy.
The Problem With Channelling
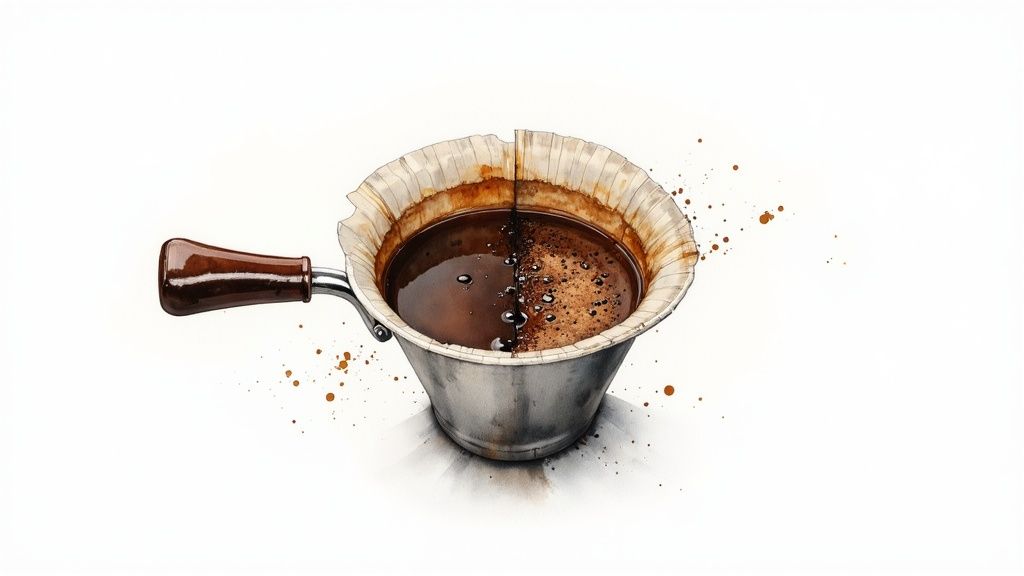
This phenomenon is called channelling. Think of water flowing through sand; it will always find the path of least resistance. In your portafilter, these easy paths mean some coffee grounds get hammered with too much water and become over-extracted (hello, bitterness!), while other parts are barely touched and end up under-extracted (which gives you that sour tang).
Channelling is the single biggest barrier to achieving a balanced and repeatable espresso shot. It doesn't matter how expensive your machine or grinder is; poor puck prep will always lead to a disappointing cup.
A well-prepared puck fights back against this uneven flow, forcing the water to saturate all the grounds equally. This is where techniques like the Weiss Distribution Technique (WDT) completely change the game. It’s a simple method that involves using a tool with fine needles to break up clumps and spread the grounds out evenly.
By turning a clumpy, uneven pile of coffee into a fluffy, level foundation, you seize control over the entire extraction process. This isn't just a fussy ritual for baristas; it’s a reliable, almost scientific method for getting consistent shots and unlocking all those complex notes in your beans. After all, when you're using high-quality beans, you want to appreciate the finer points of what is specialty coffee and how to bring out its best qualities. A disciplined puck prep routine is the bridge that connects good beans to a truly great espresso.
Assembling Your Puck Prep Toolkit
Getting flawless espresso shots really boils down to having the right gear. Before you can even think about mastering the Weiss Distribution Technique (WDT), you need to pull together a small but mighty toolkit. This is your buyer's guide to the essential bits and pieces that will make your workflow clean, consistent, and repeatable.
The heart of any modern puck prep station is, of course, the WDT tool itself. While you can knock one together with a cork and some needles, a purpose-built tool is a massive leap forward. The real secret here is the needle thickness; you want needles that are 0.4mm or thinner. Anything thicker, like a paperclip or toothpick, just ends up pushing the grounds around and can actually create new channels instead of breaking up clumps.
A quality tool with fine needles, like this ADS Coffee Supplies WDT Tool, lets you gently fluff the grounds. The goal is a truly uniform and de-clumped coffee bed, and this simple upgrade is honestly one of the most impactful changes you can make to your whole routine.
Essential vs Optional Puck Prep Tools
While the WDT tool is the star of the show, a few other items are non-negotiable for achieving that all-important repeatability and keeping your workspace tidy. To make it clear what you absolutely need versus what's nice to have, here's a quick breakdown.
| Tool | Essential/Optional | Key Function |
|---|---|---|
| Precision Coffee Scales | Essential | Accurately measure your dose to 0.1g for shot-to-shot consistency. You can buy some here. |
| Dosing Funnel | Essential | Prevents coffee grounds from spilling, ensuring a mess-free workflow. |
| WDT Tool | Essential | Breaks up clumps and evenly distributes grounds in the portafilter. |
| High-Quality Tamper | Essential | Evenly compresses the coffee bed into a dense, stable puck. |
| Self-Levelling Tamper | Optional | Guarantees a perfectly level tamp every time, removing human error. |
| Puck Screen | Optional | Sits on top of the puck to improve water distribution and keep the group head clean. You can buy one here. |
| Mirror for Bottomless Portafilter | Optional | Helps you watch your extraction to diagnose channelling issues. |
This table should give you a clear idea of where to focus your budget. The four essential tools are the foundation of any solid puck preparation workflow.
The Essential Companions
Beyond the WDT tool, a few other items are absolutely crucial. A good quality grinder is foundational, as different burr types can really affect how much your coffee clumps. If you want to dive deeper, this guide on conical vs flat burr grinders explained is a great resource for understanding how your grinder choice plays into the whole process.
Next up are the other core components you can't skip:
- Precision Coffee Scales: Consistency is impossible without measurement. A set of scales accurate to 0.1g lets you weigh your dose precisely every single time, taking one of the biggest variables out of the equation. You can buy some here.
- A Dosing Funnel: This little accessory is your best friend for a mess-free workflow. It sits snugly on top of your portafilter, catching any stray grounds while you grind and use your WDT tool. This means every precious particle ends up in the basket, not on your countertop. We’re big fans of the magnetic ADS Coffee Supplies Dosing Funnel.
Completing Your Setup
Finally, a quality tamper is what locks in all your hard distribution work. The plastic one that came with your espresso machine? It's time for an upgrade. A solid, well-fitting metal tamper provides much better feedback and helps you create a perfectly level surface. The goal isn't to apply brute force, but to compress the grounds evenly into a dense, stable puck.
The ultimate goal of your toolkit is to create a repeatable system. By using the same tools and measurements for every shot, you eliminate guesswork and gain direct control over your espresso's final taste.
With these four key items—a WDT tool, scales, a dosing funnel, and a tamper—you have everything needed to execute a professional-level puck prep routine right at home. It’s a small investment that pays huge dividends in the quality and consistency of your daily coffee.
Mastering the WDT Distribution Method
Right, this is where the magic happens—the technique itself. Getting the hang of the Weiss Distribution Technique isn't about memorising complex theories. It's about developing a feel for how the coffee grounds should look and behave. This part of our guide will walk you through the exact motions that turn a lumpy pile of coffee into a fluffy, perfectly level bed, setting you up for a flawless extraction.
Forget vague advice. This is an actionable breakdown. The whole thing is a simple, two-stage affair: a deep rake to break up the big clumps, followed by a shallow pass to create a smooth, even surface. With a bit of practice, you’ll learn to see and feel when the grounds are just right, giving you the confidence to pull incredible shots time after time.
This workflow shows the core sequence of a solid puck prep routine. You move from the dosing funnel to the WDT tool and finish with the tamper.
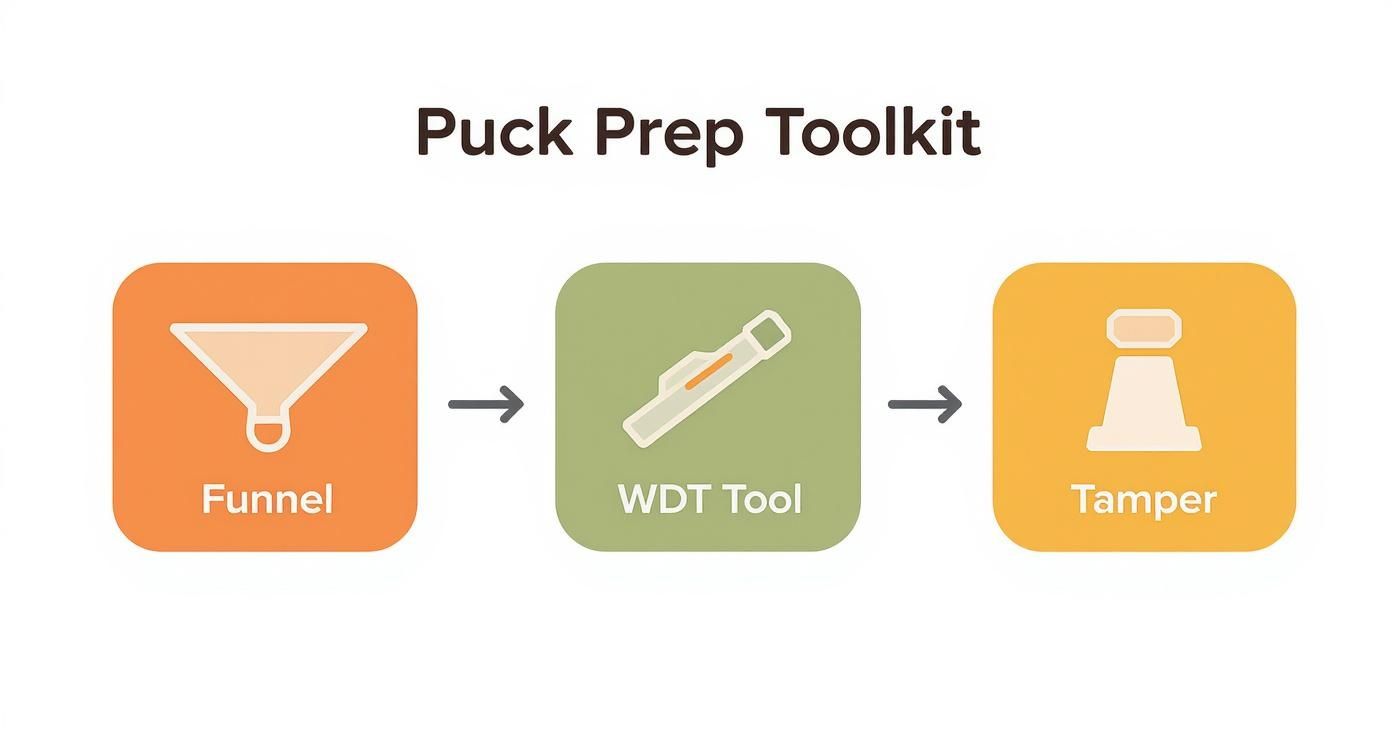
The real insight here is the logical flow; each tool builds on the work of the last one, creating the ideal conditions for an even extraction.
Start with a Consistent Dose and Grind
Your technique starts the second the coffee leaves the grinder. Consistency begins with measurement, so using scales to weigh your dose to within 0.1g is non-negotiable. This one step eliminates a massive variable from your espresso-making.
Once you've weighed your beans, grind them directly into your portafilter, which should already have a dosing funnel on it. The grind size is absolutely critical. If it's too coarse, water will gush through and give you a sour, under-extracted shot. Nailing the right texture is fundamental, and you can dive deeper into this in our detailed coffee grind size guide, which covers everything from espresso to French press.
The grounds will probably form a little mountain in the centre of the basket, often with visible clumps. Don't worry, this is totally normal and exactly what WDT is designed to fix.
The Deep Rake
With your coffee dosed and ready, it’s time for phase one. Grab your WDT tool and hold it loosely, almost like you’re holding a paintbrush. The aim here is to demolish any large clumps and get the entire coffee bed evenly distributed.
- Insert the needles all the way to the bottom of the basket.
- Start making small, overlapping circles, working from the centre outwards and then back in again.
- Keep your wrist loose and just let the needles do the work. You’re not trying to pack the coffee down, just fluff it up.
You'll want to keep this deep raking motion going until you can no longer feel any real resistance from clumps. The coffee should start to look much more uniform in density from top to bottom.
The Shallow Levelling Pass
Once the deep rake has broken everything up, the next job is to create a perfectly level surface. This second pass is much lighter and only focuses on the top layer of the grounds.
Lift your WDT tool so the needles are only about halfway into the coffee bed. Using swift, circular motions across the top of the grounds, gently guide them into a flat, even layer. You can also finish with a gentle side-to-side or zigzag motion across the surface to smooth everything out.
The goal is a bed of coffee that looks completely uniform. No visible clumps, no gaps, no mounds. It should be fluffy, level, and ready for a perfect tamp.
By following this two-stage process, you're doing more than just stirring coffee—you're purposefully engineering the ideal puck structure. It’s this hands-on, tactile approach that really separates good espresso from great espresso.
From Fluffy Grounds to a Perfect Tamp
After a good WDT session, you should be looking at a beautifully fluffy, even bed of coffee grounds. But don't stop there. Distribution is only half the battle; the tamp is what locks in all that meticulous work, creating the dense, stable puck your machine needs for a great extraction. This is the critical step that bridges the gap between those loose grounds and a flawless shot.
Before even thinking about the tamper, most baristas give the grounds a final settle. It’s a small but important grooming step that ensures the coffee is level enough for an even tamp.
One popular trick is a gentle vertical tap. Just lift the portafilter a few centimetres off your work surface and tap it down once or twice. Gravity does the work for you, collapsing any sneaky air pockets and creating a flatter, more consolidated surface to press down on.
The Myth of Tamping Pressure
Let's bust one of the biggest myths in home espresso right now: the idea that you need to apply a specific, forceful pressure. You’ve probably heard someone mention applying exactly '30 pounds of pressure', but that advice is outdated and, frankly, often does more harm than good. The real goal isn't brute force. It's about consistency and creating a perfectly level surface.
The most important part of tamping isn't how hard you press. It’s making sure the tamper is perfectly level and that you apply the same pressure every single time. A level puck is a happy puck that fights off channelling.
Once the coffee is compressed, pressing harder doesn't make it any more compact. You'll get much better results by focusing on a level and repeatable action instead of trying to hit some arbitrary weight target. Nailing this is a key part of learning how to make perfect espresso at home.
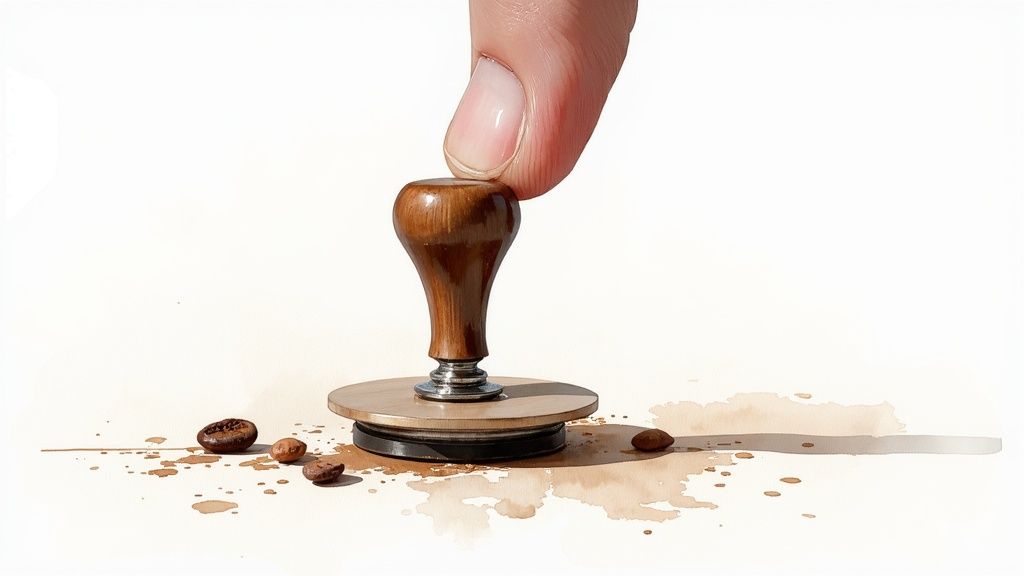
Achieving a Level and Consistent Tamp
So, how do you get it right? The best way to guarantee your tamp is level is to use your fingers as a guide. As you press down, spread your thumb and index finger so they touch the rim of the portafilter basket. This gives you immediate tactile feedback, letting you feel if the tamper is tilting one way or the other.
Here’s a simple workflow for a consistent tamp:
- Place the tamper on the grounds and give it a gentle press to create an initial level surface.
- Position your fingers around the basket's rim to act as your guide.
- Apply firm, even pressure straight down until you feel the coffee bed is fully compressed. You'll notice a point where the coffee just stops giving way.
- Finish with a gentle spin of the tamper on the surface—without pushing down—to polish the puck. This just smooths out any loose grounds and is more of an optional finishing touch.
If you're looking to build muscle memory and take the guesswork out of the equation, a calibrated tamper is a fantastic investment. A tool like the ADS Coffee Supplies Calibrated Tamper gives you a satisfying 'click' when you've hit a pre-set pressure. It’s a game-changer for ensuring every single tamp is identical, which is invaluable for getting consistent shots.
Common Puck Prep Mistakes and How to Fix Them
Even when you have all the right gear and the best intentions, espresso has a funny way of keeping you humble. Let's walk through some of the most common pitfalls home baristas run into, turning those frustrating shots into moments of genuine learning. Nailing your puck prep is a journey, and honestly, figuring out what went wrong is half the fun.
A classic sign something’s off is the dreaded one-sided extraction. You know the one—espresso gushing from just one side of your bottomless portafilter. Nine times out of ten, this points to an uneven coffee bed. But before you even grab your WDT tool, take a look at your workspace. Is your countertop actually level? Even a tiny slant can make the grounds settle unevenly, giving the water an easy escape route.
This idea of even distribution is everything. It’s as true for our little coffee puck as it is for a national economy. Just look at the UK's trade figures—recent numbers show UK exports at £927.0 billion and imports at £955.5 billion. It’s a massive network that relies on balanced, efficient distribution, a principle that scales right down to getting a perfect espresso shot. You can see more about the latest UK trade figures for some surprising insights.
Overlooking the Basics
Sometimes it’s the simplest things we forget. For instance, are you pre-heating your portafilter properly? A cold portafilter is a shot-killer, sucking the heat right out of your brew water and leaving you with a sour, under-extracted mess. Make sure it's locked into the group head for at least 10-15 minutes before you even think about dosing.
Another rookie error is starting with subpar coffee. Those supermarket beans might be convenient, but they're often stale and roasted way too dark. This makes them a nightmare to dial in and almost guarantees a bitter, ashy cup. To give yourself a fighting chance from the get-go, check out some of the best coffee beans for an espresso machine sourced from speciality roasters.
The quality of your beans sets the ceiling for the quality of your espresso. No amount of perfect WDT distribution or flawless tamping can rescue stale, poorly roasted coffee.
Refining Your WDT and Tamping Technique
So, you’ve got a WDT tool, but you're still seeing channels spray all over the place. What gives?
The problem could be the tool itself, or how you're using it. If the needles are too thick (anything over 0.4mm), they can end up just pushing the grounds around and creating new channels instead of breaking up clumps. You want something with fine, acupuncture-style needles for the best results.
Your tamping is the other likely culprit. Remember, the goal isn't brute force; it's a perfectly level and consistent press. If you lean on one side more than the other, you create a dense spot that water will naturally avoid, which is a direct ticket to channelling. Try using your fingers as a guide against the rim of the basket to feel if the tamper is completely flat. This kind of meticulous attention to detail is at the heart of any good puck prep guide WDT distribution, and it's the real secret to unlocking consistently incredible espresso.
Your WDT Questions Answered
Let's dig into some of the most common questions that pop up when you're getting to grips with WDT. Nailing these little details will make a massive difference not just to your confidence, but more importantly, to the quality of your espresso.
Plenty of home baristas wonder if they can get away with using a paperclip or a toothpick. It’s a tempting shortcut, I get it, but these makeshift tools often do more harm than good. Their tips are just too thick, so they end up pushing the grounds around instead of gently breaking up clumps. This actually creates new pathways for channelling to sneak in.
A purpose-built WDT tool is one of the most cost-effective upgrades you can make to your espresso setup. It delivers far more consistent and reliable results, making it a truly worthwhile investment for any serious home barista.
Using the right equipment takes the guesswork out of the equation, making your puck prep far more repeatable.
Essential WDT Details
So, what should you really be looking for in a proper tool and its companions? Here are the quick answers to the questions I hear most often:
- How thin should the needles be? Thinner is definitely better here. You want to aim for needles that are around 0.3mm to 0.4mm in diameter. This thickness is perfect for fluffing up the grounds without accidentally compacting them.
- Do I really need a dosing funnel? Honestly, yes—unless you enjoy cleaning coffee grounds off your worktop every morning. A good dosing funnel keeps everything contained, making sure your full dose ends up in the basket. It also gives you the room to work your WDT magic without making a mess.
- Is an expensive tool better? Not always. What truly matters are the needle gauge and having enough of them to be effective. A simple, well-designed tool like the ADS WDT Tool has everything you need to perfect your distribution without breaking the bank.
By focusing on these key details in your puck prep, you’ll be well on your way to pulling consistently delicious espresso shots every single time.
Ready to elevate your home espresso game? Explore the expertly curated range of coffee and accessories at Seven Sisters Coffee Co and discover the tools you need for the perfect brew. Find your next favourite coffee at https://sevensisterscoffee.co.uk.