Your Complete Guide to the Perfect Pour Over V60

So, you’re ready to dive into the world of V60 coffee. Good choice. This celebrated brewing method is known for producing an incredibly clean, crisp, and flavourful cup. The pour over V60 gives you a level of control that few other brewers can match, all thanks to its unique conical shape and those signature internal ribs. This guide is here to demystify the whole process, turning your morning coffee from a simple routine into a truly rewarding ritual.
Your Journey Into Pour Over V60 Coffee
The Hario V60 might look like a simple piece of kit, but its design is pure genius. The name itself breaks it down: "V" for its distinctive cone shape and "60" for the 60-degree angle of its sides. This specific geometry, paired with a large single hole at the bottom and spiral ribs along the walls, is what allows for a beautifully even extraction.
Unlike other brewers that can sometimes restrict water flow, the V60 puts you in the driver's seat. You’re in charge of the pour speed, the water temperature, and the grind size, and every single one of those factors directly shapes the final taste in your cup. It’s this hands-on approach that has made it a firm favourite in professional cafés and home kitchens alike.
The Rise of a Brewing Ritual
The pour over V60 method has absolutely boomed in the United Kingdom, slotting perfectly into the nation's growing speciality coffee scene. It's staggering to think, but Brits now drink around 98 million cups of coffee daily—a huge jump from 70 million back in 2008.
This shift isn't just about drinking more coffee; it's about a move away from instant granules towards more mindful, hands-on brewing practices. The V60 isn't just about making a quick caffeine fix. It's about the experience—that moment of focus and precision that turns a daily necessity into a genuine craft.
For many of us, the V60 is the perfect gateway into the wider world of speciality coffee. It's an accessible tool that teaches you the fundamental principles of extraction, proving just how much small adjustments can lead to dramatically different, and delicious, results.
Embracing the Craft at Home
Learning to brew with a V60 means you can replicate café-quality coffee without ever leaving your house. It’s an invitation to explore the subtle, complex nuances of different beans and roast profiles. To really get your head around this, you might find our guide explaining in detail what is specialty coffee a useful read.
As you start your V60 journey, you might even think about ways to take your great coffee on the move, maybe with something like a versatile collapsible coffee cup. Think of this guide as your starting point, covering everything from picking the right gear to mastering that final pour. It’s designed to be just as helpful for complete beginners as it is insightful for seasoned brewers.
Assembling Your Essential V60 Brewing Kit
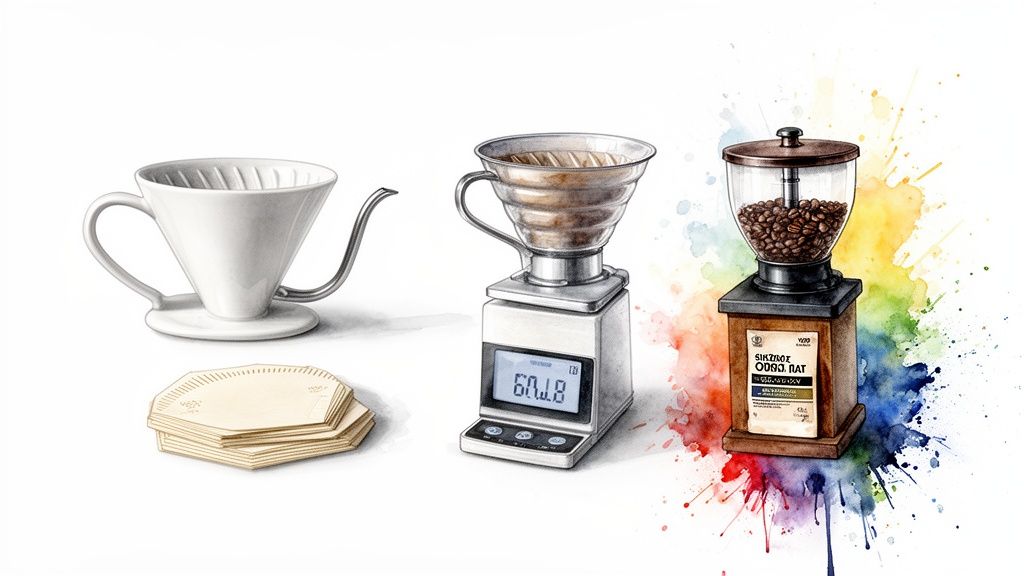
Before you can unlock the crisp, clean flavours of a V60, you'll need the right set of tools. Gathering your kit is half the fun, and honestly, understanding the why behind each piece will make you a better brewer from day one. This isn't just about ticking off a shopping list; it’s about building the foundation for a brilliant daily ritual.
Every item plays a part in taming the variables that make or break a brew, from nailing your water temperature to controlling extraction time. Getting this right is your first step towards consistently delicious coffee at home. Let's break down exactly what you’ll need to get started.
The Heart of the Setup: The Hario V60 Dripper
Of course, the dripper is the star of the show. The Hario V60 is an iconic bit of coffee kit, but you'll find it comes in a few different materials. The one you choose actually makes a difference to heat retention, how tough it is, and even the overall feel of your brewing routine.
- Plastic: Don't knock it 'til you've tried it. The plastic V60 is a brilliant starting point—it's cheap, practically indestructible, and has the best heat retention of the lot. This means your brew water stays hotter for longer, which is a massive plus for consistency.
- Ceramic: This is the classic choice. A ceramic V60 looks stunning on any countertop and holds heat beautifully once you've given it a proper preheat. It feels substantial and premium in your hands, but just be careful—it is more fragile.
- Metal: Usually made from stainless steel or copper, metal drippers are built like a tank and will last a lifetime. They're great conductors, which means they can also suck heat out of your brew water, so a thorough preheat is absolutely non-negotiable.
Your V60 Brewing Equipment Checklist
To make things simple, here’s a quick-reference table of everything you’ll need, plus a few extras to consider as you get more into it.
| Item | Why It's Essential | Pro Tip / Recommendation |
|---|---|---|
| Hario V60 Dripper | The cone-shaped brewer that defines the method. | Start with plastic for excellent heat retention and durability. |
| V60 Paper Filters | Specifically designed to fit the cone and control flow rate. | Always rinse with hot water first to remove any papery taste. |
| Gooseneck Kettle | Gives you total control over your pouring speed and placement. | Essential for even extraction and avoiding bitter or sour spots. |
| Digital Scales | For weighing coffee and water to nail your brew ratio every time. | Look for one with 0.1-gramme accuracy and a built-in timer. |
| Burr Grinder | Produces a consistent grind size for a clean, balanced extraction. | This is the biggest upgrade you can make to your coffee quality. |
| Quality Coffee Beans | You can't make great coffee with stale or poor-quality beans. | Freshly roasted single-origin beans shine in a V60. |
| Your Favourite Mug | The vessel that completes the ritual. | Choose one that feels good to hold and enhances the experience. |
This checklist covers the absolute essentials. Once you have these, you're ready to start brewing incredible coffee.
Tools for Precision and Consistency
Once you have your dripper, a few other bits of kit are non-negotiable if you want that café-quality cup. This is all about control and being able to repeat your successes.
First up, a gooseneck kettle. Its long, slender spout is the key to mastering your pour. It gives you complete authority over the flow rate and where the water lands, which is critical for saturating the coffee grounds evenly and avoiding a bitter, uneven brew.
Next are digital scales. Trying to brew by eye is a surefire way to get inconsistent results. Using scales to measure your coffee beans and water—always in grammes—means you can hit your target ratio perfectly, time and time again. A set that's accurate to 0.1 grammes lets you make those tiny tweaks that have a huge impact.
Don’t underestimate the power of precision. The difference between a good cup and a truly exceptional one often comes down to grammes and seconds. Your scales and gooseneck kettle are your best friends in this pursuit.
Finally, the grinder. Pre-ground coffee goes stale incredibly fast, losing all its amazing aromas. Grinding fresh right before you brew makes a world of difference. For V60, a decent burr grinder is a must-have. It crushes the beans into uniform-sized particles, unlike a blade grinder which just smashes them randomly. This consistency leads to a much cleaner, more predictable, and tastier extraction. If you're looking for the right one, check out our guide on the best coffee grinder for home use.
The Finishing Touches: Filters and Coffee
With the main hardware sorted, there are just a couple of consumables left to bring it all together.
- V60 Paper Filters: You have to use the filters made specifically for the V60. Their shape is a perfect match for the dripper, and the paper is designed to give you the ideal flow rate. A crucial tip: always give the filter a good rinse with hot water before adding your grounds to wash away any papery taste.
- High-Quality Coffee Beans: At the end of the day, your coffee is only as good as the beans you start with. The V60 is famous for highlighting the delicate, complex, and vibrant notes in single-origin coffees. This is where you'll taste the biggest difference.
Understanding the Fundamentals of a Great V60 Recipe
With all your gear lined up, it's time to get into what really transforms ground coffee and hot water into something special. A brilliant pour over V60 recipe isn't about following rigid rules; it's about getting a feel for the three big variables: the coffee-to-water ratio, the grind size, and the water temperature. Once you master these, you gain the creative freedom to tweak, experiment, and consistently brew coffee that you genuinely love.
Instead of just handing you a fixed recipe, let’s unpack the why behind each part. This way, you’ll move beyond just following steps and start crafting your own signature brew.
Nailing Your Coffee to Water Ratio
Your brew ratio is the absolute foundation of any recipe. It dictates the strength and body of the final cup, and it’s simply the relationship between the weight of your dry coffee grounds and the total weight of the water you use.
A fantastic, widely-used starting point is the 1:16 ratio. This just means for every 1 gramme of coffee, you'll be using 16 grammes of water.
- For a single mug: A classic recipe is 15g of coffee to 240g of water.
- For a larger batch: You might scale up to 30g of coffee and 480g of water.
This ratio provides a superb balance, but it’s by no means set in stone. If you find your coffee tastes a little weak or watery, try a tighter ratio like 1:15 to get a stronger, more concentrated flavour. On the flip side, if it feels too intense, a 1:17 ratio will give you a lighter, more delicate cup.
The Critical Importance of Grind Size
Your grind size is arguably the most powerful tool you have for tweaking the flavour. It directly controls how long the water is in contact with the coffee grounds, which is the very definition of extraction.
For a V60, you’re aiming for a medium-fine grind, something similar to the consistency of table salt. If you think about it, water would rush straight through big pebbles, but it would get stuck and clog if you used fine sand. The perfect grind is that sweet spot right in the middle.
Getting your grind right is a game of taste. If your brew is bitter, the water has spent too long with the coffee, pulling out unwanted compounds. The fix? A coarser grind. If it tastes sour, the water hasn't had enough time. The solution? A finer grind.
This is where a quality burr grinder really earns its keep. The consistency of the grind particles gives you the precision you need to make these small but impactful adjustments. To go even deeper on this, check out our complete coffee grind size guide.
Controlling Water Temperature
The temperature of your water acts as a solvent, and even small changes can dramatically alter what it pulls out of the coffee. You definitely don't want boiling water, as it can scorch the grounds and introduce a harsh, bitter taste right from the start.
A great temperature range for V60 brewing is between 92-96°C.
Hotter water extracts more from the coffee, and it does so faster. This is often perfect for lighter roasts, as it helps to coax out their bright, complex, and fruity notes. For darker roasts, you might want to start with a slightly cooler temperature—maybe around 90-92°C—to avoid over-extracting and introducing any of those heavy, bitter flavours.
The rise of speciality coffee in the UK, where the V60 truly shines, shows a real shift towards premium, traceable brews. It's no surprise that UK coffee revenue is projected to hit USD 7,023.1 million by 2030, growing at a solid 6.5% CAGR. Roasted coffee is leading the charge as both the largest and fastest-growing segment. This trend perfectly matches the V60's appeal, as its clean extraction is ideal for highlighting the nuanced flavours of freshly roasted single-origins. Interestingly, many of the principles of precise brewing cross over into other drinks; this guide on perfect brewing techniques for loose leaf tea is a great read, as temperature and timing are just as crucial there.
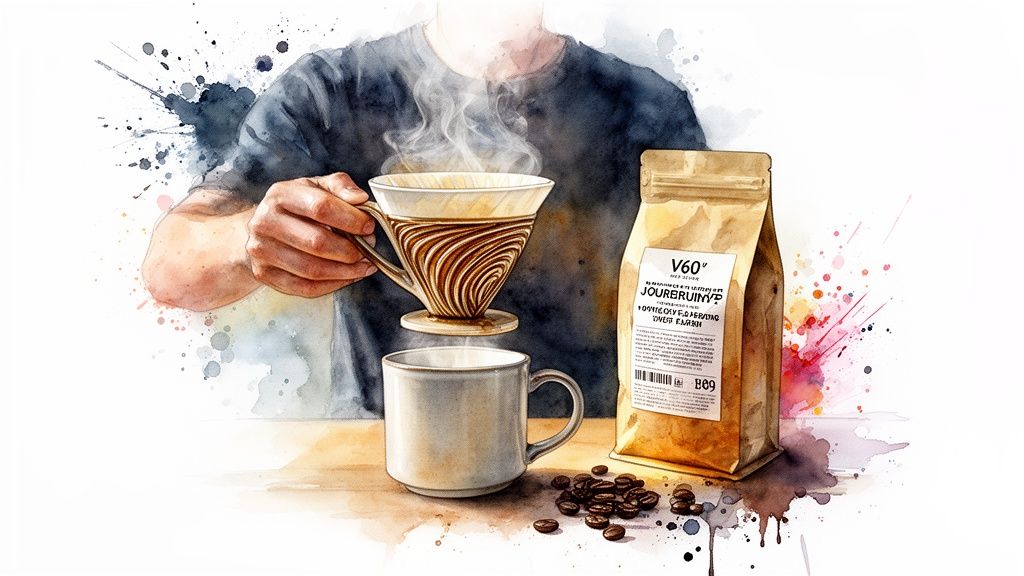
A Practical Walkthrough of the V60 Brewing Process
Alright, let's move from the theory to the satisfying ritual of actually brewing. This is where the magic happens. We're going to walk through a practical, timed guide to making an excellent pour-over V60 coffee, covering every phase from pre-heating your gear to that final, rewarding sip.
We’ll be using a classic, real-world recipe: 15g of coffee to 250g of water. This is where your attention to detail really begins to pay off. The entire process is a graceful sequence of timed events, almost like a guided meditation for making fantastic coffee.
The Initial Setup and Pre-brew Rinse
Before any coffee even touches the filter, a little prep work makes a world of difference. This first stage is all about creating a stable, clean environment for your brew, making sure no unwanted paper tastes muscle their way into your final cup. It takes less than a minute but is absolutely vital for a clean, crisp flavour.
First, place your V60 dripper on top of your server or mug, and pop the whole setup onto your digital scales. Fold along the seam of your V60 paper filter, place it snugly inside the dripper, and give it a good rinse with hot water straight from your kettle.
This simple rinse accomplishes two crucial things:
- It washes away any papery taste from the filter, which would otherwise taint your delicate coffee.
- It pre-heats the dripper and your server, preventing a sudden temperature drop when you start brewing.
Once you’ve rinsed it thoroughly, carefully toss out the water from the server, making sure not to disturb the wet filter paper. Now you've got a clean, warm vessel, ready to go.
Adding and Levelling the Grounds
With your setup ready, it’s time for the main event. Tare your scales back to zero, then add your 15g of medium-fine ground coffee into the centre of the V60 filter.
Next, give the dripper a gentle shake or a light tap on the counter. The goal here is to create a perfectly flat, even bed of coffee grounds. Why is this so important? An even bed promotes an even extraction. If you have little peaks and troughs, water will rush through the lower points—a process called channelling—and under-extract those areas, leading to a sour, unbalanced brew.
A flat bed of coffee is your foundation for a great extraction. It’s a simple, quick step that prevents water from creating channels and ensures every single coffee particle gets evenly saturated.
The Step-by-Step Timed Brewing Guide
This is where your gooseneck kettle and timer become your best friends. The following steps are timed to guide you toward a total brew time of around 3 minutes.
0:00 – 0:45 — The Bloom
Hit start on your timer and begin pouring. Gently pour 50g of hot water over the grounds, starting from the centre and spiralling outwards. Make sure all the grounds are wet, then stop. This first pour is the bloom. You’ll see the coffee bed bubble and expand as trapped carbon dioxide gas escapes. This degassing is essential; it allows the water in your next pours to properly extract flavour instead of being pushed away by the escaping gas.
This infographic breaks down the core fundamentals that influence this process, from your ratio to grind and temperature.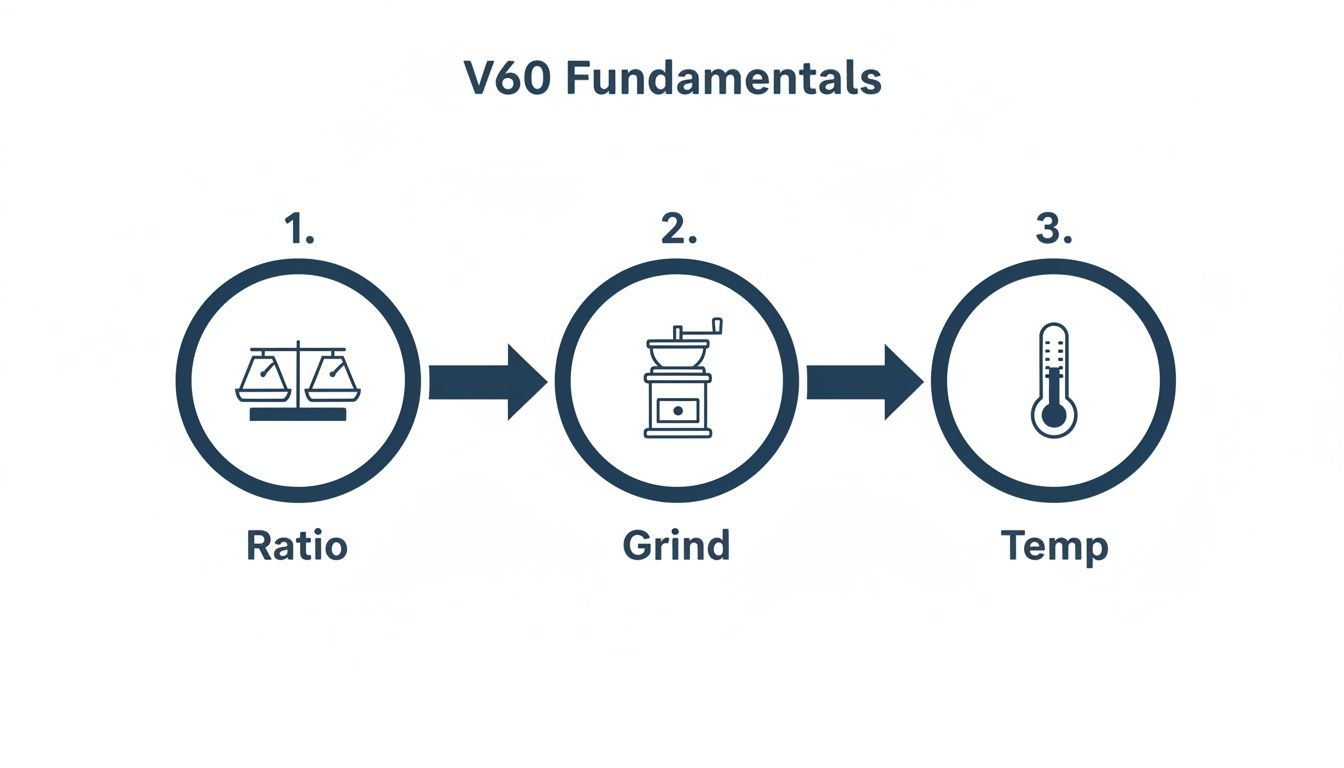
Each icon represents a variable you control, directly impacting the final taste and quality of your pour-over V60 brew.
0:45 – 1:15 — The First Main Pour
Once the timer hits 45 seconds, it's time for the main pour. Pour slowly and gently in a circular motion, adding another 100g of water. This will bring the total weight on your scales up to 150g. Try to avoid pouring directly onto the filter paper itself—concentrate on the coffee bed to keep that extraction nice and even.
1:15 – 1:45 — The Final Pour
Now for the final pour. Add the remaining 100g of water, again using a slow, controlled circular motion, bringing the total weight to your 250g target. The aim here is to keep the water level consistent without completely flooding the dripper. For the kind of control needed here, something like the Hario Buono Kettle available from ADS Coffee Supplies is a perfect example of the right tool for the job.
1:45 – 3:00 — The Drawdown
Once all the water is in, just let the coffee finish draining through. This phase is known as the drawdown. You can give the dripper one very gentle swirl to help settle the coffee bed flat and pull any grounds clinging to the sides down into the brew. Ideally, your brew should finish dripping somewhere between 2:30 and 3:15.
If it finishes much faster, your grind is likely too coarse. If it's taking ages, your grind is probably too fine. Remove the V60, give your server a final swirl to mix everything together, and enjoy. You've earned it.
How to Troubleshoot Your V60 Brew
Even when you follow a recipe to the letter, coffee has a mind of its own. It's frustrating when a brew doesn't turn out right, but don't think of it as a failure. Instead, see it as a diagnostic tool. Learning to read the signs in your cup—be it bitterness, sourness, or a general weakness—is the key to refining your technique and getting consistently great results from your V60.
This section is your go-to guide for figuring out what went wrong and how to fix it. By understanding the symptom and its likely cure, you can turn a disappointing cup into a valuable lesson and start brewing with real confidence.
Decoding Unpleasant Flavours
Most complaints about a bad brew fall into three buckets: it's too bitter, too sour, or just plain weak. Each of these points to a specific issue with extraction—the all-important process of dissolving coffee solubles into your water.
A bitter or astringent taste is a classic sign of over-extraction. This is what happens when water hangs around the coffee grounds for too long, pulling out harsh, unwanted compounds. It’s a lot like over-steeping tea; you push past the sweet spot and start extracting pure bitterness.
On the flip side, a sour or acidic taste is a dead giveaway for under-extraction. In this case, the water hasn't had enough time to pull out all the sweet, desirable flavours, leaving you with just the initial sharp, sour notes. The brew tastes undeveloped and lacks any real balance.
Bitter Coffee: The Likely Culprits and Fixes
If your coffee tastes harsh, dry, or unpleasantly bitter, you've almost certainly pushed the extraction too far. Here’s how you can dial it back.
- Coarsen Your Grind: This is your most powerful tool. A coarser grind creates more space between the coffee particles, letting water flow through faster and cutting down the contact time.
- Reduce Your Brew Time: Try to shorten the overall brew time. You can do this by pouring a little faster or reducing the number of individual pours you do.
- Lower Your Water Temperature: Water that’s too hot can strip out bitter compounds in a flash. Try dropping your temperature by a few degrees, maybe aiming for somewhere around 90-92°C.
Sour Coffee: How to Increase Extraction
When your coffee has a sharp, sour tang and none of that satisfying sweetness, you need to extract more from the grounds. It's like you haven't quite finished the job. Here are the adjustments to make.
- Grind Finer: A finer grind increases the surface area of the coffee and slows down the water flow. This gives it more time to extract those sweet, balanced flavours you’re after.
- Increase Your Brew Time: A longer brew gives the water more of a chance to work its magic. Try extending your bloom phase or just slowing down your pouring technique.
- Use Hotter Water: Bumping up your water temperature (up to 96°C) will increase the rate of extraction, helping you pull out more of the good stuff.
Remember that all these variables are connected. A change in one will almost certainly affect the others. The best approach is to adjust just one thing at a time, brew again, and taste the difference.
The V60 has become a cornerstone for UK home brewers, fitting perfectly into a culture now consuming 98 million cups daily. With 80% of people visiting coffee shops weekly but 57% brewing at home multiple times a day, the V60 offers a way to achieve café quality in your own kitchen. You can learn more about the UK's love for coffee and its consumption habits in these fascinating coffee statistics.
Common Process Problems
Sometimes the issue isn't so much the final taste but something going wrong during the brewing process itself. Two common headaches are a brew that stalls completely or one that rushes through way too quickly.
A choked or slow-draining brew is almost always caused by a grind that's too fine. It creates a dense, compacted bed of coffee that traps water. If you have a lower-quality grinder, it might also be producing too many ultra-fine particles, which create a muddy sludge at the bottom of the filter and clog it up. The fix is simple: coarsen your grind.
On the other hand, if water is gushing through the V60 in under two minutes, your grind is definitely too coarse. The water isn’t meeting enough resistance to extract properly, leading straight to a weak, watery, and under-extracted cup. The solution? Grind finer. Don't forget that water quality plays a massive role in extraction, too; you can dive deeper into that in our guide to the best water for coffee in the UK.
Common Questions About Pour Over V60
As you get to grips with the V60, a few questions are bound to pop up. It happens to everyone. Think of this as your go-to reference for tackling the most common queries and getting you over those initial hurdles.
Getting these fundamentals right will make your brewing journey a whole lot smoother. It’s the difference between frustration and a truly satisfying cup. Let's dive in.
What Is the Best Coffee Grind Size for a V60?
For a V60, you're aiming for a medium-fine grind, something that looks and feels a bit like table salt. This texture hits the sweet spot between surface area and resistance, letting you extract all the good stuff within that ideal 2.5 to 3.5-minute window.
If your coffee tastes bitter, your grind is almost certainly too fine, which means you're over-extracting. On the flip side, if it’s sour or disappointingly weak, the grind is too coarse, and you're under-extracting. This is where a quality burr grinder really proves its worth; its consistency is what allows you to make those tiny, crucial adjustments to dial in the perfect setting for your beans.
Why Is a Gooseneck Kettle So Important?
Sure, you can use a regular kettle, but a gooseneck gives you a level of control that’s fundamental to mastering the V60. That long, slender spout lets you pour a slow, steady, and incredibly precise stream of water exactly where you want it.
This control is everything. It ensures you evenly saturate all the coffee grounds without blasting them around, which would disrupt the coffee bed and lead to a messy, uneven extraction. That precision has a direct impact on the final taste, giving you a much cleaner, more consistent, and flavourful cup. For anyone serious about their coffee, it’s a non-negotiable piece of kit.
Think of the gooseneck kettle as a fine-tipped pen versus a thick marker. Both can write, but only one gives you the precision needed for detailed, controlled work. It’s this level of detail that elevates your V60 from good to great.
Can I Brew More Than One Cup at a Time?
Yes, absolutely. Hario makes the V60 in a few sizes, but the most common are the 01 (perfect for 1-2 cups) and the 02 (great for 1-4 cups). To brew a larger batch, you just scale up your coffee and water while sticking to your ratio. For example, you could use 30g of coffee to 500g of water in an 02 dripper.
Just remember that brewing a bigger volume will naturally take longer. To stop it from over-extracting, you might need to coarsen your grind just a little bit compared to what you'd use for a single cup. And, of course, make sure you're using the right size V60 paper filter to match your dripper. If you're curious how the V60 compares to another top single-cup brewer, check out our article on the V60 vs the AeroPress.
How Do I Clean My Hario V60 Dripper?
Keeping your V60 dripper clean is refreshingly simple. For the ceramic, glass, and plastic versions, a good rinse with hot water right after brewing is usually all it takes.
If it needs a deeper clean, a soft cloth or sponge with a bit of mild, unscented washing-up liquid will do the job perfectly. Just give it a thorough rinse afterwards to get rid of any soap residue. Try to avoid abrasive pads or harsh scourers, as they can scratch the dripper’s surface over time. If you have a metal V60, regular cleaning is especially important to prevent a build-up of coffee oils, which can go rancid and spoil the flavour of your next brew.
Ready to put this knowledge into practice with exceptional beans? At Seven Sisters Coffee Co, we source and roast coffee specifically to shine in brewers like the V60. Explore our full range of single-origin and blended coffees at https://sevensisterscoffee.co.uk and taste the difference for yourself.