Latte Art Basics at Home Made Simple

Ready to turn your morning coffee into a small work of art? It might seem intimidating, but mastering the basics of latte art at home really comes down to two things: a beautifully pulled espresso shot with a rich crema, and perfectly textured milk.
Once you have those sorted, it’s all about the pour—a skill that transforms a simple drink into a moment of pure creative joy.
Your Home Barista Journey Starts Here
There’s a real buzz around recreating that special café experience at home here in the UK. And great latte art? That’s more than just a pretty pattern. It’s the signature of a perfectly crafted coffee.
It’s a visual promise that the espresso base is rich and the milk has been steamed into a silky, glossy microfoam, completely free of those big, clumsy bubbles. Learning this skill doesn’t just make your coffee look good; it turns your daily brew into a genuinely rewarding ritual.
The UK's coffee scene is absolutely booming, with the total turnover for coffee shops expected to hit a massive £6.1 billion in 2024/25. This incredible growth isn't just about grabbing a quick caffeine fix; it points to a much bigger cultural shift. We’ve moved from convenience to a real appreciation for craft and presentation, and that's exactly what inspires so many of us to start pouring latte art at home.
Setting the Stage for Success
Before you even think about pouring that first heart, let’s get the fundamentals right. This isn’t about trying to replicate the complex, mind-bending patterns you see from competition-level baristas. Not yet, anyway. Instead, we’re going to focus on building a solid, achievable foundation.
The secret to great latte art isn't about having the most expensive machine on the market. It's about really understanding how milk and espresso interact and then developing the muscle memory to control the pour.
Your journey will break down into a few key stages:
- Getting the Right Tools: You definitely don’t need a full-on commercial setup, but a few key pieces of kit are non-negotiable for getting good results.
- Perfecting Your Ingredients: The quality of your espresso and, crucially, the type of milk you use will make a world of difference to your final cup.
- Building a Foundation: A focus on what makes a great speciality coffee will improve every single drink you make, whether you add art to it or not.
This guide is designed to set you off on the right foot, making the whole process enjoyable rather than a source of frustration. Let’s get stuck into this rewarding new hobby.
Choosing Your Tools and Ingredients
Before you can pour that first beautiful heart, you need the right setup. Great latte art starts with capable equipment and quality ingredients, but let's be clear: this doesn't mean you need a commercial café on your countertop. It’s all about making smart choices with your gear to get the best possible results.
The foundation of any latte is, of course, the espresso. Your espresso machine is the single most important piece of the puzzle here. You'll need one with a proper steam wand capable of producing powerful, dry steam—that’s what creates silky-smooth microfoam. Entry-level machines can definitely get the job done, but they often require more patience and a bit of finessing to get consistent results. If you're weighing your options, understanding the differences between an espresso machine vs a bean-to-cup model for home can really help clarify which path suits your ambition and budget.
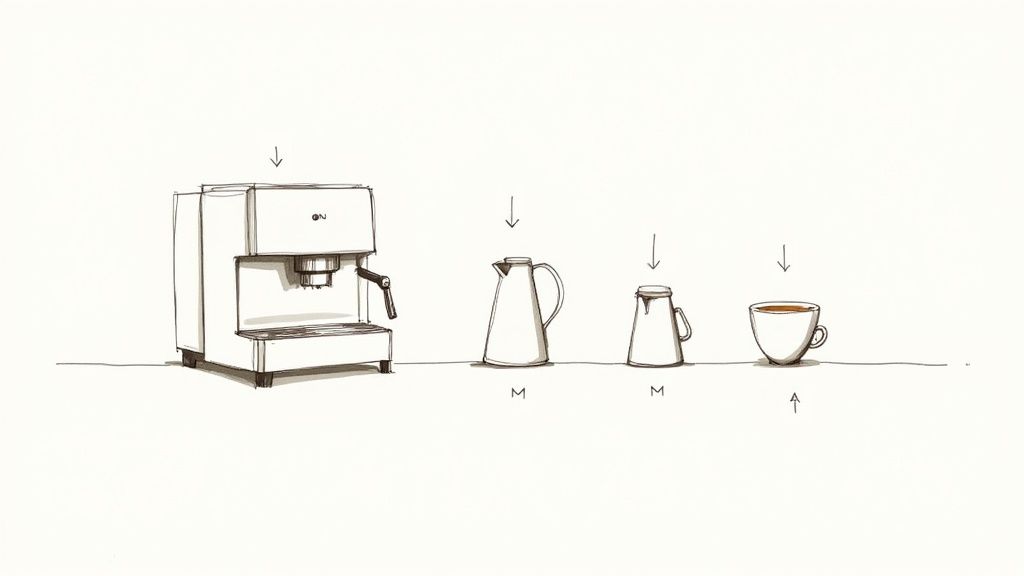
Your Milk Frothing Jug and Cup
Often overlooked but absolutely critical is your milk jug. A simple stainless steel jug with a defined, V-shaped spout gives you the control you need for detailed pouring. For a standard latte or flat white, a 350ml (12oz) jug is the ideal size; it gives the milk just enough room to swirl into that perfect vortex without sloshing over the sides.
The cup you pour into is just as important—it’s your canvas. Look for a wide-mouthed, bowl-shaped cup. The gentle, curved interior walls are what help the milk roll and the pattern develop beautifully. Choosing the right vessel can make a huge difference, so it’s worth checking out a good guide to 8 oz coffee cups to find your perfect match for practising latte art.
Selecting the Right Milk
When you're just starting out, your choice of milk can genuinely make or break your practice sessions. Trust me on this: whole dairy milk is unquestionably the best choice for beginners. Its higher fat and protein content creates a more stable, forgiving foam that's so much easier to work with.
This stability gives you a longer window to pour your design before the foam starts separating. It textures into a glossy, wet-paint-like consistency that’s absolutely perfect for creating sharp, high-contrast patterns.
Think of whole milk as your training wheels. Its rich composition makes it easier to achieve that perfect microfoam, allowing you to focus purely on your pouring technique without fighting an unstable ingredient.
If you prefer a plant-based option, oat milk is a fantastic alternative. However, it's vital to choose a ‘barista edition’ blend. These are specifically formulated with added stabilisers to mimic the steaming properties of dairy milk, ensuring you can still create a workable foam. Standard almond or soya milks just don't have the necessary proteins and often result in a thin, bubbly texture that's impossible to pour with.
The Perfect Espresso Canvas
Finally, let's not forget the espresso itself. A perfectly pulled shot should have a thick, rich, and unbroken layer of crema sitting on top. This gorgeous, reddish-brown layer is the canvas you'll be pouring your art onto.
If you start with a weak or patchy crema, your design simply won't have the contrast it needs to pop. Always use freshly roasted coffee beans and make sure your grind is dialled in correctly. This strong foundation ensures your white microfoam stands out beautifully against the dark, flavourful base, making your latte art truly shine.
Mastering the Art of Milk Steaming
The real magic behind those beautiful designs you see in cafés isn't the pour—it's the milk. Perfectly steamed milk, or microfoam, is the canvas for all great latte art. It’s a glossy, silky liquid with a texture like wet paint, and it’s what allows you to pour clean, crisp patterns. Don't worry, this isn't some closely guarded barista secret; it's a technique you can absolutely master at home.
The whole process boils down to two key phases: stretching and texturing. Get both right, and you're well on your way to consistent results.
The desire for café-quality coffee at home is growing. With the average Brit now spending around £6.42 weekly on coffee for their kitchen, and over 58% trying to replicate their favourite coffee shop drinks, learning to steam milk properly is a fantastic next step. It’s a clear sign of just how much the home barista movement has taken off in the UK.
The First Phase: Stretching the Milk
Stretching is simply introducing air into cold milk to increase its volume. This is where you build the foam that will eventually become your artwork.
Start by placing the tip of your steam wand just beneath the surface of the milk in your jug. If you imagine the surface is a pizza, a good spot to aim for is the centre of one of the bottom slices.
Now, turn on the steam. You're listening for a very specific sound: a gentle, intermittent hiss, a bit like tearing paper. This is the sweet spot—it means you're incorporating air perfectly. If you hear a loud, screeching roar, the wand is too high and you're just making big, useless bubbles. Total silence? The wand is too deep, and no air is getting in at all.
The Second Phase: Texturing the Milk
After stretching for a few seconds—once the milk has expanded by about 20-30%—it’s time to move on to texturing. This is where you create that incredible, silky microfoam.
Lift the jug just a touch, submerging the steam wand deeper into the milk. The hissing sound should stop, and you'll see a powerful swirling vortex begin to form. This whirlpool is essential. It smashes any larger bubbles and folds them back into the milk, creating that beautifully smooth, uniform texture we're after. Keep this vortex going until the jug gets too hot to comfortably hold.
Your hand is the best thermometer you have. When you can no longer keep your hand on the side of the jug for more than a second or two, you've hit the sweet spot—around 60-65°C. Go any hotter, and you'll start to cook the milk, destroying its natural sweetness.
This temperature isn't just about flavour; it provides the perfect structure for pouring latte art. It’s a similar principle we use when learning how to make a cappuccino, where the texture of the milk is just as critical. Nailing this feel for temperature will seriously elevate your coffee game.
Pouring Your First Heart and Tulip
Right, you’ve got a jug of silky, glossy microfoam in your hand and the espresso is waiting. This is the moment where all that prep work pays off. It’s time to pour.
We’re going to start with two absolute classics: the heart and the tulip. Get these down, and you’ll have the core skills needed to tackle just about any other design you can think of.
Success comes down to juggling just three things: the height of your jug from the cup, the angle you’re holding the cup, and the flow rate of your milk. Think of it this way: pouring from high up lets the milk dive under the crema, creating your base. Pouring low and close lets the white foam float on top, creating the art itself.
This infographic is a great visual reminder of the milk texturing that gets you to this point. It's all about getting that paint-like consistency.
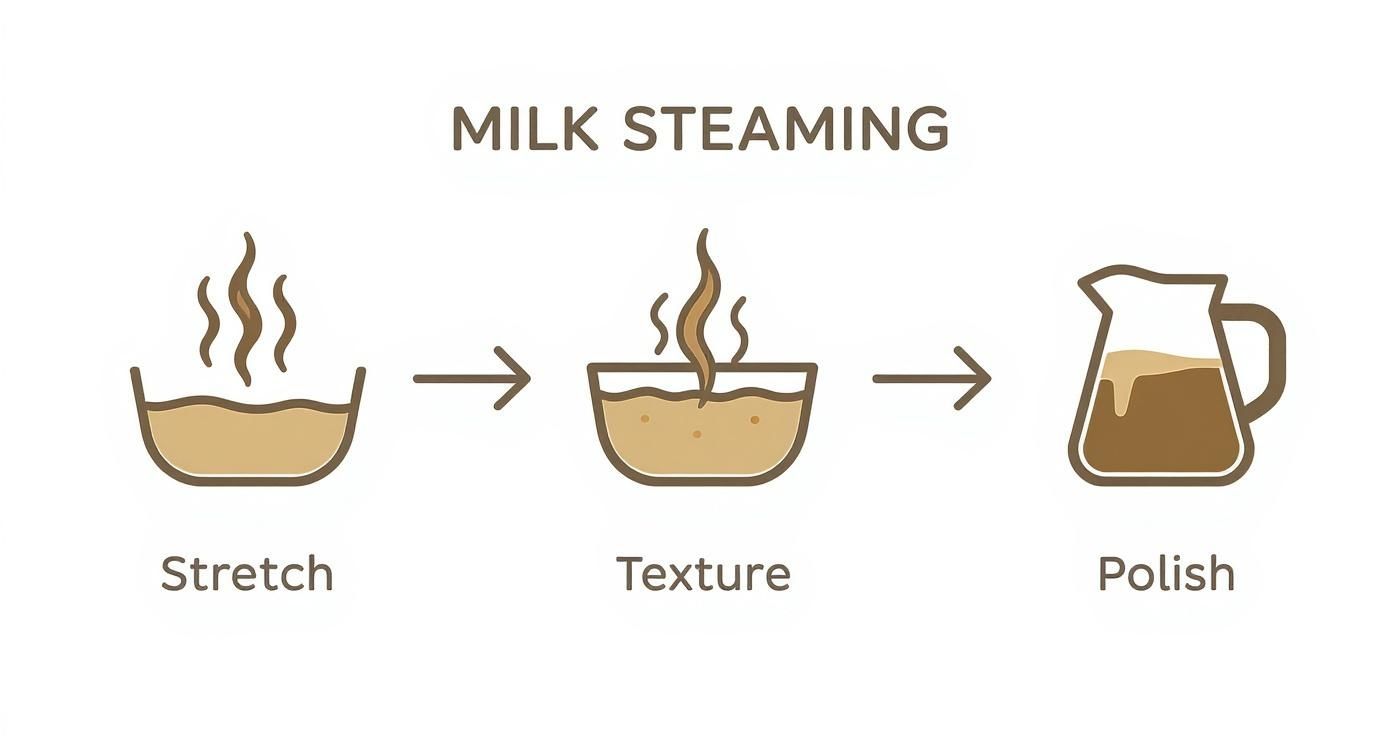
As you can see, the stretching, texturing, and polishing stages are what build that perfect microfoam you need for crisp, clean latte art.
How To Pour A Classic Heart
The heart is where everyone should start. It’s elegant, simple, and teaches you the foundational move of setting a base and finishing with a clean "strike-through." Honestly, it’s a brilliant way to instantly make your homemade coffee feel special.
First, tilt your cup towards your pouring hand at about a 45-degree angle. This gives you a deeper pool of espresso to work with, which makes things much easier. Start your pour from about 10-15 cm above the cup, aiming for the centre with a thin, steady stream. The goal here isn't to make art yet; you're just mixing the milk and espresso to create a smooth, caramel-coloured canvas.
Once the cup is about halfway full, drop the spout of your jug right down so it’s almost touching the surface of the coffee. At the same time, pour a little faster. You'll see a beautiful white dot appear. Keep pouring steadily into the centre of that dot, letting it grow into a nice, round circle.
As the cup fills up, slowly bring it back to a level position. When your circle is the size you want, lift the jug up a bit and pour a quick, thin line straight through the middle of it. That’s it! You’ve just created the point of the heart.
Building on Your Skills with the Tulip
Once you’re pouring hearts without breaking a sweat, the tulip is the natural next step. It looks much more complicated, but it’s really just a series of the same move you learned with the heart. You're simply introducing the idea of stacking layers.
Start exactly like you did for the heart—tilt the cup, pour from a height to set your canvas, and fill it about two-thirds of the way.
Now for the fun part. Bring the jug spout down close to the surface and pour your first white dot. But this time, stop pouring as soon as it’s formed. Then, create a second dot right behind the first one, gently "pushing" it forward. You can repeat this push motion a few times to create more layers, or "stacks," for a fancier tulip.
To finish it off, lift the jug and pull through all the stacks in one clean motion, just like you did to finish the heart.
This drive to master skills like latte art is a huge part of modern coffee culture. In fact, 87% of UK coffee drinkers aged 18 to 27 now consider themselves 'coffee connoisseurs', which helps explain why so many people want to bring that café experience home.
Quick Tip: Before every single pour, give the milk in your jug a good swirl. This is crucial. It keeps the microfoam perfectly integrated and glossy, stopping it from separating into thin milk at the bottom and stiff foam on top.
Getting the mechanics of the pour right is a huge piece of the puzzle, and it's something we break down in our full recipe for a latte. With a bit of practice, these patterns will start to feel like second nature.
Troubleshooting Common Latte Art Problems
Don't worry if your first few attempts aren't perfect—nobody's are. Most beginners run into the same handful of issues. Here's a quick guide to figure out what's going wrong and how to get back on track.
| Problem | Likely Cause | How To Fix It |
|---|---|---|
| The art is blurry or indistinct | Your milk foam is too thick or "bubbly" | Focus on creating a vortex when steaming. Spend less time "stretching" (aerating) and more time texturing. Tap the jug on the counter and swirl well before pouring. |
| The white foam disappears into the coffee | Your milk is too thin, or you poured from too high | Make sure you're getting that "wet paint" consistency. Lower your jug's spout closer to the surface of the espresso when you want the art to appear. |
| The pattern is off-centre | You weren't aiming for the middle of the cup | It sounds obvious, but it's a common mistake! Keep your eye on the centre of the pool of coffee as you pour the main blob. |
| The design washes out at the end | You ran out of foam before the cup was full | Either you didn't steam enough milk for the cup size, or the foam separated. Swirl the jug right before you pour to reintegrate everything. |
| The heart/tulip looks stretched or distorted | The cup was tilted too much or levelled out too late | Try to level the cup more gradually as it fills. The final "pull through" should happen when the cup is almost completely level. |
This table should help you diagnose any issues you're facing. Remember, latte art is all about muscle memory and repetition. Every cup is a chance to learn and improve.
Practice Drills and Common Mistakes to Avoid
Consistency in latte art is all about muscle memory. But let's be honest, practising with real coffee and milk can get expensive and wasteful pretty quickly. Smart drills are your secret weapon here, helping you hone your technique without pouring your profits down the drain. This is where you really start to refine your pouring motion and nail your milk texturing skills.
One of the most effective drills used by professional baristas doesn't even involve coffee. Instead, it uses a simple substitute to mimic the texture of microfoam, allowing you to practise the pouring mechanics endlessly.
The Water and Soap Drill
This simple but brilliant trick lets you practise texturing and pouring without wasting a single drop of milk. It’s a fantastic way to build confidence and really get your head around the fluid dynamics of pouring art.
- Fill your milk jug with cold water, just to the level you normally would.
- Add one single drop of washing-up liquid. Seriously, just one. Any more will create a thick, unusable foam that's nothing like steamed milk.
- "Steam" this mixture with your wand exactly as you would with milk. The soap helps the water hold air, creating a texture that's surprisingly close to real microfoam.
- Pour your designs into a cup of water. You can then tip the mixture straight back into the jug and go again, letting you practise for as long as you like.
This drill is invaluable for getting a feel for the pouring height and flow rate. It lets you focus purely on the mechanical movements of creating a heart or tulip without the pressure of ruining a perfectly good coffee.
Fixing Common Latte Art Mistakes
Every beginner makes the same mistakes—it’s practically a rite of passage! The key is to recognise them when they happen and know exactly how to fix them. Pouring blobby, undefined shapes or watching your design disappear into the crema are common hurdles.
A frequent issue is pouring too quickly or too close to the surface right from the start. This move is what causes that big white 'blob' to dominate the cup, leaving no brown canvas to work with. Always remember to start your pour from a height to set the base first, only bringing the jug spout close when you're ready to actually draw the pattern.
Another classic pitfall is using bubbly, over-aerated milk. If your milk looks more like a bubble bath than wet paint, the design will come out indistinct and fuzzy. This usually happens from keeping the steam wand too high for too long during the stretching phase. Focus on a much shorter stretching period—just a few seconds of that "tcs-tcs-tcs" hissing sound—before creating that smooth, texturing vortex.
Of course, none of this matters if your espresso base is the problem. If you suspect your canvas is flawed, check out our guide on how to make perfect espresso to get it right every time.
Common Questions About Home Latte Art
As you dive into the world of latte art, you’re bound to hit a few snags. It’s completely normal, and trust me, every home barista has asked these same questions when they were starting out. Let’s get a few of the most common ones answered so you can get back to pouring with confidence.
Why Does My Latte Art Look Bubbly and Not Smooth?
Ah, the dreaded bubbles. This is almost always down to letting too much air into the milk right at the start of steaming—a classic case of over-aerating. It happens when the steam wand tip stays too close to the surface for too long, which creates big, clunky bubbles instead of that silky microfoam we're after.
The fix is to shorten your 'stretching' phase right down. You only need a couple of seconds of that gentle hissing sound. Once you’ve done that, plunge the wand deeper into the milk to get a smooth, swirling vortex going. That whirlpool motion is what breaks down any larger bubbles and folds everything into a perfect, uniform texture.
Here’s a little trick we use in the shop: once you're done steaming, give the jug a firm tap on the counter and a gentle swirl. It’s a simple move, but it pops any last-minute bubbles and gives the milk a beautiful, glossy finish.
Can I Do Latte Art with Non-Dairy Milk?
You absolutely can, but your choice of milk is everything here. You really need to reach for a 'barista edition' of your favourite plant-based milk. From my experience, oat milk is the crowd favourite because it’s naturally creamy and creates a really stable, reliable foam.
These special barista versions have added proteins and stabilisers that help them behave much more like dairy milk when steamed. One thing to watch out for is that they can be more sensitive to high temperatures. If you steam them too hot, the flavour and texture can go a bit strange. They also tend to separate faster than dairy, so you’ll want to get pouring straight after steaming to get that sharp contrast.
Why Does My Design Have No Contrast and Look Muddy?
When the white foam just bleeds into the brown coffee, it usually points to one of three things: a weak espresso crema, pouring from too high up, or pouring too slowly.
First, check your espresso shot. You need a rich, unbroken layer of crema to act as your canvas—this is non-negotiable. Second, think about your pouring mechanics. You start high to let the milk dive underneath the crema, then you drop the jug’s spout right down close to the surface to start drawing. That closeness is what makes the white foam float on top.
And finally, be confident with your pour. A hesitant, slow drizzle just gives everything time to mix into a murky brown. A steady, deliberate flow is what you need.
Ready to brew the perfect canvas for your art? Explore our range of freshly roasted, single-origin coffees at Seven Sisters Coffee Co and discover the difference quality beans can make. Find your new favourite brew at https://sevensisterscoffee.co.uk.