How to Use an AeroPress: A UK Coffee Lover’s Guide

Using an AeroPress is deceptively simple: you just combine ground coffee and hot water in the chamber, give it a stir, and then use the plunger to press the brewed coffee through a filter straight into your cup. This clever combination of immersion brewing and air pressure results in a smooth, rich, and grit-free coffee concentrate, and it only takes a couple of minutes.
Getting to Know Your AeroPress
Before you dive into brewing, it’s worth taking a moment to appreciate the brilliant simplicity of the AeroPress. It might look a bit like a science experiment at first glance, but its design is laser-focused on one thing: giving you total control over your coffee’s flavour.
Unlike other brewers, it uses a rapid, total immersion brewing process that’s finished off with gentle air pressure. This is what really sets it apart. The process extracts all those rich, complex flavours without the bitterness you can sometimes get from longer brew times (like with a French press) and without any of that fine sediment. It's precisely why it has become such a firm favourite in kitchens all across the UK.
The Core Components
The AeroPress is made up of just a few key parts that work together flawlessly. Once you’re familiar with them, the whole process will feel second nature from your very first brew.
This infographic breaks down the essential bits and pieces you'll be working with.
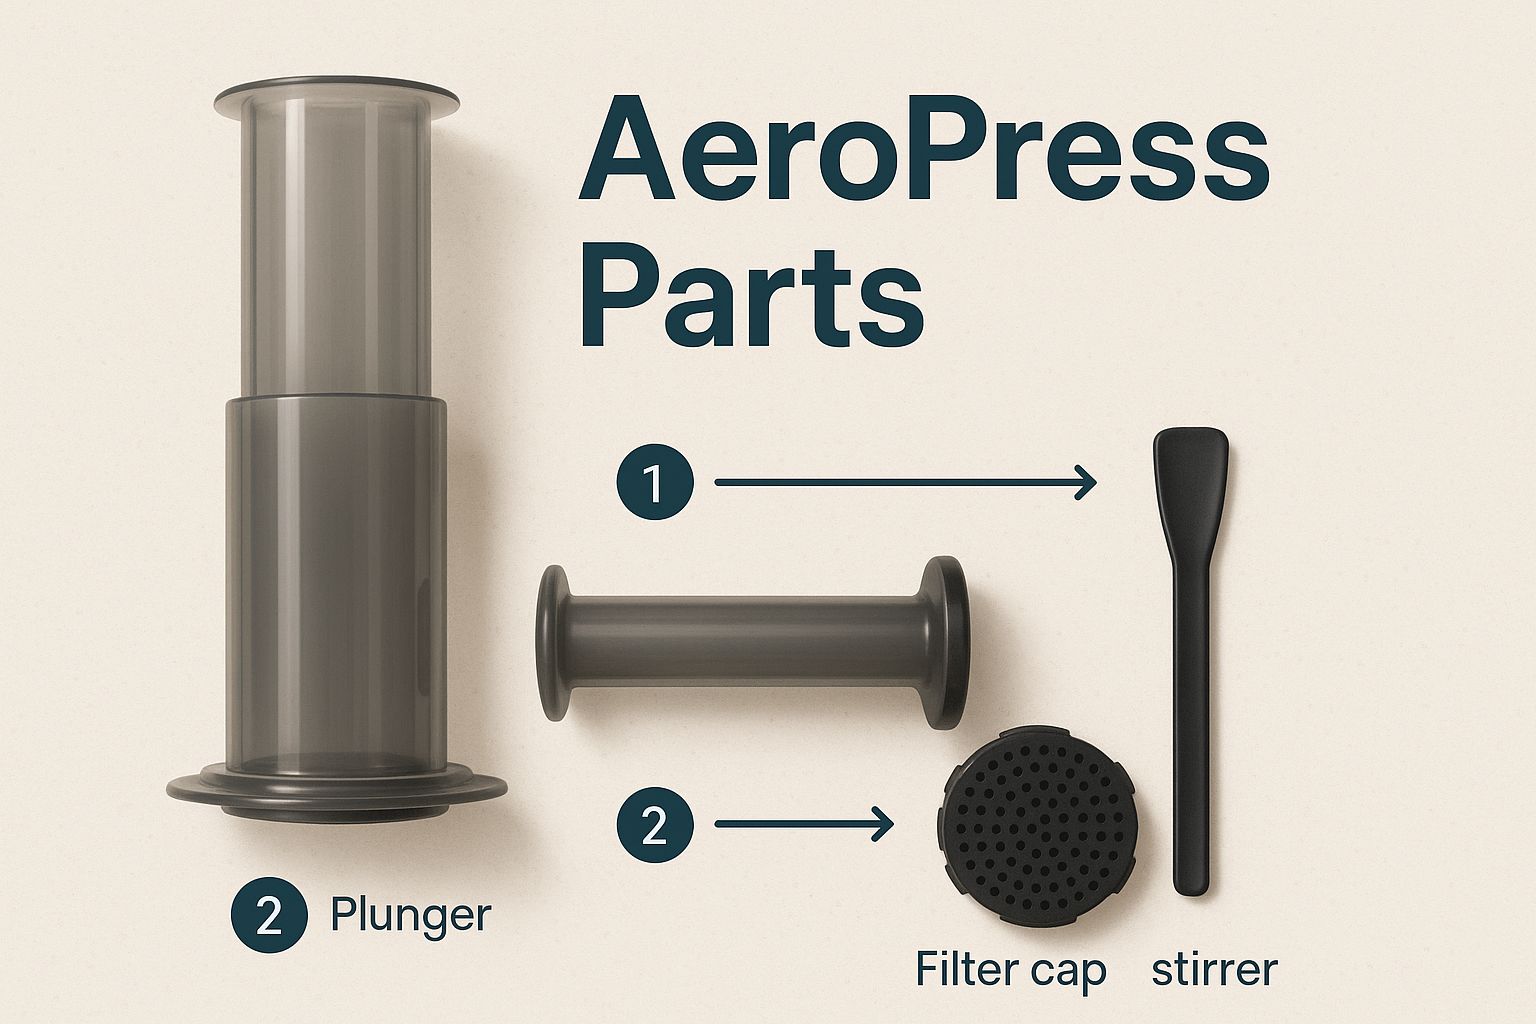
Seeing the components laid out like this really drives home how straightforward the device is to assemble and use.
The main parts you'll handle every time you brew are:
- The Chamber: This is the main body of the brewer where the coffee and water get to mingle.
- The Plunger: This part fits snugly inside the chamber and has a rubber seal on the end. When you push it down, it creates the air pressure needed for extraction.
- The Filter Cap: This plastic cap twists onto the bottom of the chamber and is what holds your paper filter securely in place.
- The Stirrer and Funnel: The stirrer is specially designed to agitate the grounds evenly, and the funnel is a handy extra to help you add your coffee without making a mess.
Invented back in 2005 by Alan Adler, the AeroPress has steadily built a loyal following within the UK coffee scene. Home brewers just love its perfect blend of convenience and quality. In fact, UK e-commerce data from 2025 showed the official AeroPress website completed over 360 transactions in just three months, which shows just how consistent its demand is.
The real beauty of the AeroPress lies in its forgiving nature. Even as a complete beginner, it's genuinely difficult to make a bad cup of coffee, which is a massive confidence booster.
Its durable, lightweight, and portable design also makes it an incredible travel companion. Many coffee lovers I know consider the official AeroPress Coffee Brewer an absolutely essential piece of kit for making exceptional coffee pretty much anywhere, from a hotel room to a campsite.
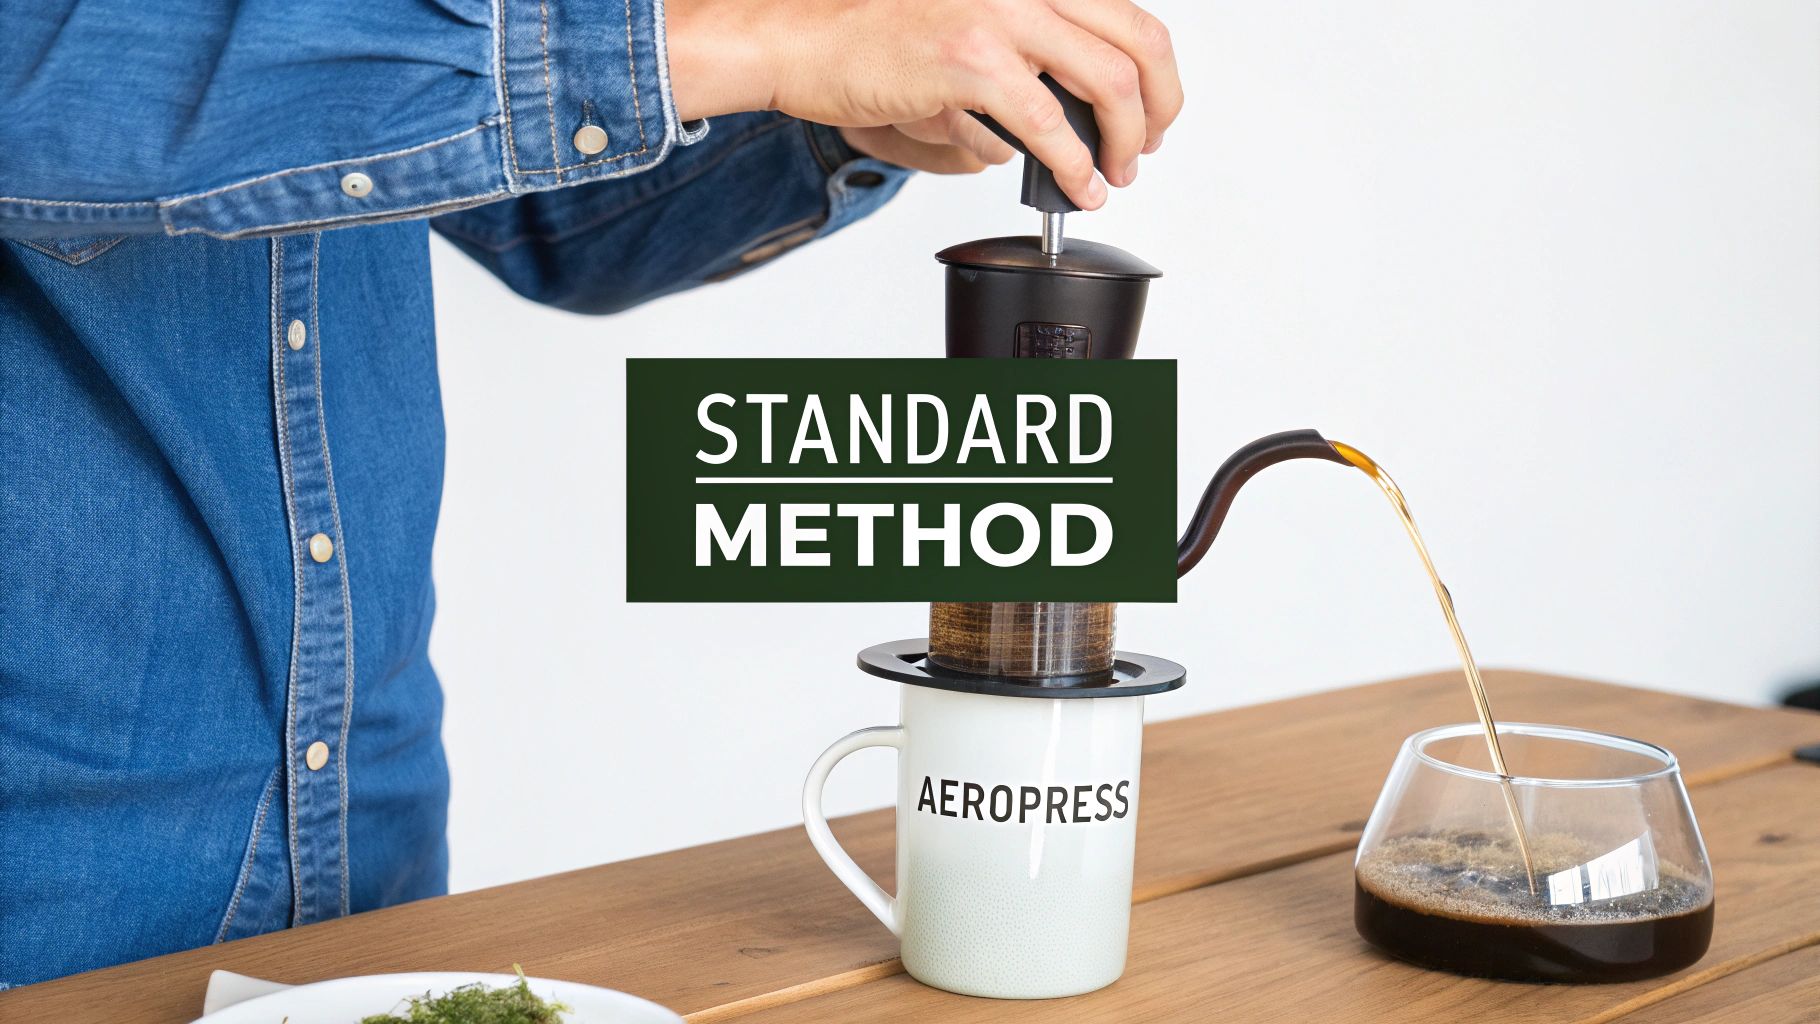
Your First Perfect Brew with the Standard Method
This is where the real fun begins. The standard AeroPress method is the classic, inventor-approved technique that’s known for delivering a brilliant cup of coffee every single time. It’s quick, reliable, and the perfect place to start your AeroPress journey. We’ll walk through the process together, so you can nail it from your very first go.
Before you start, gather your kit: the AeroPress itself, a sturdy mug, your kettle, freshly roasted coffee beans, and a grinder. While pre-ground coffee works in a pinch, grinding your beans just before you brew makes a world of difference to the final flavour.
Preparing Your Brewer and Coffee
First up, let’s talk about water temperature. It’s a common myth that you need boiling water for good coffee, but water that’s too hot can actually scorch the grounds and introduce bitterness. With an AeroPress, the sweet spot is between 80–95°C (175–205°F). A simple trick is to boil your kettle, then just let it sit for about a minute before pouring.
While the water cools down a touch, grab the filter cap. Pop a single paper micro-filter inside, and twist it securely onto the main chamber.
Now, place the chamber directly onto your favourite mug. Pour a little of the hot water through to rinse the filter. This simple step does two things: it preheats your brewer and washes away any papery taste from the filter itself.
Next is the grind size, which is absolutely crucial for getting the flavour extraction just right. You’re aiming for something with a medium-fine consistency, a bit like table salt. If you're new to grinding your own beans, our comprehensive https://sevensisterscoffee.co.uk/coffee-grind-size-guide/ offers detailed visuals and tips to help you get it spot on.
The Brewing Process
Alright, you’re ready to bring it all together. Add one rounded scoop of your medium-fine ground coffee into the chamber. Give it a gentle shake to level out the grounds.
Now, start your timer and begin pouring the hot water over the coffee until it reaches the number 4 marker on the side of the chamber.
With the water in, grab the paddle that came with your AeroPress and give the grounds a stir for about 10 seconds. This makes sure all the coffee is saturated, which is key for a full and even flavour extraction.
Time for the most satisfying part. Insert the plunger into the chamber and begin applying slow, steady downward pressure. This isn't a race; aim for a plunge that takes around 20–30 seconds. You'll feel a bit of resistance, which is completely normal. Stop pressing as soon as you hear a gentle hissing sound—that’s your cue that all the water has passed through.
Congratulations, you've just brewed a delicious AeroPress concentrate! You can enjoy it as a strong, espresso-style shot or top it up with hot water to create a beautifully smooth Americano.
Remember, the quality of your water plays a massive role in the final taste. For those looking to get really precise control over their coffee's flavour profile, exploring options like reverse osmosis drinking water systems can seriously elevate the entire brewing experience.
Fancy a bolder, richer cup? Once you get the hang of the standard AeroPress technique, it’s only natural to wonder what else this little brewer can do. Let me introduce you to the ‘inverted’ or upside-down method. It’s a massive favourite among coffee lovers for one simple reason: it puts you in complete control.
By flipping the brewer, you effectively turn it into a full immersion chamber. This clever tweak stops any coffee from dripping through the filter before you’re ready, which means you can achieve a longer, more consistent steep. The result? A fuller-bodied coffee with a much more pronounced flavour profile.
Why Go Inverted?
The main draw of the inverted method is the extended contact time between the water and your coffee grounds. Since no liquid can escape prematurely, you can let it steep for two, three, or even more minutes without losing a single drop of your precious brew.
This is a game-changer for lighter roast coffees. Their complex and delicate notes often need a bit more time to fully emerge, and the inverted method gives them exactly that. It hands you the freedom to experiment with different steep times, which is the perfect way to fine-tune a recipe and nail the exact flavour you’re chasing. It’s a bit more hands-on, sure, but mastering this technique is a seriously rewarding step on your home-brewing journey.
The AeroPress sits in a really interesting spot as a portable, manual brewer. It borrows ideas from both filter coffee and espresso, making it a hit with people who want that artisan coffee experience without the faff or cost of an electric machine. Its straightforward design and quick brew time give you a barista-like feel right in your own kitchen. You can discover more insights about the UK's growing at-home coffee market and its impact.
Before jumping in, it helps to see how the two methods stack up. The inverted method offers more control, but the standard approach is simpler and quicker.
Standard vs Inverted Method: A Quick Comparison
This table breaks down the key differences in process, flavour, and complexity, helping you decide which method suits your mood and your coffee.
| Feature | Standard Method | Inverted Method |
|---|---|---|
| Process | Simple and direct; plunge immediately after pouring. | More involved; requires a flip before plunging. |
| Steep Time | Limited by dripping; usually under 60 seconds. | Full control; can steep for 2+ minutes. |
| Flavour Profile | Clean, bright, and nuanced. | Bolder, richer, and more full-bodied. |
| Complexity | Very low; great for beginners. | Moderate; the flip requires a steady hand. |
| Best For | A quick, clean cup and easy cleanup. | Experimenting and extracting complex flavours. |
Ultimately, both methods make a fantastic cup of coffee. The choice really comes down to what you're looking for on any given day.
A Safe Guide to the Inverted Method
Ready to give it a whirl? The secret is to be deliberate and confident, especially when it’s time to flip.
-
Assemble Upside Down: Start by inserting the plunger into the chamber, but only by a centimetre or so. Now, flip it over. The plunger should be flat on your worktop with the chamber pointing up, ready for the coffee and water. This creates a surprisingly stable base.
-
Add Coffee and Water: Tip in your ground coffee (a medium-fine grind is a great starting point). Hit start on your timer and pour your hot water over the grounds, just like you would with the standard method.
-
Stir and Steep: Give it a gentle stir for about 10 seconds to make sure all the grounds are properly soaked. Now, let it steep. I’d suggest starting with two minutes, but don’t be afraid to tweak this on future brews.
-
Secure the Cap: While your coffee is steeping, pop a paper filter into the filter cap and give it a quick rinse with hot water. Once your steep time is up, carefully twist the filter cap onto the chamber. Check that it’s on good and tight.
-
The Flip and Plunge: This is the moment of truth. Place your mug upside down over the filter cap. With one hand holding the mug and the other on the chamber, confidently and smoothly flip the whole assembly over. Now, press down on the plunger with gentle, steady pressure for about 30 seconds.
The first time you do the flip, it can feel a little precarious. The key is to be firm and decisive—spills happen when you hesitate. After you’ve done it once or twice, it’ll feel like second nature.
Creative AeroPress Recipes For Your Kitchen
Once you've nailed the standard and inverted methods, you quickly realise your AeroPress is more than just a coffee maker. Its real genius is in its adaptability, letting you move beyond a simple black coffee to create a whole menu of café-style drinks right from your own kitchen. This is exactly why it's become such a treasured bit of kit for coffee lovers across the UK.

Many of us want convenience, but AeroPress fans are usually after that sweet spot where speed meets flavour. The device bridges this gap perfectly, brewing an espresso-like concentrate in about two minutes without any pods or power cables. It just fits into the modern coffee lover's routine.
Crafting An 'AeroPress Espresso' Shot
Let's be clear: it's not a true espresso. That requires the immense pressure you only get from a proper machine. However, the AeroPress can produce a remarkably rich and intense coffee concentrate that's the perfect stand-in. This 'AeroPress espresso' is your foundation for building all sorts of milky drinks like lattes, cappuccinos, or a proper flat white.
The process couldn't be simpler, and it gives you a robust, flavourful shot to work with.
- Go Finer With The Grind: Use a grind that’s noticeably finer than your standard brew. You're aiming for something between table salt and caster sugar.
- Cut Back On The Water: Instead of filling up to the number 4, stick to a 1:2 coffee-to-water ratio. A good starting point is 18g of coffee to 36g of hot water.
- Press With Purpose: After a quick 10-second stir, plunge firmly but steadily. The whole press should take you around 20 seconds.
What you're left with is a short, potent shot of coffee. From here, the possibilities open up. Add steamed milk for a creamy latte, or just top it with hot water for a classic Americano. Getting to know the different types of coffee drinks can give you even more inspiration for what to do with your concentrated shot.
You’ve basically just become your own barista. The quality of this concentrate is so impressive that many people I know actually prefer their homemade AeroPress lattes to the ones from big high-street chains.
Making A Refreshing 'Flash Brew' Iced Coffee
Forget waiting 16-24 hours for a traditional cold brew to steep. With an AeroPress, you can whip up a vibrant, refreshing iced coffee in minutes. The method is often called 'flash brewing', and it's a game-changer. You brew hot coffee directly over ice, which instantly chills it and locks in all the delicate sweetness and acidity that often get lost in a slow, cold water extraction.
Here’s a simple recipe to get you going:
- Get Your Glass Ready: Fill a sturdy server or heatproof glass with about 150g of large ice cubes.
- Brew The Concentrate: Use 20g of medium-fine ground coffee and 150g of hot water in your AeroPress, just like you normally would.
- Steep And Plunge: Let it sit for a couple of minutes. Then, pop the AeroPress directly on top of your ice-filled glass and plunge slowly.
- Serve And Enjoy: Give the now-chilled coffee a good swirl to make sure it's completely cold, and serve it straight away.
The result is a crisp, beautifully flavourful iced coffee that’s ready almost instantly—perfect for a warm afternoon when you need a quick pick-me-up.
Keeping Your AeroPress Clean Is Ridiculously Simple
Part of the AeroPress’s charm is how absurdly easy it is to clean. The brewer's clever design does most of the work for you; when you plunge, the used coffee grounds and filter paper are compressed into a neat, dry puck. This whole process is often done in less than ten seconds, making the post-brew tidy-up a breeze.
Honestly, this immediate cleanup is the most important thing you can do to maintain your brewer. Once you're done plunging, just unscrew the filter cap over a bin or compost caddy. A final push of the plunger pops the puck of coffee grounds out in one clean shot. Don't just toss those grounds, though—there are tons of creative uses for coffee grounds around the house and garden.
All that's left is a quick rinse of the rubber seal under warm water to wash away any residual coffee oils. That’s it. Your daily clean is finished before you’ve even taken your first sip.
Long-Term Care and Storage
While the daily rinse-and-go is usually enough, giving your AeroPress a more thorough clean every few weeks will keep it performing like it’s brand new. You can simply pull the plunger out of the chamber and wash all the parts with warm, soapy water. If you’re short on time, the AeroPress is also top-rack dishwasher safe.
How you store it also makes a big difference, especially for the lifespan of the rubber seal. It’s tempting to just push the plunger all the way in and put it away, but you should avoid that.
Storing your AeroPress with the plunger fully compressed can wear out the rubber seal over time, causing it to lose its airtight fit. The best way to store it is with the plunger either completely removed or pushed only just through the other side.
This small habit keeps the seal pliable and effective, ensuring you get thousands of perfect brews. It’s a simple trick that will help your brewer deliver fantastic coffee for years.
Essential Spares and Maintenance
Even with the best care, some parts will naturally wear out over time. The rubber seal is usually the first thing to go, but typically only after several years of heavy, daily use. Likewise, you’ll obviously need to keep a stash of filter papers on hand.
- Rubber Seal: If you start to notice the plunge feels a bit too easy or isn't creating a tight seal anymore, a replacement will get it back to peak performance.
- Filter Cap: It’s a durable little piece, but it’s also small and easily misplaced. Having a spare is never a bad idea.
- Filter Papers: A steady supply of these is non-negotiable for that clean, grit-free cup we all love. Keeping a good stock of official AeroPress filter papers means you’ll never be caught short when a coffee craving hits.
Common AeroPress Questions Answered
Even with a brewer as beautifully simple as the AeroPress, a few questions always pop up when you're trying to dial in your technique. From wrestling with a stubborn plunge to wondering if you can reuse filters, we've gathered the most common queries we hear. Nailing these little details is what separates a good cup from a truly fantastic one.
Getting comfortable with these answers will give you the confidence to tackle any AeroPress brew, no matter the situation.
What Is the Best Coffee Grind Size for an AeroPress?
This is easily the most common question, and thankfully, the answer is wonderfully flexible. For the AeroPress, your sweet spot is usually somewhere between a fine and medium-fine grind. A good starting point is to aim for the texture of table salt.
Of course, the best grind really depends on which method you’re using:
- The Standard Method: Because the brew time is short (around 1-2 minutes), a finer grind works beautifully. It allows the water to extract all that delicious flavour quickly and efficiently.
- The Inverted Method: When you're steeping the coffee for longer, a slightly coarser, medium-fine grind is your friend. This helps prevent over-extraction, which can lead to unwanted bitterness.
The AeroPress is famously forgiving. If your coffee tastes bitter or harsh, your grind is probably too fine. If it's weak or sour, try grinding a little finer next time. A decent burr grinder will give you the consistency you need to experiment and find what works for you.
Can I Reuse AeroPress Paper Filters?
Yes, you absolutely can! It’s a common practice among AeroPress fans to rinse and reuse a single paper filter several times to cut down on waste. After brewing, just give the filter a good rinse under the tap and set it aside to dry.
While a brand-new filter will always give you the cleanest and most consistent flavour, there's no harm in reusing them. They aren't expensive, but making them last a bit longer is a great sustainable habit to get into.
Why Is My AeroPress Difficult to Plunge?
If you feel like you're in a wrestling match with your plunger, it's almost always down to one of two things. The number one culprit is a coffee grind that's simply too fine. This can create a dense, compacted puck that clogs the filter, making it incredibly difficult for the water to pass through.
The other factor could be your plunging technique. Pushing down too hard or too fast creates a huge amount of back-pressure. You should be aiming for about 20-30 seconds of gentle, steady pressure. It's also worth checking that the rubber seal is clean; any stray grounds stuck to it can create friction against the chamber walls.
What's the Difference Between an AeroPress and a French Press?
While both brewers use immersion to steep the coffee grounds in water, the end result in the cup is worlds apart. The key differences come down to the filter and the use of pressure.
| Feature | AeroPress | French Press |
|---|---|---|
| Filter | Paper micro-filter | Metal mesh filter |
| Pressure | Uses air pressure | Manual plunging only |
| Brew Time | Around 2 minutes | Around 4 minutes |
| Taste Profile | Clean, bright, and grit-free | Full-bodied, with oils and sediment |
| Cleanup | Extremely fast and simple | More involved and messy |
The AeroPress gives you a much cleaner, brighter cup with virtually no bitterness, all thanks to its paper filter and super-quick brew time. If you want to explore other brewing styles, check out our guides on how to brew coffee at home.
At Seven Sisters Coffee Co, we believe that amazing coffee should be accessible to everyone. Explore our selection of freshly roasted, single-origin beans and signature blends to discover the perfect partner for your AeroPress. Find your next favourite brew at https://sevensisterscoffee.co.uk.