How to Roast Coffee Beans at Home
Welcome to the world of home coffee roasting. It’s a craft, really—one that gives you the final say on every single note in your cup. At its heart, the process is simple: you apply heat to green coffee beans until they transform into the rich, aromatic brown beans you know and love. This guide will walk you through everything, from simple pan roasting to using more advanced machines.
Unlocking Flavour: The Joys of Roasting at Home
Getting into home roasting is about so much more than just making coffee. It's about turning a daily ritual into a genuine hobby. While it’s true that here in the UK we get through a staggering 98 million cups daily, most of that is standard stuff from high-street chains. Roasting your own beans lets you create something personal and unbelievably fresh.
You'll start to unlock those subtle notes of citrus, chocolate, or spice that are often long gone by the time pre-packaged beans hit the shelves. The real magic is having total control. Every decision you make, from the bean you choose to how long you roast it, directly shapes the character of your coffee.
Why Freshness Matters
The second coffee is roasted, a clock starts ticking. Oxygen immediately begins to dull its vibrant flavours and aromas. That bag of coffee you buy from the supermarket? It could be weeks, or even months, old by the time it gets to your kitchen.
When you roast at home, you get to experience coffee at its absolute peak, which is usually a few days after roasting once the beans have had a chance to degas. Honestly, the difference in taste is night and day.
Roasting your own beans ensures you are always brewing with the freshest possible coffee, capturing the full spectrum of its intended flavour—from delicate floral notes to deep, rich caramel tones.
Exploring a World of Coffee
Home roasting also throws open the doors to an incredible variety of green coffee beans. Instead of being stuck with whatever your local shop has on offer, you can source beans from specific regions or even single farms.
It's a fantastic way to travel the world through your coffee cup. To get a better sense of how geography shapes flavour, you can dive deeper into the world of single-origin coffee meaning, benefits, and brewing tips. Whether you're drawn to the bright, almost tea-like acidity of an Ethiopian Yirgacheffe or the classic nutty sweetness of a Brazilian Santos, roasting them yourself is the best way to bring out what makes them special.
Choosing Your Roasting Gear and Green Beans

Before you can roast your first bean, you have two big decisions to make: what gear you'll use and which green beans you'll start with. The good news? You don't need a massive investment to get going. In fact, many seasoned roasters I know started out with things they already had in their kitchen.
The most common entry points are a simple cast-iron pan on the hob or a repurposed hot air popcorn popper. These methods are fantastic for getting a real feel for the process. You’ll learn to watch the colour change from green to yellow to brown and, most importantly, listen for that critical 'first crack'. They force you to be hands-on, which is an invaluable way to learn.
Of course, these DIY approaches have their limits. Temperature control is a constant battle, which can easily lead to uneven roasts, and you'll only be able to roast small batches at a time. If you get bitten by the roasting bug, you’ll likely find yourself eyeing up a dedicated home coffee roaster.
A Quick Look at Home Roasting Methods
Dedicated machines give you far better command over heat and airflow. This means more consistency from batch to batch and the ability to roast larger quantities. While they do cost more, the precision they offer makes it much easier to repeat that one perfect roast you achieved. It’s all a trade-off between affordability and control.
To give you a clearer picture, I've put together a quick comparison of the most common methods people start with.
Comparison of Home Roasting Methods
| Method | Initial Cost | Temperature Control | Typical Batch Size | Best For |
|---|---|---|---|---|
| Cast-Iron Pan | Very Low | Low (Manual) | 100-150g | Beginners on a tight budget who want a tactile experience. |
| Air Popper | Low | Low-Medium | 80-120g | Experimenters who enjoy a hands-on, fast-paced roast. |
| Drum Roaster | High | Excellent | 250g+ | Enthusiasts seeking maximum control and batch-to-batch consistency. |
Ultimately, the best gear for you is whatever fits your budget and commitment. Don't be shy about starting small; you can always upgrade down the line as your passion and skills grow.
Selecting Your Green Coffee Beans
Your equipment is only half of the equation. The quality and type of green beans you pick will have the single biggest impact on the final flavour in your cup. Green coffee isn't just one thing; it's a huge world of different origins, varietals, and processing methods, and each one brings something unique to the table.
The choice of green bean is fundamental. A high-quality bean roasted well will always outperform a lower-quality bean roasted perfectly. Sourcing is where exceptional coffee truly begins.
As you start browsing for beans, you’ll come across terms like 'washed', 'natural', and 'honey' processed. Here’s what they mean for your coffee:
- Washed beans tend to produce a cleaner, brighter cup with more noticeable acidity. This method really lets the bean's inherent origin flavours shine through.
- Natural (or dry-processed) beans are dried with the coffee cherry still intact, which imparts sweet, fruity, and often wine-like notes into the bean itself.
- Honey-processed beans land somewhere in the middle, offering a beautiful balance of sweetness and clarity.
For your first few attempts, I’d suggest starting with beans that are known for being forgiving, like those from Brazil or Colombia. Once you've got a few successful roasts under your belt, you can branch out and explore the more delicate and complex flavours of Ethiopian or Kenyan coffees.
Diving into the world of high-quality speciality coffee beans is the best way to understand how origin and processing shape what you taste. There's something incredibly rewarding about knowing the story behind your coffee and supporting ethical sourcing.
Getting to Grips with the Roasting Process
Right, this is where the real magic happens. Roasting is a hands-on, sensory experience that turns those dense, grassy-smelling green beans into the aromatic, brittle coffee you know and love. To get this right, you need to trust your senses—sight, sound, and smell will be your guides through each critical phase.
The whole point of roasting is to use controlled heat, typically between 180°C and 240°C, to change the bean's moisture and chemical makeup, which is what develops all those incredible flavours. Getting this right is no small thing. With coffee shops making up 7.1% of the UK’s eating-out market and 12,229 outlets expected by 2025, the demand for quality, well-roasted coffee is huge. If you're curious about the UK's coffee scene, you can get the full statistics on market growth and consumer tastes.
To make this feel less like a chemistry lesson, let's pretend we're roasting a batch of Ethiopian Yirgacheffe beans. These are famous for their bright, floral, tea-like notes, so our goal is a light roast to keep those delicate flavours front and centre.
The Initial Drying Phase
Every roast starts with drying. The moment our green Yirgacheffe beans hit the heat, their first job is to shed their internal moisture, which is usually around 10-12%.
Don’t expect anything too dramatic here. The beans will slowly shift from green to a pale yellow, then a light tan. The smell will change too, going from something grassy or hay-like to more like baking bread. This stage is all about building up the energy the beans need for the more intense reactions to come.
Getting the drying phase right sets the foundation for the entire roast. Rush it, and you'll get uneven beans with half-baked flavours. Drag it out, and you risk muting the coffee's vibrant character.
The infographic below breaks down the three core stages of roasting, showing how the temperature progression transforms the beans from drying all the way to the final development stage.
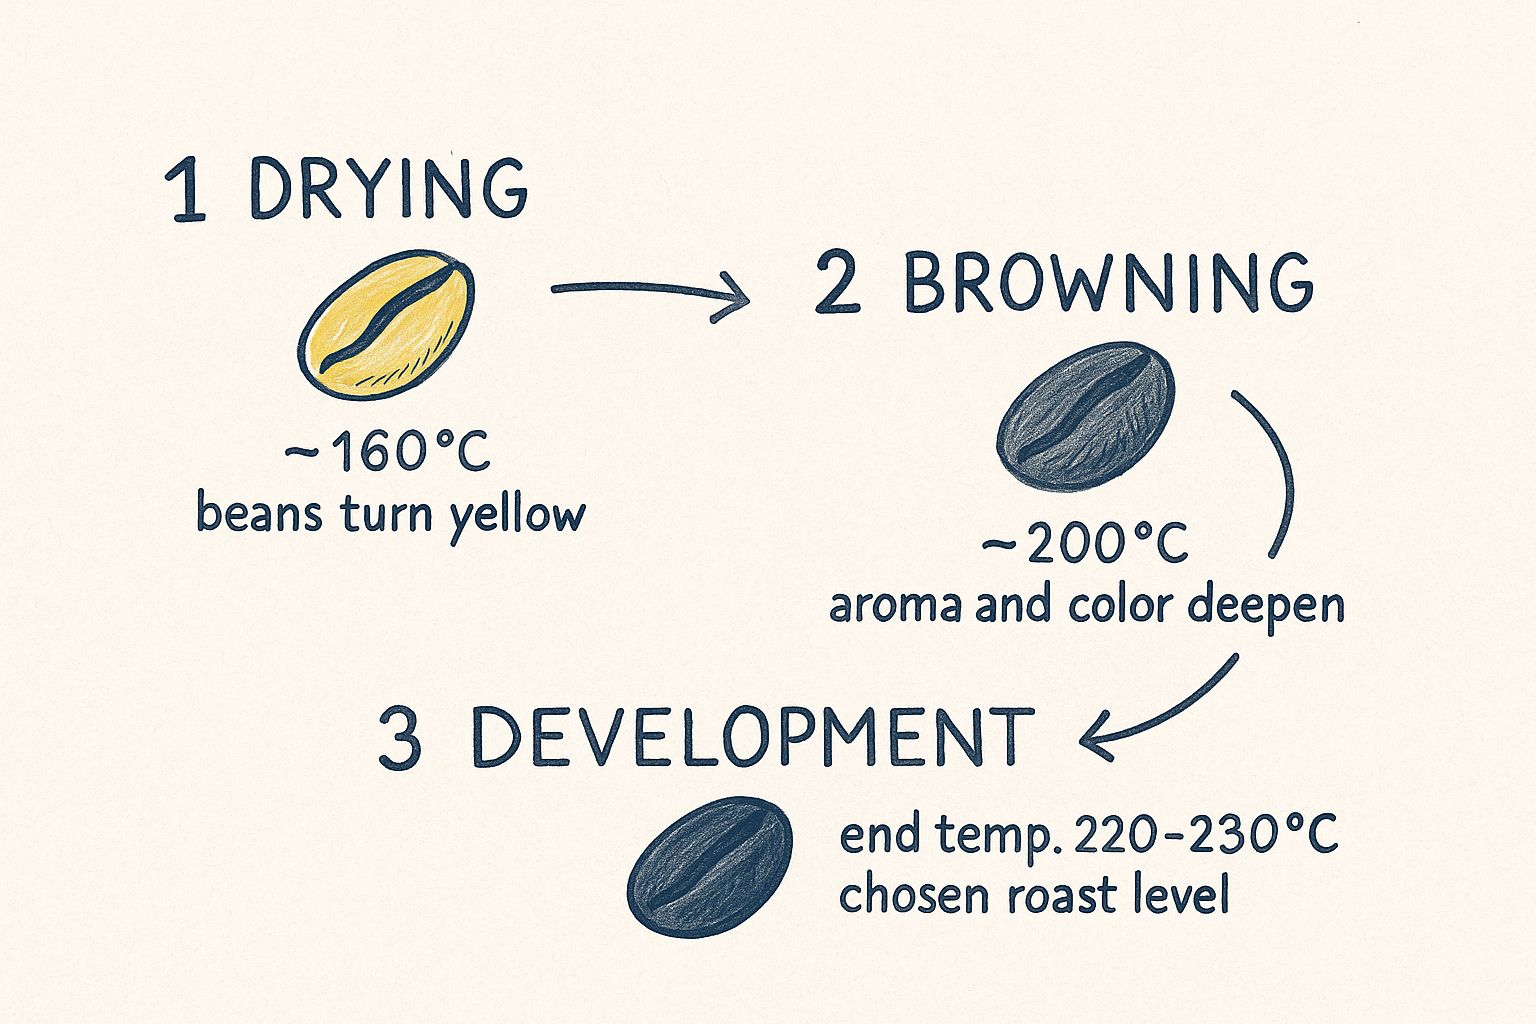
As you can see, each phase has a distinct purpose and temperature range. It really highlights how crucial controlled heat is for hitting your target roast level.
Browning and the Maillard Reaction
Once most of the water has evaporated, the browning stage kicks off. This is where you get the Maillard reaction and sugar caramelisation—the same science that gives a steak its crust or browns your toast.
Our Ethiopian beans will start turning a lovely cinnamon-brown colour. You'll notice the aroma gets deeper, sweeter, and a lot more complex as the foundational flavours begin to develop. You have to manage your heat carefully here. Too much, too fast, and you’ll scorch the outside of the beans while the inside is still raw.
First Crack: The Sound of Success
This is easily the most exciting and important moment of the roast. The "first crack" is an audible popping sound, a bit like making popcorn. It’s the signal that pressure from water vapour and carbon dioxide has built up inside the beans and is bursting out.
This is the moment our Yirgacheffe officially enters 'light roast' territory. Pay attention to the cues:
- Sound: A clear, rolling crackle.
- Sight: The beans have puffed up and now have a more uniform light-brown colour.
- Smell: The aroma is intense, sweet, and fragrant. This is when those signature floral notes we're after really start to pop.
From the second you hear that first pop, you’re in the "development phase". How long you continue roasting from this point on dictates the final flavour. For our light-roasted Yirgacheffe, we’ll probably only go for another minute or so to hang onto its bright acidity and delicate notes.
If you were aiming for something darker, you'd keep going. The beans would darken further, and eventually, you might hear the "second crack"—a quieter, more rapid crackling. This signals a much darker roast, where oils are pushed to the surface, giving the bean a shiny look and developing smoky, deeper flavours. Be warned, though: pushing too far into second crack can wipe out the bean's unique origin character, leaving you with a generic 'roasty' taste.
Crafting Your Perfect Roast Profile
A roast profile is your secret weapon for unlocking consistently brilliant coffee. Think of it as your recipe—a carefully planned dance of time and temperature that dictates everything from a bean’s acidity and sweetness to its body and aroma. Getting this right means you stop guessing and start intentionally creating the flavours you truly love.
Every roast level offers a completely different experience. Your preferences will almost certainly change as you experiment, but getting to grips with the fundamentals of light, medium, and dark roasts is the best way to start roasting coffee with purpose.
It’s also fascinating how tastes vary. A UK study of 20,000 workers found that journalists and media professionals drink the most coffee daily, clocking in at an average of 3.62 cups. This kind of consumption often goes hand-in-hand with a preference for stronger, darker roasts, which helps explain the incredible spectrum of profiles offered by UK roasters. You can dive deeper into these findings in this article on UK coffee consumption trends on gcrmag.com.
The Brightness of Light Roasts
A light roast is all about letting the bean's origin character sing. We stop the roast just after the "first crack," leaving you with a cinnamon-brown bean that has no visible oils on its surface.
This profile is perfect for showcasing delicate, complex flavours. Expect a lively acidity, a lighter body, and vibrant notes that can be anything from floral and fruity to zesty and tea-like. If you’ve got your hands on a high-quality single-origin bean from Ethiopia or Kenya, a light roast will let its unique terroir shine through spectacularly.
A light roast is the most transparent expression of a coffee bean. It highlights the work of the farmer and the unique environment where the coffee was grown, making it a favourite among speciality coffee purists.
The Balance of Medium Roasts
The medium roast is where you find that beautiful sweet spot between origin character and roasted flavour. By pulling the beans sometime after the first crack has finished but before the second one can begin, you get a richer brown colour, sometimes with just a hint of oil on the surface.
This profile smooths out the sharp acidity of a light roast, bringing forward more sweetness, body, and balanced flavours like caramel, nuts, and chocolate. It's an incredibly versatile style that suits a huge range of beans, especially those from Central and South America.
For a more detailed look at hitting this balance, take a look at our guide on coffee roasting profiles explained to master every brew.
The Boldness of Dark Roasts
If a rich, bold, and intense cup is what you’re after, then a dark roast is your destination. This roast is taken right up to, or even into, the second crack. The beans will be a deep, dark brown—almost black—with a noticeable oily sheen.
At this stage, the flavours created by the roasting process itself take over. You’ll discover deep, smoky, and bittersweet chocolatey notes, with very little acidity and a heavy body. While a dark roast can produce a powerful and comforting brew, it can also mask the more subtle, origin-specific notes of the bean. Beans from places like Indonesia or Brazil, which have bold inherent flavours, often stand up well to a darker treatment.
Cooling, Degassing and Storing Your Coffee
What you do the moment the roast stops is just as critical as the roast itself. Coffee beans are dense and hold a tremendous amount of heat. If you just let them sit, they’ll keep on cooking, baking away all the delicate flavours you worked so hard to create. It’s a classic rookie mistake.
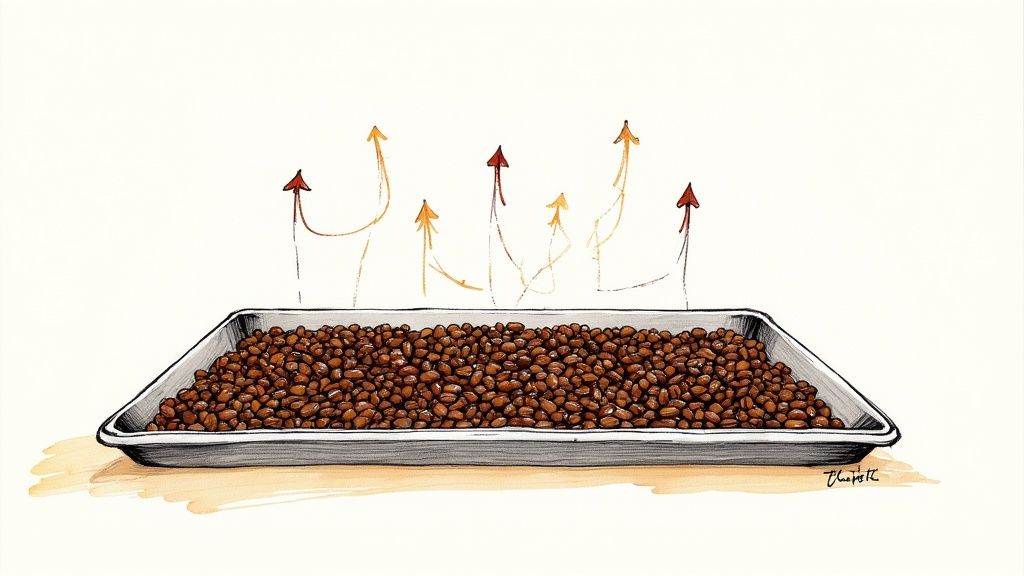
Your immediate priority is to cool them down, and fast. The goal is to get the beans back to room temperature within a few minutes. For small batches, a couple of metal colanders will do the trick. Just pour the beans back and forth between them; this agitates them and lets the heat escape quickly.
More serious home roasters might have a dedicated cooling tray with a fan that pulls cool air through the beans. Whatever your method, the principle is the same: stop the cooking process decisively to lock in that perfect flavour profile.
The Importance of Degassing
Once cooled, your beans still aren't quite ready for brewing. Now they need to degas, which is just the process of releasing the carbon dioxide (CO2) that built up during roasting. Think of it as an essential resting period that allows the coffee’s flavour to stabilise and mature.
If you try to brew coffee that hasn't degassed properly, you’ll get an uneven extraction. All that excess CO2 messes with how the water interacts with the grounds, often resulting in a brew that tastes disappointingly sour or sharp.
Let your beans rest. Most beans are at their flavour peak between three to ten days after roasting. This waiting period is crucial for allowing the complex flavours to settle and develop fully before you brew.
Storing for Maximum Freshness
Proper storage is the final piece of the puzzle. It’s all about protecting your beans from their main enemies: oxygen, light, heat, and moisture.
The best solution is a simple airtight container stored in a cool, dark place like a cupboard. If you can find a container with a one-way valve, even better. This lets the CO2 escape without letting any oxygen sneak in.
Here are a few key storage tips I've learned over the years:
- Avoid the fridge or freezer. Seriously. The temperature fluctuations and moisture will ruin your coffee’s flavour and aroma.
- Store beans whole. Only grind what you need right before you brew. This keeps the volatile aromatic compounds locked inside the bean for as long as possible.
- Use opaque containers. Light is a killer for coffee freshness, so avoid clear glass jars unless you plan to keep them tucked away in a dark cupboard.
By mastering these final steps, you ensure that every cup reflects the care you put into the roast. Once your beans have rested and are ready to go, you can explore our complete guide on how to brew coffee to really get the most out of your perfectly prepared beans.
Common Home Roasting Questions
As you dive into home coffee roasting, you’re bound to have a few questions. That’s completely normal. Getting clear answers from the start can make the whole process feel less intimidating and give you the confidence to nail those first few batches.
Let’s get into some of the most common things new roasters ask.
How Much Smoke Will This Actually Create?
Honestly, probably more than you think. One of the biggest surprises for beginners is the sheer amount of smoke roasting can produce, especially once you push past a light roast into medium and dark territory. It’s not just a faint wisp—it can be thick enough to set off your smoke alarm in seconds.
For that reason, excellent ventilation is non-negotiable. Roasting near an open window with a fan blowing outwards is a good start, but often not enough. A powerful cooker hood can work, but the best options are roasting outdoors on a patio, balcony, or in a well-ventilated garage. This keeps your kitchen air clear and your smoke alarms blissfully quiet.
How Do I Know When the Beans Are Perfectly Roasted?
This is the million-dollar question, and the real art of roasting. Knowing the exact moment to stop the roast is a skill you’ll sharpen over time through practice and paying close attention. There’s no magic timer that works for every bean; it's a sensory game.
You need to tune into three key signals:
- Colour: Watch the beans as they shift from their initial green to a pale yellow, then to a cinnamon brown, and finally into the deeper shades you’re aiming for.
- Sound: The most important audio cue you have is the ‘first crack’—an audible popping sound, like popcorn. This marks the beginning of a light roast.
- Smell: The aromas tell a story. They’ll go from grassy and bready at the start to sweet, caramelised, and toasty as the sugars develop. With experience, you'll learn to recognise the signature scents of each stage.
My best advice? Keep a detailed log for every single batch. Note the time, temperature, and when you see, hear, and smell these changes. This little notebook will become your most valuable tool for repeating your successes and learning from the batches that didn't quite work out.
When Can I Drink My Freshly Roasted Coffee?
It’s incredibly tempting to grind those beans and brew a cup the moment they’ve cooled down. But hold on—patience is crucial here. Freshly roasted beans need a ‘degassing’ period to let the carbon dioxide built up during roasting escape.
If you brew too soon, that CO2 interferes with the extraction process, often resulting in a sour, sharp, and unbalanced cup. The true flavours just haven't had a chance to settle and develop.
For most filter brewing methods like pour-over, AeroPress, or French press, waiting 24 to 48 hours is usually enough time. For espresso, the coffee needs even longer to stabilise. You’ll get much richer and more consistent shots if you can let the beans rest for 5 to 10 days. This resting phase is what allows the coffee's true character to shine through.
Ready to start your home roasting adventure? At Seven Sisters Coffee Co, we source exceptional green coffee beans from the world's finest growing regions, giving you the perfect starting point for an incredible cup. Explore our collection and begin your journey today.