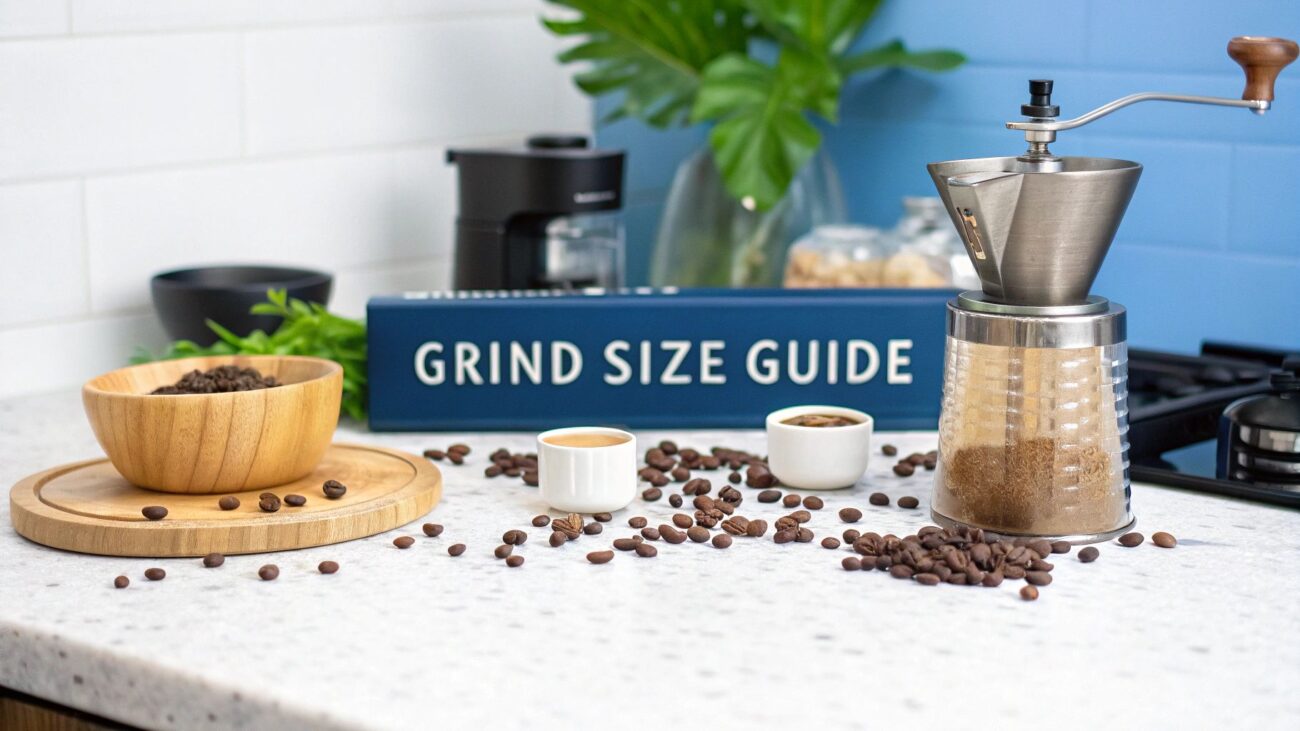
Ultimate Guide: how to make espresso without an espresso machine

That rich, intense shot of coffee you're craving is far more accessible than you might think, even without a fancy espresso machine hogging your counter space. And you're not alone in wanting it. With the UK now drinking around 98 million cups of coffee every single day, the desire for café-quality brews at home has never been stronger.
You can absolutely learn how to make espresso without an espresso machine using common brewers like a Moka pot or an AeroPress. The secret isn't in having expensive kit, but in mastering the fundamentals: a finer grind, the right water temperature, and a bit of pressure. Get those right, and you can create a surprisingly potent, concentrated coffee that comes incredibly close to the real thing.
To be clear, the goal here is a concentrated, deeply flavourful shot of coffee. While you won't replicate the nine bars of pressure from a commercial machine, brewers like the iconic Moka pot or the wonderfully versatile AeroPress are fantastic stand-ins. They work by using either steam or good old-fashioned manual force to push hot water through compacted coffee grounds. The result? A rich, punchy brew that’s a perfect base for lattes and cappuccinos, or simply to be sipped and savoured on its own.
For a deeper dive into the UK's love affair with coffee, check out this insightful article on coffee consumption statistics.
Your Quick Guide to Machine-Free Espresso
So, you're ready to start brewing. Which method should you choose? It really boils down to what you prioritise: a clean, nuanced taste or a bold, classic flavour delivered with impressive speed.
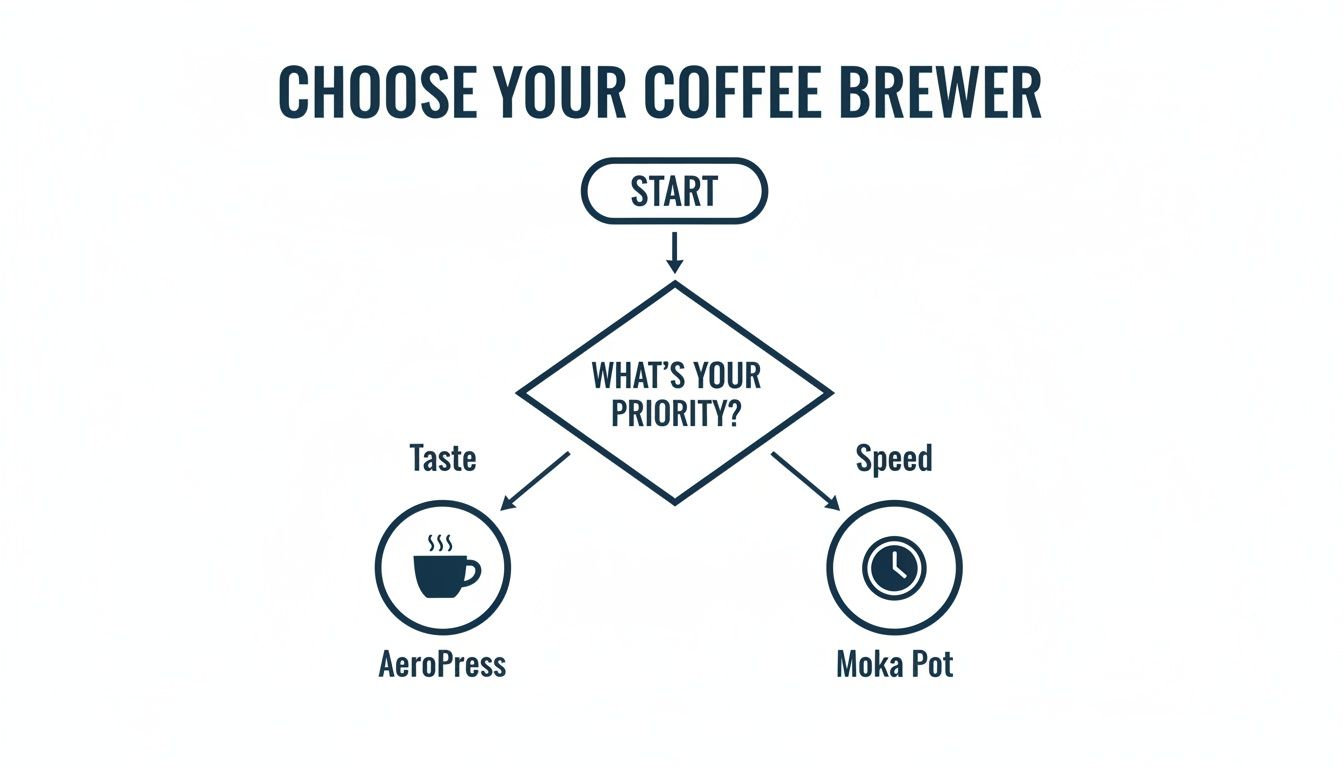
As the flowchart shows, an AeroPress is often the go-to for those who value a cleaner, more refined taste. On the other hand, a trusty Moka pot, like the ones from ADS Coffee Supplies, is hard to beat for its speed and its ability to produce that classic, bold stovetop coffee flavour.
This guide will walk you through both of these methods, plus a few others, giving you all the tips you need to pull a satisfying shot, no matter what gear you have.
Comparison of Espresso Alternatives
To give you a quick overview, here's a look at how the most popular methods stack up against each other. Each has its own charm and delivers a slightly different style of coffee, so it's worth seeing which one aligns best with your taste and daily routine.
| Method | Equipment Needed | Crema Quality | Strength | Estimated Time |
|---|---|---|---|---|
| Moka Pot | Moka pot, stovetop | Light, often disappears quickly | Strong | 4-5 minutes |
| AeroPress | AeroPress, kettle, filters | Very light to none | Strong, concentrated | 2-3 minutes |
| French Press | French press, kettle | None | Moderate to Strong | 5-7 minutes |
This table should help you decide at a glance which brewer might be the right starting point for your machine-free espresso journey. Now, let's get into the nitty-gritty of each method.
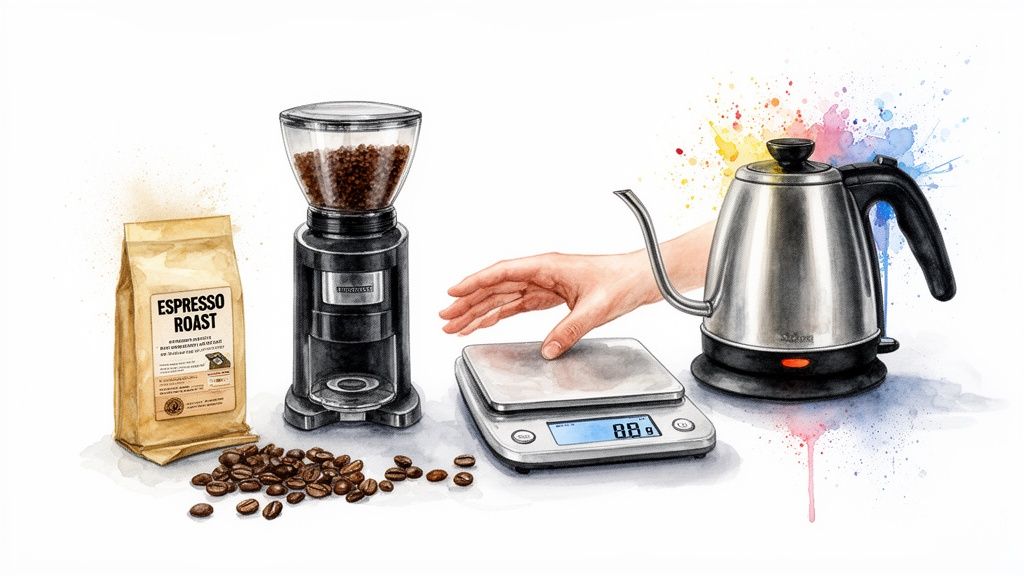
Gathering Your Essential Tools and Ingredients
Great coffee doesn’t just happen when the water hits the grounds; it begins with having the right kit. Before you even think about brewing that intense, espresso-like shot, getting your gear lined up is the most important thing you can do. Think of it as preparing your canvas before you paint – the final result is only as good as your prep work.
While sorting your brewing tools, don't overlook the simple joy of the right cup. Finding the perfect espresso mug really does make the whole experience better.
If there’s one piece of equipment that will completely change your coffee game, it’s a quality burr grinder. Unlike a blade grinder that just smashes beans into uneven chunks, a burr grinder mills them to a consistent size. For a balanced extraction, that consistency is everything. It’s what stands between you and the sour, bitter flavours that come from poorly ground coffee. You can find excellent burr grinders at ADS Coffee Supplies.
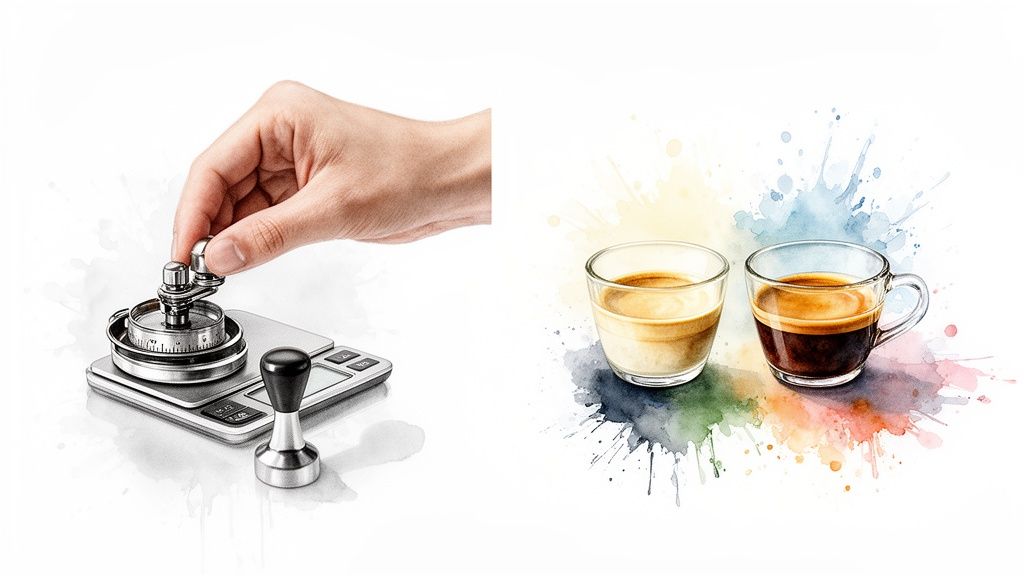
Next up, get yourself a precise digital kitchen scale. Honestly, using tablespoons is just too hit-or-miss for strong, concentrated coffee. Weighing your beans is the only way to guarantee you’re using the exact same amount every single time, letting you nail that perfect shot again and again.
Choosing the Right Coffee and Grind Size
The real secret to incredible flavour is in the beans. You need fresh, high-quality coffee that’s been roasted specifically for espresso. A dedicated espresso roast has a richer body and lower acidity, which is exactly what you want for the intense brewing methods we're about to get into.
Now, the grind size is where the real magic happens. This is your main tool for controlling the extraction and the final taste, and it will change depending on the brewer you’re using.
- For a Moka Pot: You're aiming for a medium-fine grind. It should feel a bit grittier than sand, but definitely finer than your standard drip coffee grind.
- For an AeroPress: A fine grind is the perfect starting point, something close to the texture of table salt. This creates the resistance needed to build up pressure for a truly concentrated shot.
Getting the grind size just right can take a bit of practice. If you're struggling to visualise the different textures, our detailed coffee grind size guide is a brilliant resource that breaks it all down.
Essential Accessories for Better Brewing
While you can get by without them, a few extra bits of kit can make a huge difference. A temperature-controlled kettle, for instance, lets you hit that sweet spot of 93-96°C. Using water that's too hot is a classic mistake that leads to a burnt, bitter brew. Boiling water is a definite no-no.
Filtered water is another game-changer. You'd be surprised how much the minerals in tap water can mess with the final flavour of your coffee.
Finally, a small tamper that fits your brewer (this is especially useful for the AeroPress) will help you create a perfectly level and compacted puck of coffee grounds. This simple step encourages the water to flow through evenly, leading to a much more balanced and delicious extraction. With all that ready, you’re set to start brewing.
Mastering the Stovetop Moka Pot Method
The Moka pot is a true icon of home coffee brewing, and for good reason. It crafts a bold, rich, and beautifully concentrated coffee that gets remarkably close to the flavour and intensity of a real espresso. For many, learning how to make espresso without a proper machine starts right here, on the stovetop.
This classic Italian brewer uses steam pressure to force water up through a bed of coffee grounds, delivering a potent and aromatic shot. While it won't generate the nine bars of pressure you'd find in a commercial machine, the result is a fantastic substitute. It forms the perfect base for lattes and cappuccinos or stands strong all on its own.
Preparing Your Moka Pot
Your journey to the perfect stovetop shot begins with getting the setup just right. Precision is what separates a good Moka pot coffee from a great one, so let’s start with the grind.
You’ll want to weigh out 18–20g of medium-fine ground coffee—think of a texture slightly coarser than table salt. An even, consistent grind is absolutely crucial for a balanced extraction, preventing any nasty, bitter flavours from creeping in.
Next, it’s all about the water. A common mistake is filling the chamber with cold water straight from the tap. This forces the Moka pot to sit on the heat for far too long, effectively cooking the grounds and leaving you with a burnt, metallic-tasting brew. Nobody wants that.
Here’s how to get it right:
- Pre-heat your water: Bring it to a near boil, aiming for a temperature around 93°C. This little step makes a huge difference.
- Fill the chamber: Carefully pour the hot water into the bottom chamber, filling it right up to the safety valve but not covering it.
- Add the coffee: Pop the filter basket into the chamber and fill it with your grounds. Level them off gently with your finger, but whatever you do, don't tamp them down.
A quick but important tip: Tamping coffee in a Moka pot can create way too much pressure. At best, it will choke the brewer and prevent water from passing through; at worst, it can be dangerous. A level, uncompressed bed of coffee is all you need for a brilliant extraction.
From here, you can dive even deeper into the brewing process. We've laid out every detail in our comprehensive guide on how to brew with a Moka pot.
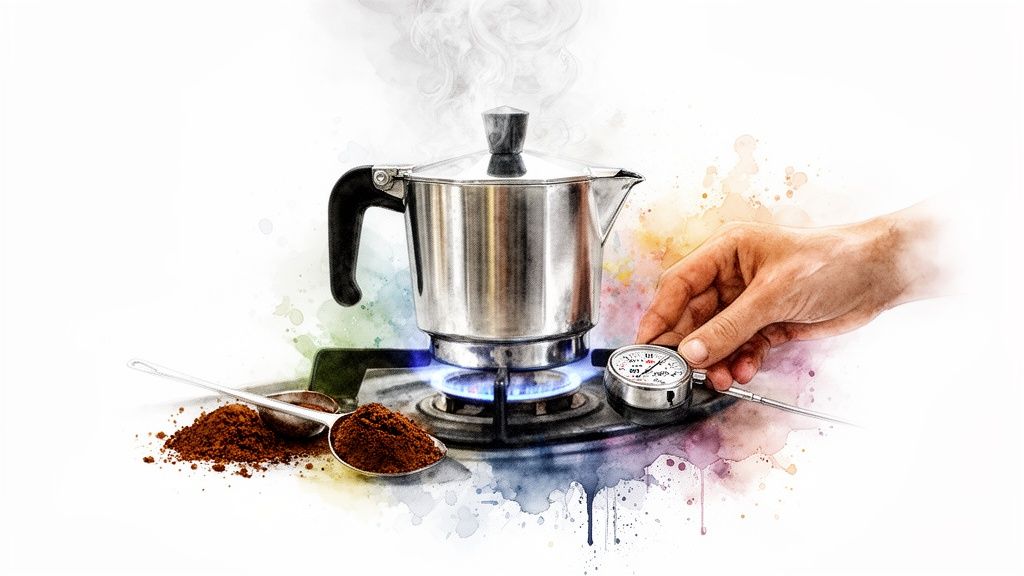
Managing Heat for Perfect Extraction
Now for the most critical part of the process: managing the heat. Securely screw the top and bottom chambers together—use an oven mitt or a tea towel, as the base will be scorching—and place the pot on your stovetop over a medium-low heat.
I always recommend keeping the lid open so you can watch the magic happen. Within a couple of minutes, you should see a rich, dark stream of coffee start to flow steadily from the spout. That’s the sign of a good, even extraction. If it sputters and shoots out aggressively, your heat is definitely too high.
Once the stream turns a pale, honey-like colour and you hear a gentle gurgling sound, it's time to act fast. Immediately remove the pot from the heat.
Here’s a final pro trick to lock in that perfect flavour: run the base of the pot under cold tap water. This instantly stops the extraction and prevents any residual heat from scorching the coffee. It’s a simple step that guarantees your brew is smooth and never burnt. If you're looking to get started, you can find a fantastic selection of classic and contemporary Moka pots over at ADS Coffee Supplies.
Perfecting the AeroPress Espresso-Style Shot
For the home barista, the AeroPress is a bit of a secret weapon. It’s an incredibly versatile and forgiving brewer that, with just a few tweaks to your technique, can produce a clean, full-bodied shot of coffee that really punches above its weight.
Unlike a Moka pot, the AeroPress doesn't use steam. Instead, it relies on manual pressure to force water through the coffee grounds, creating a concentrated and flavourful brew that gets you remarkably close to genuine espresso. This method is all about giving you control. You can browse the AeroPress and its accessories at ADS Coffee Supplies.
By flipping the brewer upside down—the popular "inverted" technique—you get total command over the immersion and extraction time. This clever trick stops any weak, watery coffee from dripping through before you’re ready, which is exactly how you build the right conditions for an intense, espresso-like shot.
Dialling in Your AeroPress Shot
To get started, you'll want to use 15–18g of coffee ground to a fine-to-medium consistency. As a reference, aim for something slightly finer than you would for a Moka pot. This specific grind is essential because it creates the resistance needed for the water to properly extract all those rich, soluble compounds when you apply pressure.
With your coffee in the chamber, the next step is a quick pre-infusion, often called a "bloom." Pour just enough hot water (around 93°C is perfect) to fully saturate the grounds. Give it a quick stir and let it sit for about 30 seconds. This simple action allows trapped CO2 to escape from the fresh coffee, paving the way for a much more even and balanced extraction.
After the bloom, top up the water until you hit your desired ratio. A tight 1:2 coffee-to-water ratio is a fantastic starting point for that classic espresso style.
The Plunge and the Filter Choice
Now for the main event: applying steady, consistent pressure. Secure the filter cap, flip the AeroPress onto a sturdy mug, and begin pressing the plunger down firmly and evenly. You should aim for this plunge to take roughly 30 seconds.
If it feels too easy, your grind is probably too coarse. If it’s a real struggle to push down, it’s likely too fine.
A key takeaway for a cleaner cup is to stop plunging as soon as you hear a hissing sound. Pushing that last bit of air through the coffee puck often introduces bitter notes you're better off without.
The type of filter you use also makes a huge difference to your final shot.
- Paper Micro-Filters: These are the standard filters that come with the brewer. They produce an exceptionally clean, bright cup by trapping most of the coffee oils and all of the sediment.
- Metal Filters: A reusable metal filter allows more oils and fine particles into the cup. The result is a brew with a fuller body and a richer texture, which many people prefer for an espresso-style shot.
Experimenting with both is really the best way to find what you love. For a more detailed walkthrough, check out our complete guide to making espresso in an AeroPress, which covers every variable you need for a truly exceptional brew.
Exploring Other Creative Brewing Techniques
Don't have a Moka pot or an AeroPress? Don't worry. Your mission for a rich, concentrated coffee is far from over. There are still plenty of inventive ways to brew a potent, espresso-like shot using kit you might already have tucked away in your kitchen.
Learning how to make espresso without an espresso machine is all about adapting your technique. With a few smart tweaks, even the most common brewers can produce something wonderfully intense.
The French Press Concentrate Method
The humble French press, usually the go-to for a full-bodied, immersive brew, can be coaxed into creating a seriously powerful coffee concentrate. The secret? Forget everything you know about standard French press brewing. You can explore a range of French presses at ADS Coffee Supplies.
Instead of a coarse grind, you’ll want a medium-fine setting. This creates more surface area, allowing for a much faster and more robust extraction.
From there, it's all about ramping up the concentration.
- Use a Tight Ratio: Aim for a potent 1:4 coffee-to-water ratio. That means for every 1 gram of coffee, you'll use only 4 grams of water.
- Keep Brewing Short: With a finer grind, a long steep will just lead to bitterness. Stick to around four minutes before plunging slowly and steadily.
What you'll get is a thick, syrupy brew that works brilliantly as a base for lattes or cappuccinos. It won't have any crema, but it delivers a satisfyingly heavy body and deep, rich flavour. If you're curious how this stacks up against other brewers, our guide comparing the French Press vs AeroPress vs V60 has some fantastic insights.
Modifying a Stovetop Percolator
That classic stovetop percolator, maybe one you've inherited or associate with old-school camping trips, can also be wrangled into making a stronger coffee. A few simple adjustments to the process can yield a surprisingly bold and punchy result.
Start by using a slightly finer grind than you normally would—something closer to a medium setting. The real art here is managing the brewing cycle to avoid that dreaded burnt taste. As the water starts to "perc," keep a close watch on the colour of the liquid bubbling up into the glass knob.
The moment the coffee reaches a deep, dark brown, take it off the heat immediately. Letting it cycle for too long is the quickest way to a bitter, scorched brew. This method demands your full attention, but the strong cup it produces can be well worth it.
To help you decide which of these creative shortcuts might work best for you, here’s a quick look at how they compare.
Overview of Alternative Espresso Methods
This table offers a simple side-by-side comparison of the key variables for each method, helping you choose the right technique based on the gear you have and the results you're after.
| Method | Grind Setting | Water Ratio | Extraction Time | Crema Presence |
|---|---|---|---|---|
| French Press | Medium-Fine | 1:4 (Concentrated) | 4 Minutes | None |
| Percolator | Medium | Standard | Cycle-dependent | None |
While neither of these methods will produce true crema, they are excellent for creating a strong coffee base that holds up well in milk-based drinks, giving you that espresso-like intensity without the expensive machine.
Troubleshooting Common Brewing Problems
Even when you follow every step perfectly, sometimes your machine-free espresso shot just doesn’t hit the mark. It might taste a little sour, overwhelmingly bitter, or just disappointingly weak. This is a completely normal part of learning the craft, and thankfully, these issues are almost always fixable with a few small, simple adjustments.
Think of it less as a failure and more as your coffee giving you direct feedback. The flavour in your cup is a direct result of your technique, and a handful of common culprits are usually to blame. By learning to identify these signs, you can start to fine-tune your process like a seasoned barista.
The three most important variables you have control over are grind size, water temperature, and extraction time. A tiny change in any one of these can transform a lacklustre brew into a delicious one. Let's break down the most frequent problems and how to solve them.
Diagnosing Sour or Weak Coffee
If your coffee has a sharp, sour taste or feels thin and watery, it’s a classic sign of under-extraction. This simply means the water didn't have enough time or the right conditions to pull all the desirable sweet flavours from the coffee grounds.
This problem often points directly to your grind. A grind that is too coarse creates large gaps between the coffee particles, allowing water to race through far too quickly without grabbing enough flavour.
To fix a sour shot, try these adjustments:
- Go Finer: Adjust your grinder to a slightly finer setting. This increases the surface area of the coffee, which slows the water down and boosts extraction.
- Increase Dose: Adding a little more coffee to your brewer can also help slow the flow of water, giving it more contact time with the grounds.
Sourness is the most common hurdle for beginners. The key is to make one small adjustment at a time. Drastically changing both your grind and dose at once can make it harder to figure out what actually fixed the problem.
Tackling Bitter or Burnt Flavours
On the other end of the spectrum is a harsh, bitter, or even burnt taste. This is a tell-tale sign of over-extraction, where the water has pulled too much from the coffee grounds, including the unpleasant, bitter compounds.
Often, the cause is a grind that's too fine, which chokes the flow of water and extends the extraction time for far too long. Another common culprit is using water that is simply too hot. If you're struggling with bitterness, you can find a deeper explanation in our guide on why your espresso might be bitter.
Here’s your checklist for fixing a bitter brew:
- Go Coarser: Try a slightly coarser grind setting to allow water to flow through more easily.
- Check Temperature: Ensure your water is just off the boil, ideally around 93°C. Boiling water will scorch your grounds instantly.
- Shorten Time: For methods like the AeroPress or French press, reducing your brew or plunge time can prevent over-extraction.
Frequently Asked Questions
Even with the best guides, a few questions always pop up when you're trying to nail that espresso-like shot at home. Let's tackle some of the most common ones I hear from fellow home baristas.
Can I Get Real Crema Without an Espresso Machine?
This is the big one, isn't it? While getting that thick, stable crema you see in cafes is nearly impossible without the 9 bars of pressure from a proper espresso machine, you can absolutely get a rich, crema-like foam.
It's all about maximising the pressure you can generate. Methods like the AeroPress and a well-handled Moka pot can create a surprisingly satisfying layer on top of your shot. The key is using exceptionally fresh beans and getting your technique just right.
What's the Best Grind Size for a Moka Pot?
For a Moka pot, you’re aiming for a medium-fine grind. Picture this: it needs to be noticeably finer than what you’d use for a drip coffee maker, but still a bit coarser than a true espresso grind.
If you go too fine, you'll choke the filter, creating way too much pressure and a bitter, sludgy result. But if it's too coarse, the water will rush through, leaving you with a weak, disappointingly under-extracted brew.
How Much Does Water Temperature Affect the Flavour?
Water temperature is everything. Seriously, it's a make-or-break variable.
If your water is at a rolling boil, you'll scorch the grounds instantly, and your coffee will taste burnt and bitter. No coming back from that. On the flip side, if the water isn't hot enough, the coffee will taste sour and undeveloped because you haven't extracted the good stuff. The sweet spot is just off the boil, right around 93°C. This ensures you get a beautifully balanced extraction of all those delicious flavours locked in the beans.
Ready to perfect your home brewing setup? ADS Coffee Supplies has everything you need, from classic Moka pots to essential accessories.