How to Make Espresso at Home: Easy Step-by-Step Guide

Making espresso at home is far simpler than you might think. It really just boils down to four things: a decent machine, a quality grinder, fresh coffee beans, and a repeatable technique. Once you get the hang of grinding, tamping, and pulling a shot, you'll be able to create rich, flavourful espresso that stands up to anything from your favourite café.
Why Making Espresso at Home Is Easier Than You Think
Ever dreamt of recreating that perfect café espresso right in your own kitchen? You're not the only one. More and more coffee lovers across the UK are discovering the genuine satisfaction of becoming a home barista. It isn’t about needing wildly expensive, complicated gear; it's about understanding a few key steps.
This guide is designed to cut through the jargon and show you exactly what it takes to make great espresso at home. We’ll look at choosing the right equipment for your budget, picking beans that suit your taste, and mastering the simple rituals of grinding, tamping, and pulling that perfect shot. My goal is to help you build both your confidence and your skills.
The Growing Appeal of the Home Barista
The move towards home brewing isn't just a passing trend. Here in the UK, making espresso at home has shot up in popularity recently, driven by a mix of economic sense and a growing desire for top-notch coffee without leaving the house. A recent report showed the home coffee market is booming as people react to rising coffee shop prices—which have jumped an average of 17% since 2022—by investing in their own espresso setups. In fact, over 50% of coffee-drinking households in the UK now own a machine that can make espresso. You can dig into more of these insights over at Qahwaworld.com.
At its heart, making espresso is a craft. It’s less about automation and more about the satisfying, hands-on process of turning whole beans into a concentrated, aromatic shot of coffee. This guide embraces that approach.
What This Guide Covers
I’ve structured this journey to give you the complete picture, from the foundational knowledge you need right through to the practical skills for your daily brew. We'll demystify the entire process so you feel empowered, not overwhelmed. Of course, espresso is just one of many methods. For a wider view, you might find our guide on how to brew coffee using different techniques interesting.
Here’s a quick look at what you'll learn:
- Essential Equipment: We’ll run through the must-have tools, explaining why a good grinder is often even more important than the machine itself.
- Bean Selection: You'll learn how to pick the right beans, focusing on roast profiles and freshness to get the best possible flavour.
- The Workflow: We will break down the core techniques of dosing, distributing, and tamping your coffee grounds correctly.
- Pulling the Shot: Finally, we’ll walk you through the extraction itself, teaching you how to spot a great shot by sight, time, and taste.
Choosing Your Home Espresso Equipment
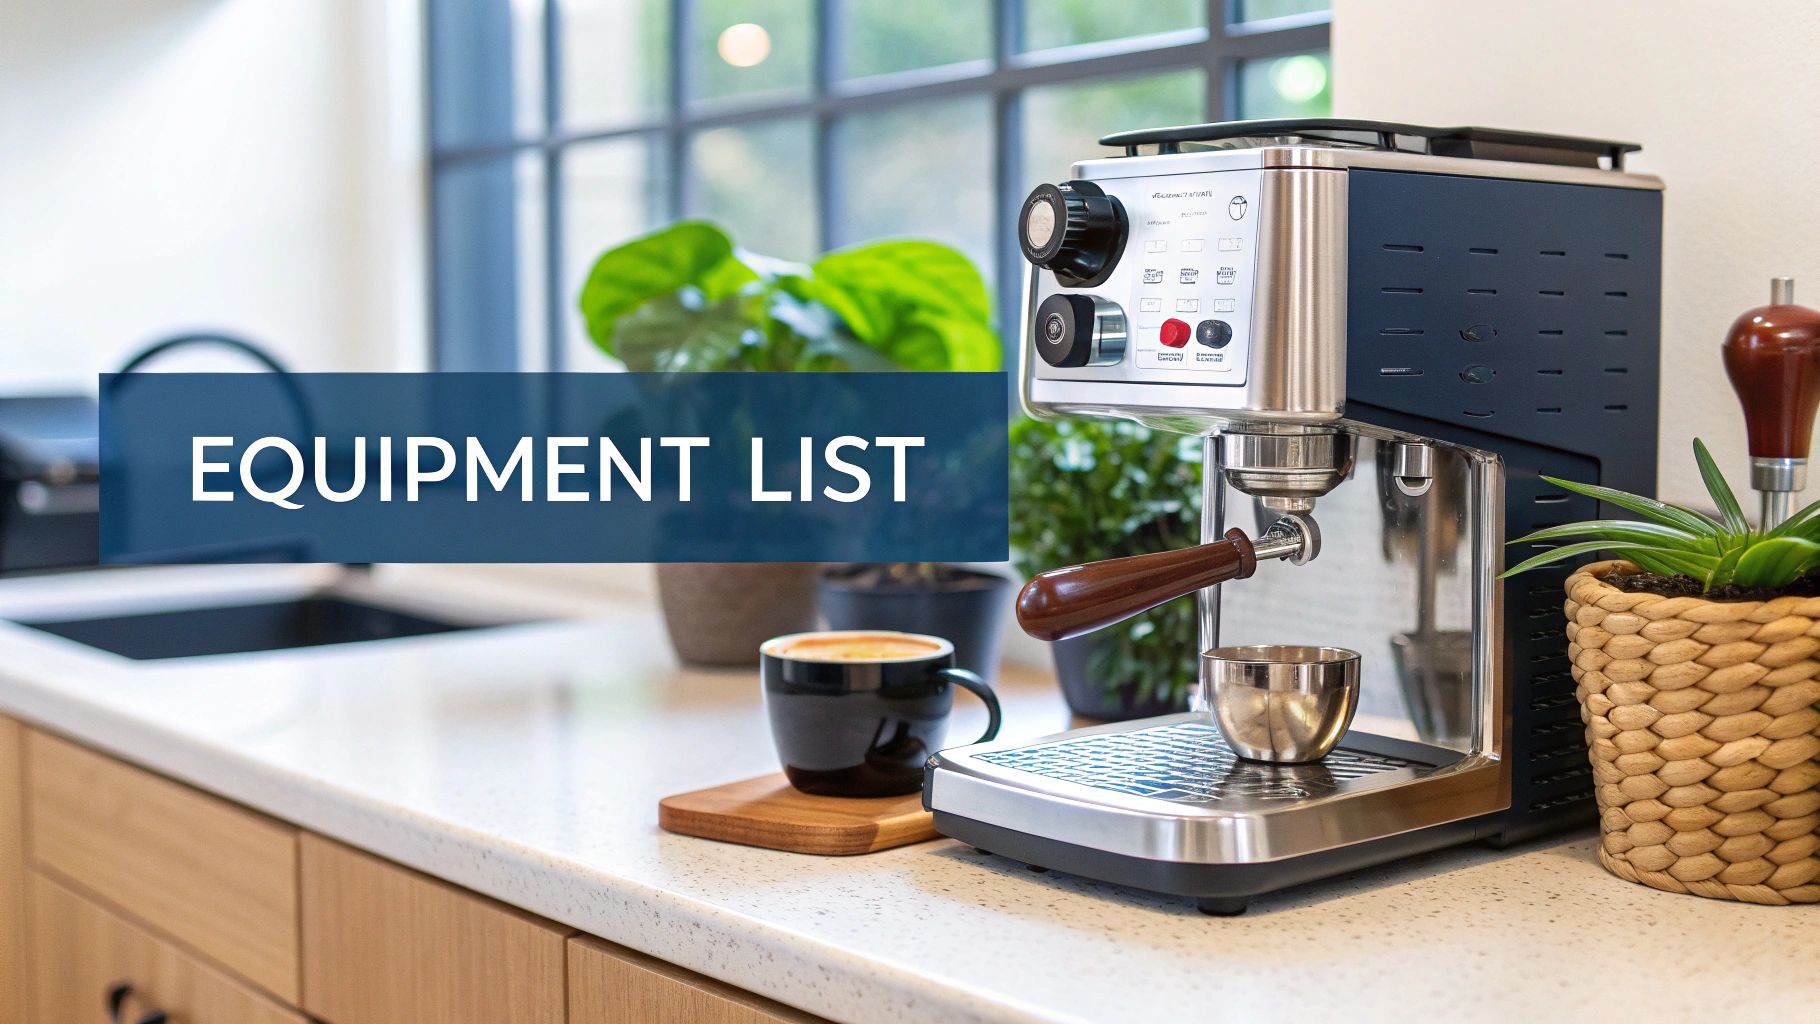
Starting your home espresso journey doesn’t mean you need to remortgage the house. The right equipment comes down to your personal goals, your budget, and just how hands-on you want the experience to be. Finding the perfect fit is all about matching the machine to your lifestyle.
The good news is that the market for home coffee gear has absolutely exploded in recent years. This growth is a huge reason why espresso machines now make up a big slice of the £500 million+ UK home coffee machine market. It’s a clear sign of a national shift away from instant coffee towards recreating that speciality coffee shop experience right in our own kitchens.
Understanding Espresso Machine Types
Your first big decision is the machine itself. They generally fall into a few key categories, each striking a different balance between convenience, control, and cost. Getting your head around these differences will help you make a smart investment from day one.
While espresso is a fantastic rabbit hole to go down, it's just one of many ways to enjoy great coffee. If you're curious about what else is out there, you can explore some of the best coffee brewing methods in our other guides.
For now, let’s focus on the espresso machines you’re most likely to come across. To make things clearer, here’s a breakdown of the main types you'll find on the market.
Comparing Home Espresso Machine Types
| Machine Type | How It Works | Best For | Approx. Price Range |
|---|---|---|---|
| Manual Lever | You physically pull a lever to create all the pressure needed for extraction. | The purist who wants total control and enjoys the craft and ritual of making espresso. | £300 – £2,500+ |
| Semi-Automatic | An electric pump provides the pressure, but you start and stop the shot manually. | The home enthusiast who wants a blend of control over extraction time and reliable consistency. | £200 – £4,000+ |
| Automatic | The pump provides pressure, and the machine cuts the shot off for you at a pre-set volume. | Someone who values high consistency and convenience with slightly less manual input. | £400 – £5,000+ |
| Super-Automatic | A "bean-to-cup" machine that grinds, doses, tamps, and brews with one button press. | Those who prioritise ultimate convenience over the ability to fine-tune and craft the shot. | £300 – £2,000+ |
Each of these machines can produce a great shot of coffee, but the journey to get there is quite different. The key is to be honest about how much time and effort you want to put into your morning routine.
Why Your Grinder Is a Non-Negotiable Investment
Now for a piece of advice that might seem backward at first: your grinder is more important than your espresso machine. It’s true. I can pull a much better shot of espresso with a £200 machine and a £400 grinder than I could with a £2,000 machine and a cheap blade grinder.
Espresso extraction is all about forcing hot water through a tightly packed puck of coffee at incredibly high pressure. For this to work, the coffee grounds need to be exceptionally fine and, most importantly, uniform in size.
This is where a good burr grinder becomes absolutely essential. It uses two revolving abrasive surfaces (the burrs) to crush the beans into a consistent size. A cheap blade grinder just smashes them into a chaotic mix of dust and boulders, which makes a balanced extraction completely impossible.
An inconsistent grind is the number one cause of failed espresso shots. Without uniform particles, water will channel through the path of least resistance, leading to a shot that is simultaneously sour (under-extracted) and bitter (over-extracted).
Essential Accessories That Make a Difference
Beyond the big-ticket items, a few smaller tools are vital for getting consistent results and turning a good shot into a great one. These aren't expensive luxuries; they are fundamental to building a repeatable workflow.
- Digital Scales: Precision is king in espresso. You need to weigh your coffee beans before you grind (your 'dose') and weigh the liquid espresso as it brews (your 'yield'). A set of scales accurate to 0.1 grams is a must-have.
- A Quality Tamper: Most machines are bundled with a flimsy plastic tamper. Investing in a solid, heavy metal tamper that fits your portafilter basket snugly (usually 58mm, but always check your machine's specs) makes all the difference in applying firm, even pressure every single time.
- A Knock Box: A brilliantly simple tool. It's just a sturdy container with a rubberised bar across the middle for "knocking" the used coffee puck out of your portafilter. It’s a small thing, but it keeps your workspace clean and makes the whole process much smoother.
Investing wisely in these three areas—machine, grinder, and accessories—will set you up for success from the very beginning. You don't need the most expensive gear on the market, but you absolutely need the right gear to learn how to make brilliant espresso at home.
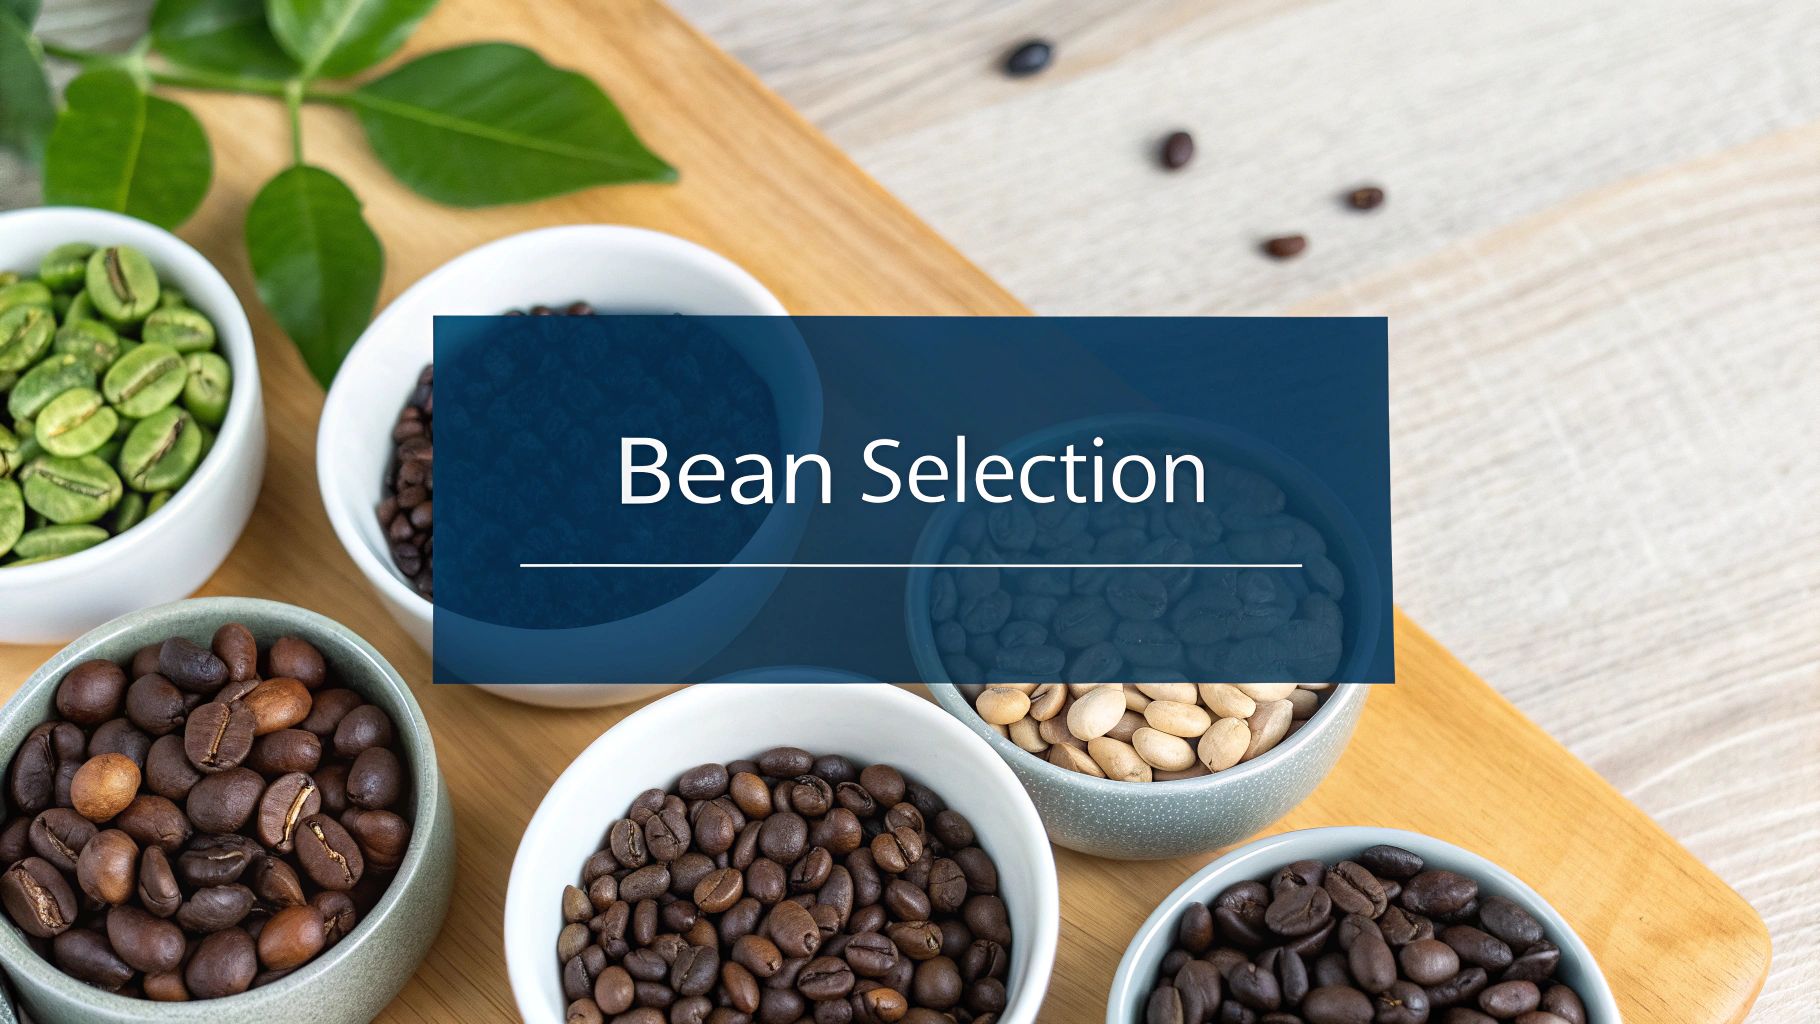
Finding the Right Coffee Beans for Espresso
Your shiny new espresso machine and grinder are the engine, but the coffee beans? That’s the fuel. Choosing the right ones is the single most important decision you'll make, dictating the entire flavour experience in your cup. It’s what turns a morning routine into a genuine journey of taste and aroma.
And it’s a journey more and more of us are taking. The UK’s love for coffee is booming, with projections showing that 15.1% of the population will be drinking it weekly by 2025. That’s over 7.9 million people. As home espresso setups become more common, the beans we pick have never been more crucial. You can dive deeper into these trends in this in-depth UK coffee market analysis.
Single Origin vs Espresso Blends
When you start browsing for beans, you'll immediately run into two main camps: single origin and blends. One isn't better than the other; they just offer different paths to a great shot of espresso.
-
Single-Origin Beans: These beans all hail from a specific farm, cooperative, or region within a single country. They’re prized for their unique, often wild, flavour profiles. Think of the bright, berry-like notes of an Ethiopian Yirgacheffe or the deep, chocolatey character of a Brazilian coffee. For espresso, single origins can be a thrilling ride, but their distinct acidity or delicate floral notes can sometimes be a challenge to dial in perfectly under pressure.
-
Espresso Blends: A roaster acts like a chef here, artfully combining beans from different origins to create something new. They might take a Brazilian bean for its creamy body, add a Colombian for sweetness, and finish with a dash of Ethiopian for a bright, acidic spark. The entire point is to craft a balanced, consistent, and well-rounded shot that pulls beautifully time after time.
If you're just getting your feet wet with home espresso, a classic espresso blend is almost always the best place to start. They are far more forgiving and are specifically designed to deliver that rich, syrupy body and thick, luscious crema we all crave.
The Importance of Roast Profile
How a coffee bean is roasted has a colossal impact on its final flavour. While it's a whole spectrum, you can generally break it down into light, medium, and dark.
A light roast is all about preserving the bean's origin character, which means you'll get higher acidity and more delicate, nuanced notes like fruits or flowers. On the other end, a dark roast develops deep, rich flavours of dark chocolate, caramel, and nuts, with a much heavier body and lower acidity. A medium roast, as you’d guess, tries to find the sweet spot right in the middle.
Traditionally, espresso was synonymous with dark, oily roasts, especially in Italy. But the modern speciality coffee scene has thrown that rulebook out the window, embracing lighter roasts that showcase the incredible diversity of coffee. There's no right or wrong—it's entirely down to what you enjoy drinking.
Why Freshness Is Everything
Here's the most important tip I can give you for buying coffee beans: completely ignore the 'best before' date and hunt for the 'roasted on' date. Coffee is a fresh agricultural product. Its flavour hits a peak a few days to a couple of weeks after roasting and then starts to fade as all those wonderful aromatic compounds escape.
For espresso, this isn't just a suggestion; it's critical. Freshly roasted coffee (which has rested for about 5-10 days post-roast) is still releasing CO2, a gas that is absolutely essential for creating a thick, stable crema. Use beans that are too old, and you'll be left with a thin, sad-looking crema and a shot that tastes flat and lifeless.
Make it a habit to buy beans that were roasted within the last month, and try to use them up within a few weeks of opening the bag. If you’re ready to explore what freshly roasted coffee can do for your espresso, a great place to begin is with a curated collection of specialty coffee beans from roasters who are passionate about quality.
Mastering Your Espresso Workflow
Now that you've got your beans and equipment sorted, it’s time to get hands-on. This is where the real magic happens. The secret to ditching the frustrating coffee guessing game and creating a satisfying daily ritual is developing a consistent, repeatable workflow. It’s how you finally gain control over the flavour in your cup.
This section will walk you through the essential techniques for preparing your coffee, from weighing the beans with precision to that final, decisive tamp. Mastering these foundational steps will make all the difference on your journey to pulling excellent espresso shots at home.
Dialling In Your Grinder
"Dialling in" might sound a bit technical, but it’s really just about finding the perfect grind size for a specific coffee bean. This is easily the most important variable you can control, as it directly dictates how quickly water flows through the coffee puck.
If your grind is too coarse, water will gush through, giving you a sour, weak, and under-extracted shot. You'll often see a thin, pale crema that vanishes in seconds. Go too fine, and the water will struggle to push through at all, resulting in a slow, dripping shot that tastes bitter, harsh, and over-extracted. The goal is to find that perfect sweet spot right in the middle.
This image breaks down the core relationship between your grind, dose, and time.
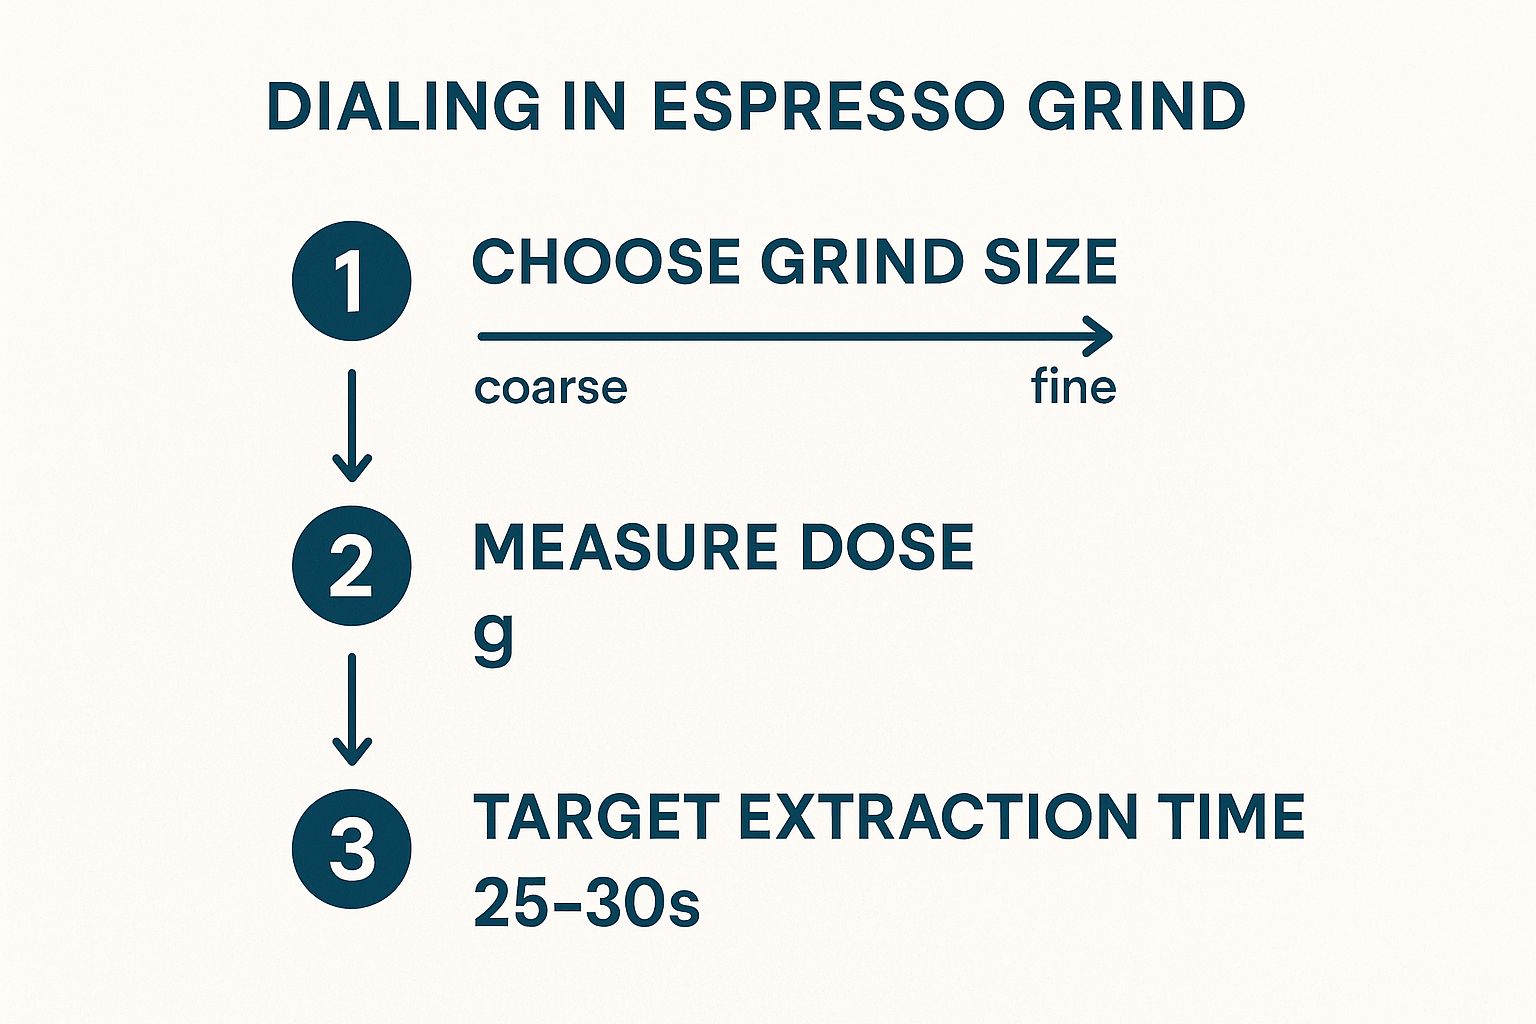
As the infographic shows, it’s all about a feedback loop. You'll keep adjusting until you hit your target extraction time, which for most espresso recipes is somewhere between 25-30 seconds. This isn’t a rigid rule, but it’s an excellent starting point.
When you're trying to perfect your shot, adjusting these variables can feel a bit like spinning plates. This table breaks down the troubleshooting process, making it easier to see how one change affects everything else.
Dialling In Your Espresso: A Quick Guide
| Variable | If Too Fast (Under-extracted) | If Too Slow (Over-extracted) | How to Adjust |
|---|---|---|---|
| Grind Size | The shot is sour and watery. | The shot is bitter and harsh. | Make your grind finer to slow it down, or coarser to speed it up. |
| Dose (Amount) | The crema is thin and pale. | The shot drips and struggles to come out. | Increase the dose slightly for more resistance, or decrease it for less. |
| Tamp Pressure | Water channels through weak spots. | Water can't penetrate the puck evenly. | Focus on a firm, level tamp. Consistency is more important than force. |
| Extraction Time | Less than 25 seconds. | More than 30 seconds. | Adjust grind size as your primary tool to hit the target time. |
Think of this table as your cheat sheet. When a shot goes wrong, a quick glance here can point you in the right direction, helping you make small, informed adjustments instead of guessing.
The Importance of Weighing Your Dose
When it comes to espresso, precision is your best friend. You might get away with scoops for other brewing methods, but espresso demands accuracy. That's why a digital scale accurate to 0.1 grams is a non-negotiable tool. You must weigh your whole beans before grinding to ensure a consistent 'dose' every single time.
Most standard double espresso recipes call for a dose of around 18 grams of coffee. By sticking to this precise amount, you eliminate a major variable from the equation. If you just eyeball it, you'll never be sure if a bad shot was caused by the grind size, your tamp, or the wrong amount of coffee.
Weighing your dose isn't about being fussy; it’s about control. When your dose is consistent, you can confidently blame (and fix) changes in your shot time and taste based on the adjustments you make to your grinder.
Distributing and Tamping Your Grounds
Once the coffee is in the portafilter, the next job is to get the grounds evenly distributed and compressed into a level puck. This is crucial for preventing 'channelling'—where water finds the path of least resistance and bypasses most of the coffee, leading to a horribly uneven extraction.
There are a few simple ways to get an even distribution:
- Tapping: Gently tap the side of the portafilter with your palm to settle the grounds and collapse any air pockets.
- Levelling: Use your finger or a dedicated levelling tool to create a flat surface before you tamp.
- WDT (Weiss Distribution Technique): This involves using a tool with fine needles (even a paperclip will do in a pinch!) to stir the grounds, breaking up clumps and ensuring a fluffy, uniform bed.
After distribution, it’s time to tamp. The goal here is consistency, not brute force. You want to apply firm, even pressure to create a compact and perfectly level puck. With your arm at a 90-degree angle to the counter, press down until you feel the coffee push back. A level tamp is far more important than a hard one. An uneven puck will cause water to flow faster on the lower side, ruining the extraction.
By focusing on this methodical workflow—dialling in, dosing, distributing, and tamping—you'll build the muscle memory needed for consistently delicious espresso, every single day.
How to Pull the Perfect Espresso Shot
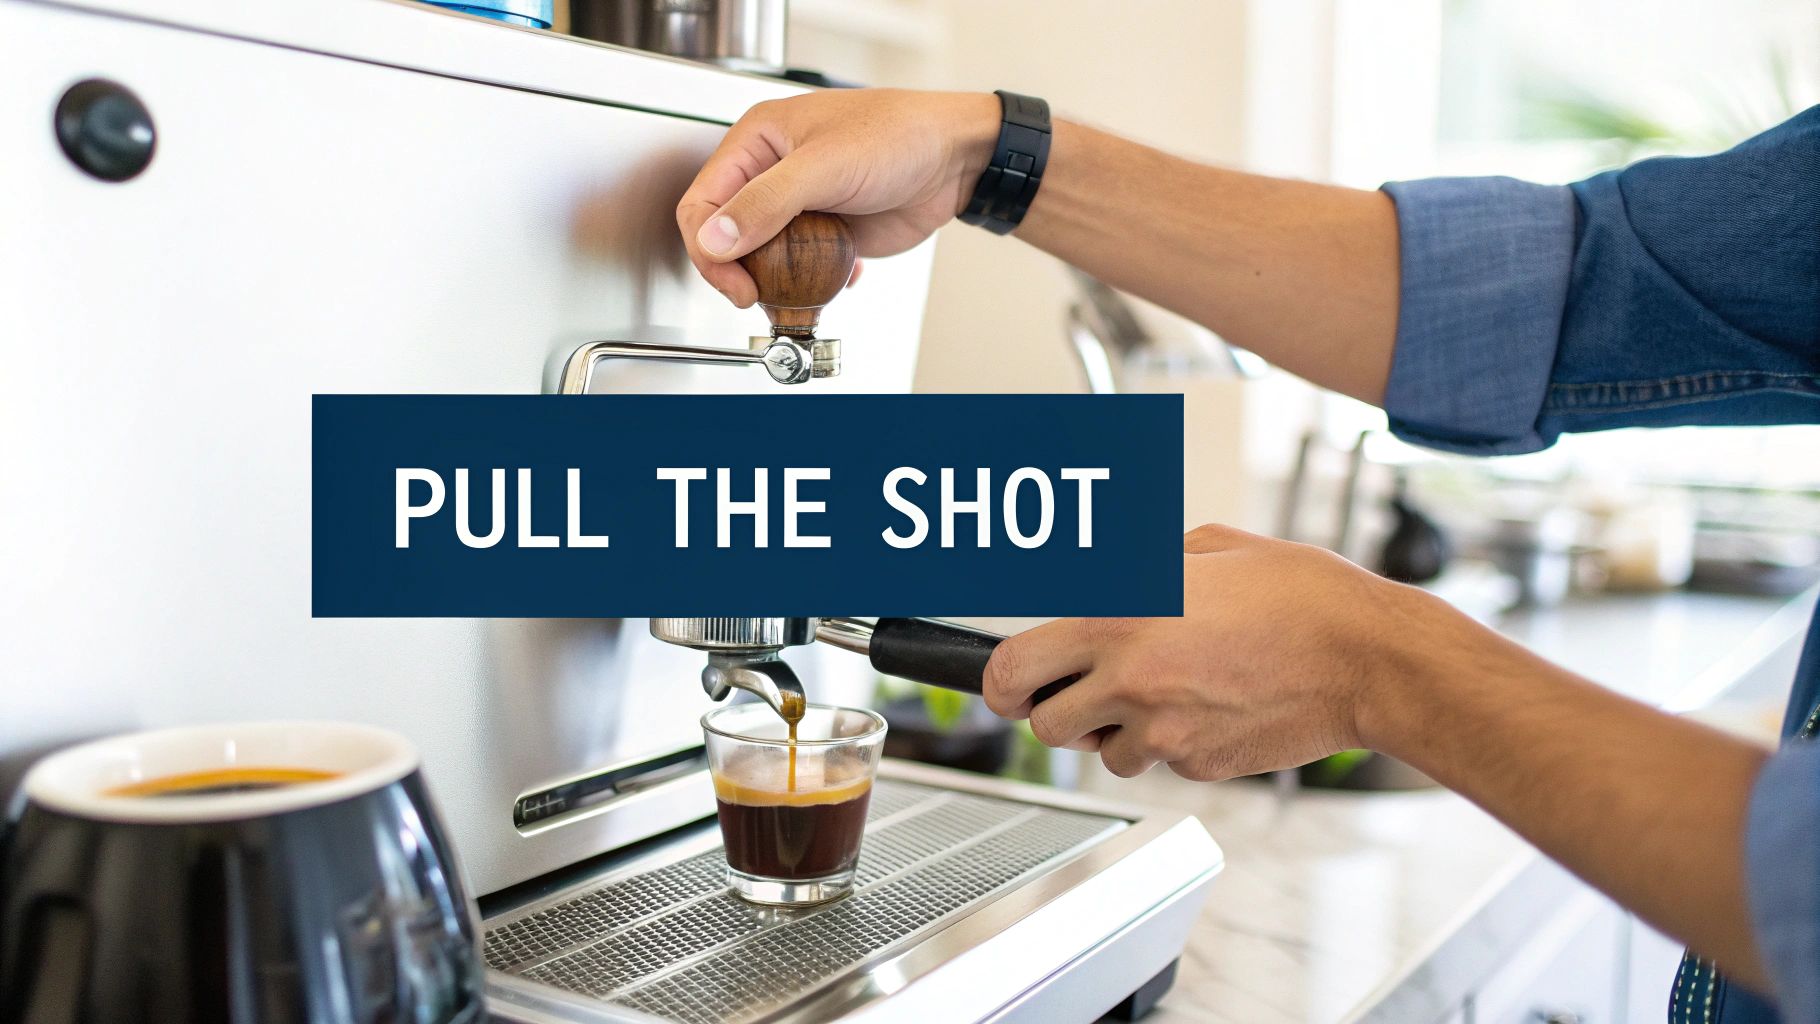
With your coffee meticulously prepared, it’s time for the main event—pulling the shot. This is where all your preparation comes together. The goal isn't just to make coffee; it's to extract a balanced, flavourful shot that hits all the right notes.
To get there, we need to aim for a few key targets that provide a framework for consistency. Think of it as a recipe. The two most important elements are your brew ratio and your extraction time, which work together to define the final taste of your espresso.
Defining Your Brew Ratio and Time
The brew ratio is simply the relationship between the weight of your dry coffee grounds (the dose) and the weight of the liquid espresso in your cup (the yield). A fantastic starting point for modern espresso is a 1:2 ratio.
So, if you start with 18 grams of dry coffee in your portafilter, you'll want to end up with 36 grams of liquid espresso in the cup. Easy enough, right?
Your target extraction time is how long it takes to reach that yield. The universally accepted sweet spot is between 25 and 30 seconds, starting the timer the moment you hit the brew button. These numbers aren’t rigid laws, but they provide a brilliant baseline for dialling in your coffee.
What a Perfect Extraction Looks Like
Watching a great shot pull is one of the most satisfying parts of making espresso at home. Place your cup and scales under the portafilter, tare the scales, start your timer, and hit the brew button. For the first few seconds, nothing will happen.
Then, you should see the first dark, syrupy drips begin to form. These will quickly merge into a steady, unified stream that should look rich and viscous, like warm honey. As the extraction progresses, the colour will shift from a dark reddish-brown to a lighter, caramel colour. The stream should remain steady, not gushing out too quickly or sputtering and dripping erratically.
A well-pulled shot is a visual delight. The flow should be graceful, and the final result will be a dark liquid crowned with a thick, stable layer of reddish-brown crema. This crema is an emulsion of coffee oils and CO2, and it’s a key indicator of a fresh, well-extracted shot.
Tasting and Troubleshooting Your Espresso
The real skill in learning how to make espresso at home is connecting what you see and time to what you taste. Your palate is the ultimate judge, and it will tell you exactly what you need to adjust for the next shot.
Is your espresso unpleasantly sharp, sour, or lemony? This is the classic sign of under-extraction. It means the water flowed through the coffee too quickly, likely in under 25 seconds. The water didn't have enough time to dissolve all the desirable sweet compounds, leaving you with mostly acids.
To fix a sour shot, you need to slow the extraction down. The most effective way to do this is by making your grind size finer. This creates more resistance in the puck, forcing the water to work harder and extract more goodness from the coffee.
On the other hand, does your shot taste harsh, bitter, and hollow? This points to over-extraction. The shot probably ran too long, perhaps over 30-35 seconds. In this scenario, the water had too much contact time and started pulling out the bitter, less pleasant compounds from the coffee grounds.
To correct a bitter shot, you need to speed up the extraction. The solution is to make your grind size coarser. This reduces the resistance, allowing water to flow through more easily and shortening the overall extraction time.
Understanding how different roast levels affect these flavours can also be incredibly helpful. You can learn more about how a bean's journey from green to roasted impacts its final taste by exploring these coffee roasting profiles explained in detail.
By tasting each shot and identifying these core flavour cues—sour or bitter—you can make intelligent, targeted adjustments. This feedback loop is what puts you in complete control, transforming you from someone who just makes coffee into a true home barista.
Your Home Espresso Questions Answered
As you get to grips with making espresso at home, you’re going to have questions. It's completely normal. Learning this craft is a real journey, and trust me, every home barista has wrestled with these exact same queries at some point.
This section is all about tackling the most common questions we hear from people just starting out. Think of it as your go-to guide for sorting out those frustrating little issues and building up your confidence shot by shot.
Can I Use Pre-Ground Coffee for Espresso?
You technically can, but I would strongly advise against it. The success of an espresso shot is incredibly sensitive to the grind size. Pre-ground coffee, even when it’s labelled for "espresso," is almost never the exact fineness you need for your specific machine, your basket, and your chosen beans. It’s a one-size-fits-all approach to something that demands precision.
When you can't make tiny adjustments to your grind, you lose all control over how long your shot takes to pull. This means you'll likely be stuck with espresso that’s either consistently sour (under-extracted) or bitter (over-extracted), with no way to dial it in. A quality burr grinder is hands-down the most important piece of kit you can own for learning to make great espresso.
Why Has My Crema Disappeared?
A disappearing crema is one of the most common frustrations for new baristas, and it almost always boils down to one simple thing: bean freshness. That beautiful, reddish-brown crema is formed when CO2 gas, trapped in the beans during roasting, emulsifies with coffee oils under intense pressure. This gas is only really abundant in freshly roasted coffee.
If your beans were roasted more than a month ago, most of that precious CO2 will have already escaped. The result? A thin, pale, sad-looking crema that vanishes in seconds.
Always check for a 'roasted on' date, not a 'best before' date. For the best flavour and a rich, stable crema, aim to use beans that are between five days and three weeks past their roast date. Stale beans are the number one culprit behind disappointing espresso.
How Often Should I Clean My Machine?
Keeping your machine clean is non-negotiable. It’s essential for both the taste of your coffee and the long-term health of your equipment. Coffee oils build up fast, and if left, they turn rancid and will impart a nasty, bitter flavour to your shots. A simple, consistent cleaning routine is your best friend here.
- Daily: After you’ve made your last coffee for the day, give the group head a good flush with water. If your machine has a three-way solenoid valve, this is called a backflush. Don't forget to wipe down the shower screen and the steam wand. The whole process takes less than a minute.
- Weekly: Do a more thorough backflush using a specialised espresso machine cleaner to dissolve all those stubborn, built-up coffee oils. While you’re at it, soak your portafilter and filter baskets in the same cleaning solution.
- Monthly (or as needed): Descale your machine following the manufacturer’s instructions. This is especially important if you live in a hard water area, as it prevents limescale from building up and damaging the internal components.
What Is a 'Naked' Portafilter?
A naked, or bottomless, portafilter is one of the best diagnostic tools you can have. It’s simply a portafilter that has had the bottom and spouts chopped off, completely exposing the underside of the filter basket. This lets you watch your espresso extraction happen in real-time.
A perfect, even extraction will show dark drips appearing across the entire basket before merging into a single, syrupy stream right in the centre. But if you see jets of coffee spraying out wildly (we call this 'channelling') or notice some areas are much lighter than others, it's a dead giveaway that your puck preparation needs work. It gives you instant visual feedback that helps you perfect your distributing and tamping technique like nothing else can.
At Seven Sisters Coffee Co, we believe that exceptional coffee begins with exceptional beans. If you're ready to taste the difference that freshly roasted, ethically sourced coffee can make in your cup, explore our curated selection today. Discover your next favourite blend at https://sevensisterscoffee.co.uk.