Cafetières how to use: A Practical Guide to Perfect French Press Coffee

Using a cafetière is one of the most rewarding ways to brew coffee at home, and getting it right is simpler than you might think. It really just comes down to mastering three things: how coarse your coffee is, the temperature of your water, and how long you let it brew. Nail these, and you’ll be rewarded with a consistently delicious cup, every single time.
Why a Cafetière is a British Home Brewing Favourite
The cafetière, or French press as it's often called, has earned its place as a fixture in British kitchens for a good reason. It’s wonderfully simple and makes an exceptional cup of coffee. Unlike complicated machines, it uses an immersion brewing process where the coffee grounds steep directly in hot water. This technique is fantastic at extracting a real depth of flavour and all the essential oils from the beans, giving you a brew with a heavy body and a satisfying, robust taste that many filter methods just can’t match.
But its popularity isn’t just about the final taste; it’s about the ritual. The whole process is hands-on yet completely unfussy, turning a daily routine into a small moment of mindful craft. There’s something deeply satisfying about that gentle stir, the patient four-minute wait, and the slow, steady plunge. If you're just starting your home brewing journey, you can find the perfect starter cafetière at ADS Coffee Supplies.
The Appeal of Simplicity and Control
One of the best things about using a cafetière is the amount of control it gives you. You're in charge of every single element, which opens the door to endless tinkering and experimentation to find what you like best.
- Grind Size: You can easily adjust the coarseness to fine-tune how much flavour is extracted.
- Water Temperature: Tweaking this just a few degrees can completely change which flavour compounds are dissolved.
- Brew Time: A longer or shorter steep can dramatically alter the coffee's strength and character.
This direct control means you can tailor each brew to your exact preference. For a deeper dive into different brewing techniques, you can explore our detailed guide to brewing coffee at home.
Before we get into the step-by-step process, this quick reference table summarises the key parameters for a perfect cafetière brew. It’s a handy snapshot of the ideal settings we'll be aiming for.
Quick Guide to Perfect Cafetière Coffee
| Variable | Recommendation | Why It Matters |
|---|---|---|
| Grind Size | Coarse (like breadcrumbs) | Prevents over-extraction and stops fine particles from clogging the filter, which can lead to a muddy taste. |
| Water Temperature | 90-96°C (off the boil) | Protects delicate flavour notes from being scorched by boiling water while still being hot enough for proper extraction. |
| Coffee-to-Water Ratio | 60g coffee per 1 litre water | Creates a balanced, full-bodied brew. You can adjust this slightly to match your personal taste for strength. |
| Brewing Time | 4 minutes | This is the sweet spot for extracting the ideal balance of flavour without introducing too much bitterness. |
This table gives you the foundational numbers, but remember, the real magic happens when you start adjusting them to discover what works best for you and the specific coffee you're using.
A Cornerstone of UK Coffee Culture
Brewing coffee at home with a cafetière has become a cornerstone of daily routines right across the nation. It's no surprise when you hear that the UK gets through about 98 million cups of coffee every single day, with the average person sipping around 1.5 cups.
This massive consumption, highlighted in recent UK coffee consumption habits on Balance Coffee, really shows why mastering a simple, effective method like the cafetière matters. As ground coffee sales continue to climb, perfecting this classic brew ensures you’re making the most of the growing trend for quality coffee at home.
Setting Up for the Perfect Brew
Before you even think about pouring hot water over coffee grounds, let's talk about what makes a truly brilliant cup. The real secret isn't some complicated technique; it's all in the preparation. Getting your kit together isn't about being fussy—it’s about setting yourself up for success and brewing something genuinely delicious. Every tool has a job to do in controlling the brew.
Think of it like baking. You wouldn’t just guess the amount of flour, right? The same logic applies here. Precision and consistency are your two best friends when it comes to mastering the cafetière.
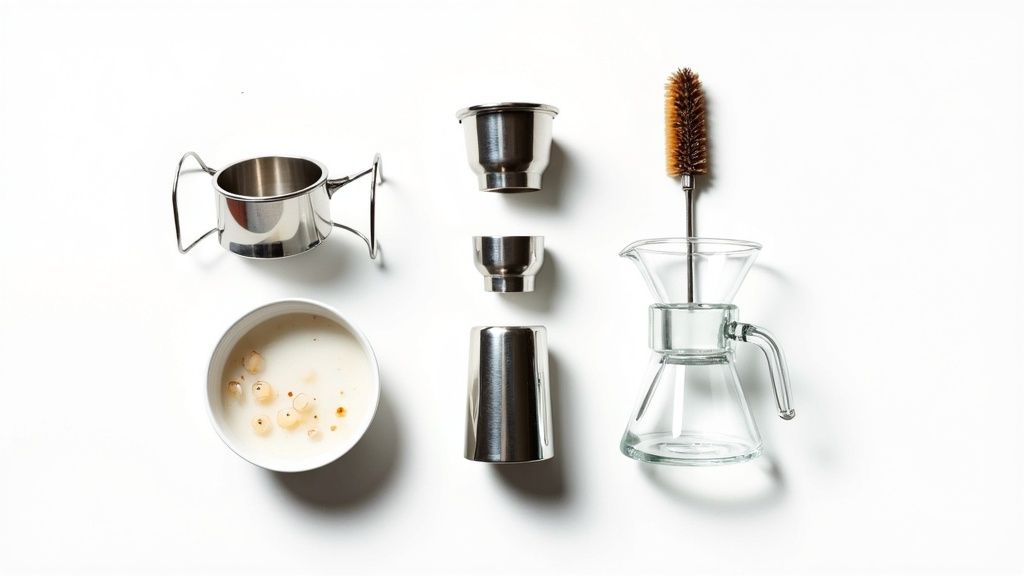
Your Essential Cafetière Kit
Getting your setup right from the get-go makes the whole process smoother and, frankly, a lot more fun. While you can technically get by with just a cafetière and a kettle, a couple of extra bits of gear will take your coffee from "good enough" to exceptional.
Here’s a quick rundown of what you'll need:
- A Quality Cafetière: The star of the show. Whether you go for a classic glass model or a sturdy stainless steel one, make sure it’s well-made. Borosilicate glass is great for watching the magic happen, but insulated stainless steel versions are fantastic for keeping your brew piping hot. You can find a range of reliable cafetieres at ADS Coffee Supplies.
- A Burr Grinder: This one is a total non-negotiable for great coffee. Blade grinders just smash beans into uneven bits, giving you a messy mix of bitter dust and sour chunks. A burr grinder, on the other hand, mills the beans evenly, creating that perfect coarse grind you need for a clean, balanced brew.
- Digital Scales: Precision is everything. Weighing both your coffee and your water (remember, 1 gram of water is 1 millilitre) means you can nail that perfect recipe again and again. A good starting point is the industry standard ratio of 60g of coffee per 1 litre of water.
- A Kettle: Any kettle will work, but a temperature-controlled one is a real game-changer. It lets you hit that 90-96°C sweet spot without any guesswork.
Honestly, the single biggest upgrade you can make to your coffee routine, no matter how you brew, is grinding your beans fresh. Pre-ground coffee starts losing its amazing aromatic compounds within minutes, leaving you with a noticeably flatter-tasting cup.
The Unsung Heroes: Water and Beans
With your hardware sorted, there are two final—and crucial—elements that dictate the final flavour: the water you use and the coffee you choose. It might sound obvious, but the quality of these two can completely change the taste in your cup.
The mineral content in your tap water can seriously mess with your coffee’s flavour. Hard water can dull the delicate, bright notes, while water that's too soft can leave the coffee tasting flat and uninspired. Using freshly filtered water gives you a clean, neutral base, allowing the coffee’s true character to shine. It's such a simple switch, but it makes a world of difference.
And finally, the beans. You can have the best kit on the planet, but if your coffee isn’t up to scratch, your brew never will be. It's so important to pick beans that really suit this brewing style. For a full rundown, we’ve put together a helpful guide on choosing the best coffee for French press that'll point you in the right direction. Freshly roasted, high-quality beans are the foundation of any memorable brew.
A Step-by-Step Guide to Flawless Cafetière Coffee
Right, with all your gear assembled, it’s time for the fun part. Think of this less as a set of rigid instructions and more as a proven ritual, one we’ve refined over countless brews to get a flawless cup, every single time. Once you understand the ‘why’ behind each stage, you’ll move beyond guesswork and start making consistently brilliant coffee with intention.
This little guide breaks down the prep into three key stages: grind, measure, and heat. Get these right, and you're already halfway there.
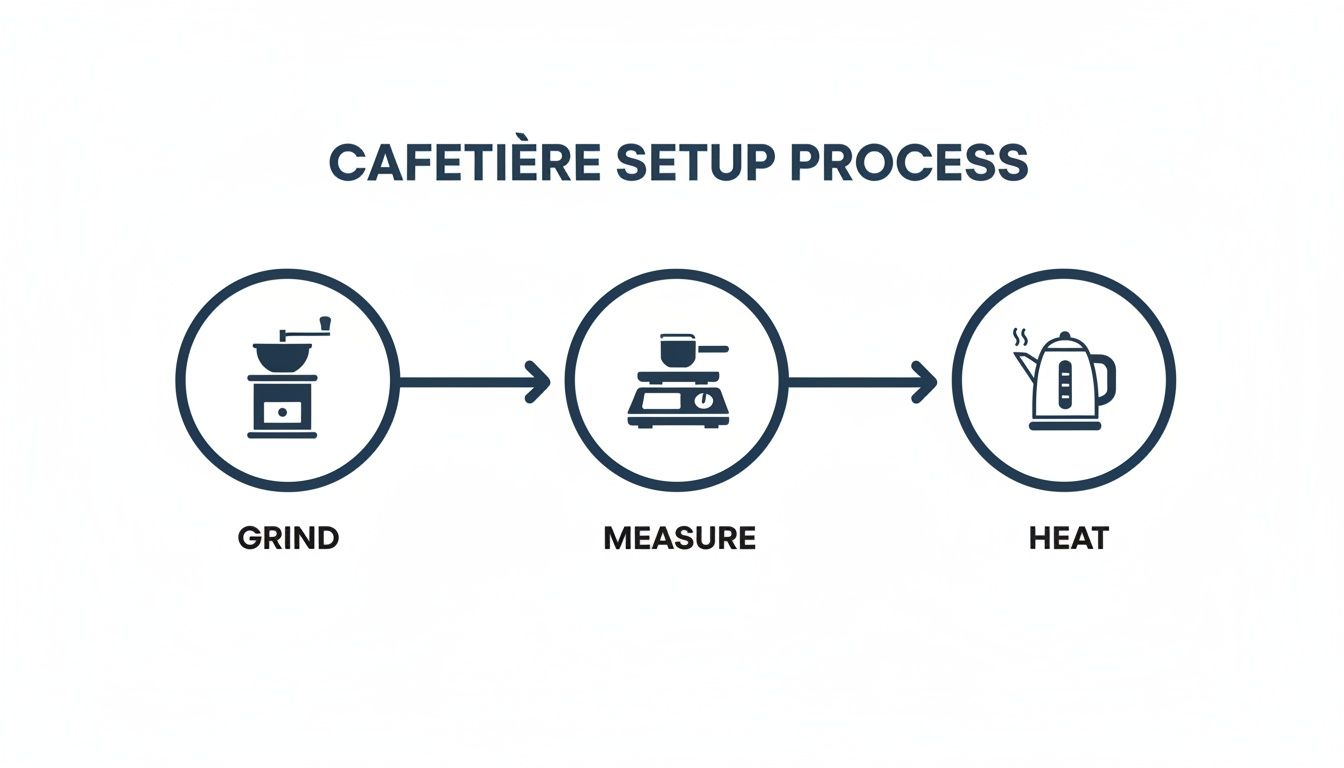
It’s all about getting your coffee and water dialled in with a bit of precision before the brewing even begins.
The Warm-Up Act: Preheating Your Press
First up is a step that’s far too easy to skip: preheating your cafetière. Just fill it with hot water from the kettle and let it sit for a minute while you sort your coffee. This simple action stops the cold glass or steel from shocking your brew water, which can cause a massive temperature drop and lead to under-extraction—the number one culprit behind sour, weak coffee.
After a minute, tip that water out. You’ve just created a stable thermal environment, making sure your brew temperature stays right where it needs to be for the whole four-minute steep.
The Foundation: Grind and Weigh Your Coffee
Now for the single most important variable you have control over—the coffee itself. For a cafetière, you need a coarse grind. The texture should be like rough, chunky breadcrumbs. If you go too fine, you’ll over-extract and get a bitter brew. Worse, it can clog the filter mesh and push a load of gritty sediment into your final cup.
For the best accuracy, weigh your beans before you grind them. A brilliant starting point is a 1:15 coffee-to-water ratio. For a standard 8-cup (1-litre) cafetière, that means about 60 grams of coffee to 900 millilitres of water. Don’t be afraid to tweak this later, but it’s the perfect ratio for a balanced, full-bodied brew.
If you want to go deeper on this, check out our complete coffee grind size guide.
The Magic Moment: The 30-Second Bloom
With your coarse grounds sitting in the preheated cafetière, it’s time for the bloom. Start a timer and pour in just enough hot water to completely saturate all the grounds—about twice the weight of the coffee, so 120ml for 60g. You’ll see the coffee bed bubble up and expand beautifully.
That’s the sign of fresh coffee. It's releasing trapped carbon dioxide gas, and giving it 30 seconds to escape is crucial. If you don't, that CO2 forms a barrier that stops water from properly extracting all the good stuff, leaving you with a hollow, sour-tasting brew.
The Main Event: The Pour and Gentle Stir
Once your 30-second bloom is up, gently pour the rest of your hot water over the grounds until you hit your target weight (900ml in our example). Use a slow, circular motion to gently agitate the grounds and encourage an even extraction from the very start.
With all the water in, give it a very gentle stir. Use a wooden or bamboo spoon to avoid any risk of scratching or cracking a glass carafe. The goal isn't to create a whirlpool; you just want to break up the "crust" of coffee that forms on top, ensuring every single particle is submerged and doing its job.
The Patient Wait: The Four-Minute Steep
Now, place the lid on top, but do not plunge yet. Let the plunger rest just above the water line to help trap the heat inside. Set your timer for exactly four minutes.
This four-minute window is the real sweet spot for a cafetière. It’s long enough for the water to pull out all the desirable oils, sugars, and complex flavour compounds, but not so long that it starts extracting the bitter elements that ruin a good cup. It’s a technique honed by pros and home brewers alike, as getting it right can yield 20-25% better extraction.
The ideal process is simple: a 1:15 ratio, water just off the boil, a 30-second bloom, a gentle stir, and a precise 4-minute steep before you press. This careful approach is your best defence against the sediment issues that frustrate around 20% of first-time users, guaranteeing a much cleaner, more flavourful cup.
The Final Push: The Slow and Steady Plunge
When that four-minute timer dings, it’s go time. But this isn’t a race. Press the plunger down slowly and steadily, using gentle, even pressure. A slow plunge, taking around 15-20 seconds from top to bottom, is the secret here.
- Why so slow? Plunging too fast churns up all the fine particles at the bottom, forcing them straight through the mesh filter and into your mug. This is what causes that dreaded sludgy final sip. A slow, controlled press gently filters the coffee, leaving the sediment behind where it belongs.
- What if it's hard to press? If you feel a lot of resistance, your grind is probably too fine. Don't force it. Just lift the plunger an inch or so to release the pressure, then continue your slow descent.
Serve Immediately to Preserve Flavour
The moment the plunger hits the bottom, pour all of the coffee out of the cafetière. Don't let it sit there, not even for a minute.
Remember, the grounds at the bottom are still in contact with the water, so they will keep on extracting. Any coffee left in the press will quickly turn bitter and harsh. By decanting it all into your mugs or a separate server, you lock in that perfectly balanced flavour you worked so patiently to create.
Troubleshooting Common Cafetière Problems
Even with the best technique, some brews just don’t hit the mark. It happens to all of us. The good news is that most cafetière problems are surprisingly easy to fix once you know what’s gone wrong. Think of this as your brewing first-aid kit, ready to turn a disappointing cup into a valuable lesson.
Let's get to the bottom of the most common issues you'll run into when learning how to use a cafetière and get them sorted for good.
Why Does My Coffee Taste Weak and Watery?
This is easily the most frequent complaint we hear from new brewers, and it almost always points to one thing: under-extraction. In simple terms, you haven't managed to pull enough of that lovely flavour out of the coffee grounds.
A few things could be causing this:
- Your Grind is Too Coarse: If the coffee grounds are too chunky, the water just rushes past them without grabbing enough flavour. Try going a notch finer on your grinder—you're aiming for a texture like coarse sea salt.
- You're Rushing the Brew Time: A four-minute steep isn't just a random number; it's the gold standard for a reason. Cutting this short, even by a minute, will almost certainly lead to a thin, underdeveloped taste.
- The Coffee-to-Water Ratio is Off: It's very easy to under-dose your coffee if you're not using scales. For a consistently balanced brew, stick to the 60g per litre rule.
- Your Water Isn't Hot Enough: Water that's too cool just doesn't have the energy to properly dissolve all the flavourful compounds in the coffee. Make sure your kettle is just off the boil, ideally between 90-96°C. For a deeper dive, check out our full guide on the best water temperature for coffee.
Why Does My Coffee Taste Bitter or Harsh?
On the other end of the spectrum is a bitter, harsh brew—a classic sign of over-extraction. This happens when the water has pulled too much from the grounds, including all the unpleasant, bitter-tasting compounds that are best left behind.
The most common culprit for bitterness is steeping for too long. If you get distracted and leave your coffee brewing for six or seven minutes instead of four, you're almost guaranteed a bitter cup. Always set a timer.
Another major cause is grinding your coffee too fine. A powdery, espresso-like grind has a massive surface area, which makes it extract far too quickly in a cafetière and leads directly to that harsh, astringent taste.
Why Is There So Much Sediment in My Cup?
A little fine sediment is part of the cafetière charm; it’s what gives the coffee its signature full, heavy body. But if you’re getting a mouthful of grit with every sip, something's not right. This usually comes down to your plunging technique.
Mastering the plunge is non-negotiable. We recommend a slow, steady 30-second press. This gentle approach properly traps the coffee oils for that full-bodied flavour while keeping sediment to a minimum. A slow press is especially important for the 85% of Brits who brew their coffee at breakfast and need a consistently delicious start to their day. Getting this right also avoids the weak or bitter brews that can disappoint the 35% of people who enjoy an afternoon coffee pick-me-up.
Plunge too fast, and you create turbulence that forces fine particles straight through the mesh filter. Be gentle and let gravity do most of the work for a much cleaner cup.
Beyond the Basics: Elevating Your Coffee Game
Once you’ve got the fundamental four-minute brew down to a fine art, the real fun begins. Your cafetière is far more than a one-trick pony; it’s a brilliantly versatile tool for exploring the vast world of coffee flavour. Now is the time to start tinkering with the variables to create a cup that’s perfectly yours.
Think of the standard 1:15 coffee-to-water ratio as a reliable starting point, not an unbreakable rule. Small adjustments here can have a huge impact on the final taste, allowing you to dial in the perfect strength for any coffee or mood. This is where you truly start mastering your cafetière.
Adjusting Your Brew Strength
Tweaking your coffee-to-water ratio is the simplest way to completely customise your brew. It’s a straightforward balancing act between intensity and subtlety, and finding your sweet spot is a seriously rewarding process.
Here’s a practical guide to get you started:
- For a Bolder, Richer Cup: Try moving to a 1:14 or even a 1:13 ratio. This just means using slightly more coffee for the same amount of water (e.g., 65g of coffee for 900ml of water). This approach is perfect for dark roasts or when you want a brew that can stand up to a splash of milk without getting lost.
- For a Milder, More Delicate Cup: Shift towards a 1:16 or 1:17 ratio. By using a little less coffee, you allow the more subtle, nuanced flavours of the beans to come forward. This works beautifully for light-roast single-origin coffees with delicate floral or fruity notes.
Experiment in small increments and take notes. You'll quickly develop an intuition for how each coffee responds to different strengths. The cafetière is just one of many ways to make great coffee at home; you can explore a full comparison of the best coffee brewing methods to see how it stacks up against others.
Making a Concentrated Coffee Shot
Fancy a homemade latte or flat white? Your cafetière can create a surprisingly effective coffee concentrate that works as a brilliant base for milk drinks. It just requires a big shift in your ratio and a slight adjustment to your method.
To make a coffee shot, use a much stronger ratio—somewhere around 1:7. For example, try 30g of coffee with just 210ml of water. Keep the four-minute steep time, plunge slowly, and you'll be left with a small volume of intensely flavoured coffee. No, it won't have the crema of a true espresso, but its rich character is more than enough to cut through steamed milk beautifully.
How to Make Cafetière Cold Brew
The cafetière is also a fantastic, no-fuss tool for making smooth and refreshing cold brew. The process couldn't be simpler, though it does require a bit of patience.
Here's a simple recipe to get you going:
- Grind Your Coffee: Use the same coarse grind you would for a hot brew.
- Combine Coffee and Water: Add your coffee to the cafetière, then top with cold, filtered water. A good starting ratio for cold brew is 1:8 (e.g., 100g of coffee for 800ml of water).
- Stir Gently: Give it a quick stir to ensure all the grounds are saturated.
- Steep Patiently: Pop the lid on (don't plunge yet) and leave it on your worktop or in the fridge to steep for 12-18 hours.
- Plunge and Store: After steeping, slowly press the plunger all the way down. Pour the resulting concentrate into a separate bottle or jar for storage.
Your cold brew concentrate will be strong! Serve it over ice, diluted with an equal part of water or milk. It will keep happily in the fridge for up to a week, giving you delicious, low-acid coffee on demand.
To truly elevate your coffee setup, you might also consider exploring some unique coffee lover gifts that can introduce you to new brewing accessories or premium beans.
How to Clean and Maintain Your Cafetière
A clean cafetière is absolutely non-negotiable for a decent cup of coffee. It’s one of those things that seems obvious, but you’d be surprised how many people skip it. Leftover coffee oils quickly turn rancid, and tiny grounds get trapped in the filter, creating a bitter, muddy flavour that will completely ruin your next brew.
Taking proper care of your press not only guarantees a better-tasting cup but also helps your gear last for years.
Thankfully, keeping it in top shape is incredibly easy. The trick is to get into the habit of cleaning it right after you’ve poured your last cup, before those oils have a chance to set. This daily ritual takes less than a minute.
Your Daily Cleaning Routine
Once you’ve finished enjoying your coffee, give your cafetière a quick clean by following this simple process.
- Empty the grounds. Grab a wooden spoon or a spatula and scoop out the used grounds. Never, ever wash them down the sink—they will cause serious plumbing blockages over time. Pop them in your compost or food waste bin instead.
- Wash and plunge. Add a single drop of washing-up liquid and some warm water to the carafe. Give the plunger a few good pumps up and down. This forces water through the mesh and dislodges any stubborn particles hiding in the filter.
- Rinse and dry. Give all the parts a thorough rinse with clean water to get rid of any soap residue. Leave everything to air dry separately before putting it away. That’s it. A pristine cafetière makes all the difference.
Performing an Occasional Deep Clean
Every few weeks, it pays to give your cafetière a deeper clean. This is your chance to tackle any stubborn stains and get rid of the oily residue that can build up in the filter mesh, even with daily washing. It’s also a good time to check that all the components are in good condition.
Start by completely disassembling the plunger. Just unscrew the base and carefully separate the mesh filter, spiral plate, and cross plate. Let these small parts and the carafe soak in a solution of warm water and a specialised coffee equipment cleaner.
A lot of cafetières are built with stainless steel parts. If you're looking for general tips, there’s some useful information about cleaning stainless steel components that might come in handy. After a good soak, use a soft brush to gently scrub everything, rinse it all well, and put it back together. Your cafetière will be as good as new.
Common Cafetière Questions Answered
Even with the best guide in hand, there are always a few questions that crop up when you’re getting the hang of a cafetière. We hear them all the time, so let’s get them cleared up so you can brew with complete confidence.
What’s the Best Coffee for a Cafetière?
The non-negotiable answer? Freshly roasted coffee. Always. Beyond that, a cafetière is incredibly forgiving and works well with almost anything, but a solid medium to medium-dark roast is a fantastic starting point. It brings out that rich, full-bodied flavour with a touch of sweetness that French press is famous for. You can find a great selection of freshly roasted coffee beans perfect for your cafetière at ADS Coffee Supplies.
But the single most important factor is the coarse grind. Get this wrong, and you’ll end up with a sludgy, bitter cup, no matter how good your beans are.
Can I Brew Just One Cup in a Big Cafetière?
You can, but we really wouldn’t recommend it. When you use a small amount of coffee and water in a large cafetière, the heat escapes far too quickly during that crucial four-minute steep. The result is often a weak, disappointingly under-extracted brew.
For a consistently great cup, your best bet is to match the cafetière size to the amount of coffee you’re making.
If you’re usually just making coffee for one, investing in a smaller 3-cup model is a game-changer. It keeps the water temperature stable, giving you a much better extraction and a far more flavourful coffee every single time. Take a look at the range of cafetières available from ADS Coffee Supplies to find the perfect size for you.
Why Do I Have to Pour the Coffee Out Straight Away?
This is a classic mistake we see people make. Once you push that plunger down, the brewing doesn’t just magically stop. All those coffee grounds are still sitting at the bottom, steeping away in the hot water.
If you leave it sitting, the coffee will keep extracting and will quickly turn bitter, harsh, and unpleasant. To lock in that perfect flavour you just created, pour all the coffee into your mugs or a separate server immediately after plunging. It’s a simple habit that makes all the difference.
At Seven Sisters Coffee Co., we believe everyone deserves to make brilliant coffee at home. Explore our collection of high-quality cafetières and brewing equipment to start your journey today.