
Best milk for latte art UK: Top picks for creamy microfoam
When it comes to pouring crisp, beautiful latte art, the undisputed champion in the UK is fresh, cold whole dairy milk. Its perfect harmony of protein and fat is just what you need for silky, stable microfoam. But don't worry if you're dairy-free—fantastic results are totally achievable with barista-edition plant-based milks. Oat milk, in particular, has become a firm favourite in speciality coffee shops for its creamy texture and reliable performance.
Choosing the Best Milk for Your Latte Art

So, you're ready to master the art of the perfect pour? Brilliant. Getting your milk right is just as vital as the quality of your coffee beans if you want that silky microfoam and those sharp, defined designs. It’s the very first step on the road to a beautiful latte. If you want to perfect your pouring, our detailed recipe for a latte is a great place to start, but it all begins with what’s in your milk pitcher.
Here in the UK, we love a milky coffee. The latte reigns supreme, making up a huge 36% of all coffees bought out of the home, with the cappuccino not far behind at 22%. It’s clear that knowing your way around a steam wand is a non-negotiable skill for any home enthusiast or pro barista.
This guide will get into the nitty-gritty of the best dairy and plant-based milks out there, with practical tips for everyone.
What to Look for in a Good Latte Art Milk
The magic behind that perfect, paint-like microfoam comes down to two things: protein and fat. The proteins are the architects, building a stable structure for the foam, while the fats bring that creamy, luxurious texture we all love. Getting this balance right is everything.
Here’s a quick breakdown of what each component brings to the pitcher:
| Milk Component | Primary Role in Latte Art | Ideal Characteristics |
|---|---|---|
| Protein | Creates a stable foam structure by wrapping around air bubbles. | A higher protein content (around 3-3.5%) helps produce resilient, long-lasting microfoam that holds its shape. |
| Fat | Provides a creamy texture, rich mouthfeel, and glossy appearance. | Whole milk (around 3.5% fat) is the gold standard for its balance, delivering flavour without destabilising the foam. |
The Science of Creating Perfect Microfoam
Before we pit dairy against plant-based milks, we need to get into what’s actually happening inside your milk pitcher when you hit it with steam. That glossy, paint-like texture you’re chasing isn't magic; it's a bit of kitchen chemistry, and it all comes down to two things: protein and fat. Nail this bit, and you're already halfway to pouring consistently beautiful latte art.
At its heart, milk is a complex brew of water, sugars (lactose), fats, and proteins. When you steam it, you’re doing much more than just warming it up. You're forcing air into the liquid and fundamentally changing its structure on a molecular level. It's a delicate dance that decides whether you get silky microfoam or a sad, bubbly mess.
The Critical Roles of Protein and Fat
Think of protein as the architect of your foam. The casein and whey proteins in milk are the real heroes here. As you inject air, these proteins unravel and wrap themselves around the tiny air bubbles, forming a strong, stretchy net. This structure is what gives microfoam its staying power and stops it from disappearing before it even hits the cup.
Fat, on the other hand, is all about that luxurious flavour and mouthfeel. Those little fat globules are what give a latte its rich, creamy texture that we all love. But fat can also be the enemy of a good foam if you don't treat it right. It has a knack for destabilising that protein net, which is why the key is to melt the fat into the liquid without bursting all your precious bubbles. This creates a smooth, homogenous mixture. It’s also why starting with fresh, cold milk is non-negotiable—it buys you more time to build the foam structure before the fats have a chance to break it all down.
To get that coveted 'wet paint' texture, you need enough protein to build a stable structure and just the right amount of fat for a creamy, luxurious feel. It’s this exact interplay that makes certain milks, like whole dairy, the go-to choice for baristas hunting for the best milk for latte art in the UK.
The Two Stages of Steaming Milk
Nailing that perfect microfoam is a two-part process. Get both right, and you'll have the texture needed for pouring detailed art, whether that's a simple heart or a complex rosetta. Many of these principles are the foundation for drinks like the flat white. You can dive deeper into this in our guide on how to make a flat white at home.
-
Stretching (Aeration): This is stage one, where you introduce air into the milk. By keeping the steam wand's tip just below the surface, you should hear a gentle hissing sound, a bit like tearing paper. This phase creates the volume for your foam and should really only last for the first few seconds until the milk feels lukewarm to the touch.
-
Texturing (Emulsification): Once you've got enough air in, you plunge the steam wand deeper into the milk. This gets a whirlpool, or vortex, going. This spinning motion smashes the larger bubbles into tiny ones and smoothly blends the air with the liquid milk. This is where the magic happens, creating that seamless, glossy microfoam without adding any more volume.
Comparing Dairy and Plant-Based Milks
Picking between dairy and plant-based milk isn't just about what you fancy in your coffee; it's a technical choice. For latte art, this decision is everything. It changes foam stability, the final texture, how the milk pairs with the espresso's flavour, and frankly, how easy it is to work with.
Every milk reacts differently under the steam wand's heat and pressure. We're going to dive into the most popular options out there, from classic whole milk to the oat milk that's taken over every coffee shop, helping you figure out what's best for your brew, whether you're behind a professional bar or your kitchen counter.
The Dairy Standard: Whole and Semi-Skimmed Milk
For as long as anyone can remember, whole dairy milk has been the undisputed champion for latte art. It just has the perfect natural makeup for the job. With around 3.5% fat and 3.3% protein, it provides the ideal scientific base for creating that silky, stable, and glossy microfoam we're all chasing. The fat gives it a rich, creamy mouthfeel that so many of us love, while the proteins are the architects, building a resilient structure that holds those intricate designs.
You can get by with semi-skimmed, but it’s a bit of a compromise. The lower fat content (usually around 1.7%) means the foam can end up less creamy and a bit more bubbly if you don't steam it with absolute precision. It works, but it’s far less forgiving than its full-fat cousin, and the texture in the cup is noticeably thinner.
Whole milk is still the benchmark for a reason. Its perfect balance of fats and proteins creates a forgiving canvas for pouring. This makes it easier for beginners to get the hang of it and allows experts to pour complex, high-contrast art with a rich, satisfying flavour.
The Rise of Plant-Based Barista Blends
Plant-based milks have absolutely exploded in popularity, and not just for dietary reasons. Many of them perform brilliantly in coffee. But here’s the crucial bit: not all cartons are the same. You absolutely must look for a "Barista Edition" or "Barista Blend". These versions are specifically formulated with added oils, proteins, and acidity regulators to stop them from splitting in the espresso and to help them steam just like dairy.
The infographic below breaks down the science of microfoam, showing how protein, fat, and heat work together. This applies to both dairy and plant-based milks.
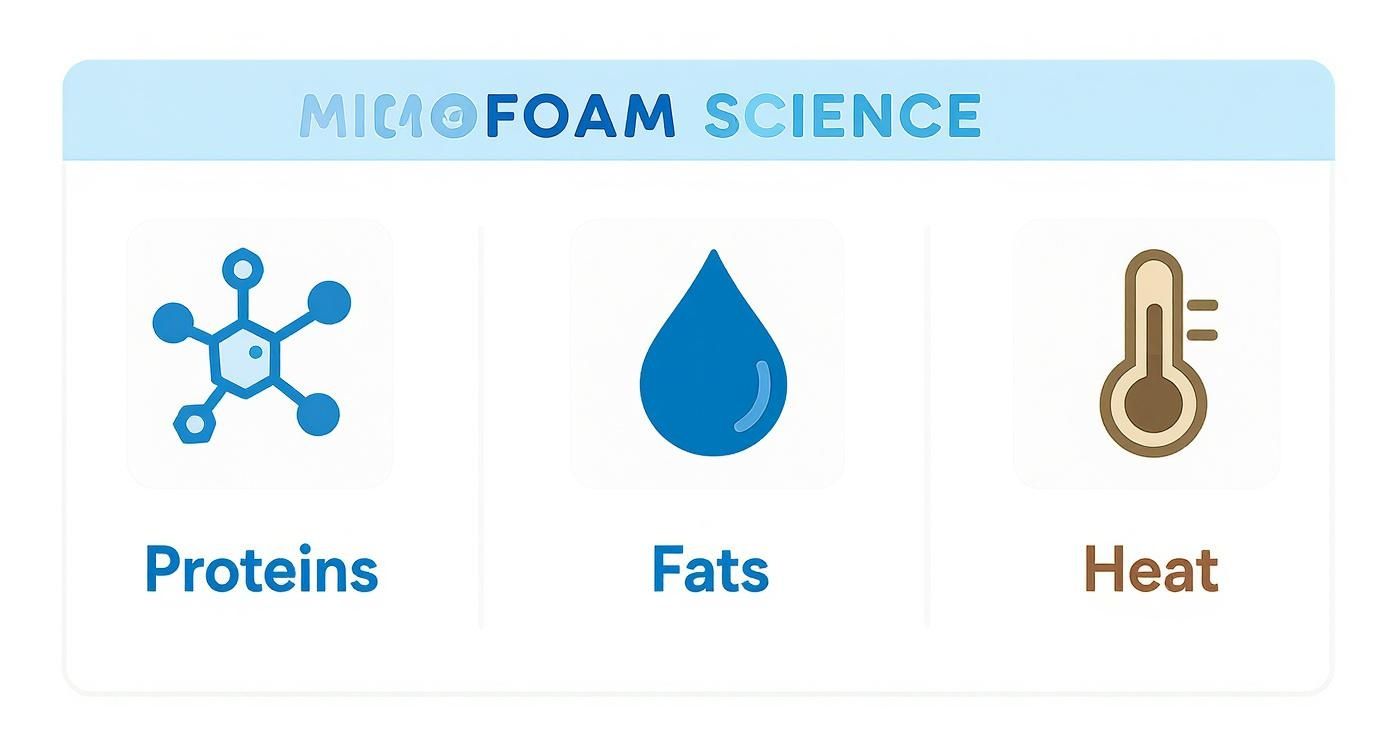
It’s a great visual reminder of how that careful balance is the secret to getting that perfect, paint-like texture needed for beautiful latte art.
Milk Performance Comparison for Latte Art
To help you choose, here's a quick look at how the most common milk types stack up against each other when it comes to creating latte art.
| Milk Type | Foam Stability & Texture | Flavour Profile | Ease of Steaming | Best For |
|---|---|---|---|---|
| Whole Dairy | Excellent stability, silky texture | Creamy, rich, complements most coffees | Very forgiving, great for beginners | High-contrast, complex latte art and classic flavour. |
| Semi-Skimmed | Good stability but can be bubbly | Lighter, less rich than whole milk | Less forgiving, requires precision | Lower-fat option for experienced hands. |
| Oat (Barista) | Excellent stability, creamy texture | Neutral, slightly sweet, oat-y finish | Very easy, behaves like dairy | Baristas and home users looking for a reliable dairy-free option. |
| Soya (Barista) | Very stable, dense foam | Distinct, slightly beany flavour | Moderately easy, can overheat quickly | Creating very stable, long-lasting foam. |
| Almond (Barista) | Lower stability, thinner foam | Nutty, can overpower espresso | Difficult, prone to splitting | Experienced baristas wanting a low-calorie, nutty option. |
This table shows there’s a trade-off with every choice. While whole milk is the easiest to work with, a good barista oat milk comes incredibly close and offers a fantastic dairy-free alternative.
A Closer Look at The Alternatives
Oat Milk: The UK's Favourite
Oat milk has firmly established itself as the top plant-based choice in the UK, and for good reason. It’s loved by customers and baristas alike, making up 55% of all plant-based milk sales. In fact, some data shows that up to 60% of coffees in speciality shops are now made with oat milk. Its success comes down to a creamy texture and a neutral, slightly sweet flavour that works beautifully with espresso without overpowering it.
Soya and Almond Milk
Soya milk, the original dairy alternative, is still a solid performer. Its high protein content helps it create a really stable, dense foam. The flavour is quite distinct and not for everyone, but you can rely on it to hold up. Almond milk is much trickier. It’s lower in both protein and fat, which often leads to a thin foam that disappears quickly. You need a really skilled hand to get decent results with it.
When we talk about plant-based milks, the conversation often expands to their environmental footprint. Looking into sustainable living practices can give you a bigger picture for making choices that fit your values.
No matter which milk you choose, getting the temperature right is critical; overheating will destroy the texture and taste. Our guide on how to steam milk at home to the right temperatures gives you all the essential tips to nail it every single time.
Our Top Barista-Approved Milk Recommendations
Walking down the milk aisle can feel like a guessing game when you're after the perfect base for latte art. To cut through the noise, we've put together a list of the milks that UK baristas and coffee pros consistently reach for—the ones that deliver that silky, pourable microfoam needed for crisp, clean designs.
Each one has been picked based on what really matters: foam stability, texture, how well its flavour pairs with espresso, and how forgiving it is to steam. Whether you’re a dairy purist or a plant-based pioneer, there’s a great option here for you.
For the Dairy Devotees
When it comes to dairy, consistency is king. While just about any fresh, cold whole milk will do a decent job, a couple of brands have built a serious reputation for their reliable fat and protein content, which is the very foundation of brilliant microfoam.
- Estate Dairy Whole Milk: Often seen as the gold standard in speciality coffee shops, this milk is produced with coffee specifically in mind. Its higher protein and butterfat content creates an incredibly creamy and stable foam that’s a dream to work with.
- Brades Farm Barista Milk: Sourced from a family farm in Lancashire, this is another huge barista favourite. It’s homogenised to give it a super-consistent texture, making it perfect for getting that glossy, paint-like foam, pour after pour.
The main takeaway for dairy is to always, always go for whole milk. That perfect balance of fat and protein gives you a much wider window for steaming, making it far easier to nail the texture without the foam getting dry or bubbly.
For Plant-Based Perfection
The plant-based world has come a long way. We now have several brands creating products that rival—and sometimes even beat—dairy milk when it comes to performance. The secret? Always look for a "Barista Edition."
Barista-specific plant milks are specially formulated with added stabilisers and emulsifiers, like oils and acidity regulators. This clever addition stops the milk from splitting when it hits the hot, acidic espresso and helps it build a durable, dairy-like microfoam.
Here are the milks that really stand out from the crowd:
- Minor Figures Barista Oat M*lk: This is probably the most popular oat milk you'll find in UK cafés, and for good reason. It steams like a charm, creating a silky, dense microfoam that’s fantastic for intricate latte art. Its neutral, slightly sweet flavour complements coffee perfectly instead of overpowering it.
- Oatly Barista Edition Oat Drink: A very close second and another giant in the industry. Oatly’s barista version is known for its creamy texture and rock-solid performance under the steam wand. It’s incredibly easy to work with, whether you're a total beginner or a seasoned pro.
- Alpro Barista Soya: If you're a soya fan, Alpro's barista blend is a solid choice. It produces a very stable and thick foam thanks to its high protein content, though its distinct flavour comes through a bit more than oat milk does.
For a consistently excellent performance that countless UK cafes rely on, you can stock up on Minor Figures Barista Oat Milk directly from ADS Coffee Supplies. Grabbing a case means you'll never be caught short when you're ready to pour your next plant-based masterpiece.
Mastering Steaming and Pouring Techniques

Having the right milk is only half the battle; your technique is what turns a decent flat white into a work of art. This is where the real skill comes in, transforming a simple coffee into an experience. It’s all about control, from the temperature right down to the texture of the foam.
The whole process really boils down to three core stages: steaming the milk perfectly, grooming it into a glossy liquid, and finally, the pour itself. Each step is critical if you want to create that silky microfoam needed for sharp, high-contrast designs.
Steaming for Silky Microfoam
The foundation of any great latte art is perfectly textured milk. Your goal isn't stiff, bubbly foam but a smooth, paint-like consistency. You'll get there through a two-phase process: stretching and texturing.
Start with your steam wand tip just below the surface of cold milk. You’re listening for a gentle hiss, almost like tearing paper. This is the sound of air being introduced. This initial aeration, or stretching, should only last until the pitcher feels lukewarm to the touch, somewhere around 30-35°C.
Once you’ve stretched it, plunge the wand deeper into the milk to create a swirling vortex. This second phase, texturing, breaks down any larger bubbles and integrates the air, creating that uniform, glossy microfoam. Aim for a final temperature of 55-65°C. Go any hotter and you’ll scald the milk, killing its natural sweetness and ruining the texture.
Grooming and Pouring with Precision
As soon as your milk is steamed, the clock is ticking. The microfoam will start to separate pretty quickly, so you need to move with purpose. Give the pitcher a firm tap on the counter right away to pop any large surface bubbles.
Next, swirl the milk vigorously in the pitcher. This "polishing" step is vital. It keeps the foam and liquid milk combined, creating a shiny, homogenous texture that’s ready for pouring.
The perfect pour is a dance between height and speed. Start high to sink the milk below the crema, then lower the pitcher to the cup's rim to let the white microfoam float on top, forming your design.
The pouring itself can be simplified into three key actions:
- Setting the Canvas: Start pouring from a height into the centre of the espresso. This mixes the milk with the coffee, creating a uniform beige base for your art. Fill the cup about halfway.
- Creating the Design: Now, bring the pitcher's spout as close as you can to the surface of the coffee. As you pour, the white foam will appear. This is where you form your pattern, whether it's the base of a heart or the beginnings of a rosetta.
- The Final Cut-Through: To finish, lift the pitcher and pour a thin, steady stream through the centre of your design. This creates that classic finish on patterns like the heart.
Practising these fundamental steps will build the muscle memory you need for more complex designs. For a deeper dive into these techniques, check out our guide on latte art basics at home.
Troubleshooting Common Latte Art Issues
Even the most seasoned baristas have off-days where the milk just doesn’t want to play ball. Perfecting your pour is a long game, and hitting a few bumps is all part of the process. The first step to fixing things is figuring out what’s actually going wrong, turning that moment of frustration into a proper learning curve.
Most problems you'll come across boil down to one of three things: the milk texture, your pouring technique, or the coffee itself. Once you can isolate the issue, you can make small, precise tweaks that lead to big improvements. Let’s break down the most common challenges and how to solve them.
Diagnosing Your Foam Problems
Is your foam more like bubbly dish soap than silky, wet paint? That’s a classic sign of over-aeration. You’ve simply pulled too much air into the milk during the stretching phase, creating big, unstable bubbles that don’t have the density to hold a pattern.
To fix this, cut back your aeration time. Listen for that gentle hissing sound for just a few seconds, only until the outside of the milk pitcher feels lukewarm. Then, dunk the steam wand deeper into the milk to create that whirlpool, focusing on texturing what’s there rather than adding more air. This motion will break down any large bubbles into a smooth, integrated microfoam.
On the flip side, if your milk is thin and watery, vanishing into the coffee the second you pour, it’s likely under-aerated or overheated. Under-aerating means you haven't introduced enough air to build a stable foam structure in the first place. You need to hear that distinct, sharp hiss right at the start.
Overheating is another common enemy of good latte art. Pushing the milk past 65°C actually denatures the proteins, causing your beautifully made foam to collapse on itself. The result is a thin, lifeless liquid that has no hope of supporting a design.
Fixing Your Pouring Technique
Sometimes the milk texture is spot on, but the art just doesn’t show up. If your designs look blurry or washed out, the problem is often your pouring height. Starting your pour too low causes the foam to dive straight into the crema, muddying your canvas before you’ve even started.
A common mistake is trying to start the design before the cup is about half-full. Always build your canvas first by pouring from a height, then bring the pitcher spout right down close to the surface to draw your pattern.
If your pattern ends up as a big, undefined "blob," you might be pouring too quickly or holding the jug too close. Slow down your pour and keep a steady hand to allow the design to spread more gracefully across the surface. Getting these techniques right can take time, especially if you're working without a steam wand. Our guide offers some handy tips on frothing milk without a steam wand, which can help you refine your manual frothing skills.
Frequently Asked Questions
Even with the best beans and a top-notch machine, a few questions always pop up on the journey to the perfect pour. Here are some of the most common queries we hear from baristas, whether they're behind a commercial counter or their own kitchen counter.
Can I Make Good Latte Art with Skimmed Milk?
You can technically create foam with skimmed milk because of its protein content, but the results are rarely what you're hoping for. The foam is often stiff, dry, and bubbly—more like a classic cappuccino foam than the silky, paint-like texture you need for detailed latte art.
The lack of fat also means you miss out on that creamy, satisfying mouthfeel. For the best results, we always recommend sticking with whole milk or a dedicated barista plant-based alternative.
Why Does My Oat Milk Sometimes Split in Coffee?
This is a classic problem. Oat milk can sometimes curdle or split the moment it hits the hot, acidic espresso. This is usually down to a sudden temperature shock.
To get around this, make sure you're always using a ‘Barista Edition’ oat milk. These are specifically formulated with acidity regulators to prevent splitting. Letting your espresso cool for just a moment before you pour the milk can make a big difference, too.
What Is the Ideal Temperature for Steaming Milk?
The sweet spot for steaming any milk is between 55-65°C (130-150°F). This is the magic range where the fats have melted just enough to create that gorgeous creamy texture, and the natural sugars are at their peak sweetness.
If you push it much past 70°C, you'll scald the milk. This not only destroys the stable microfoam you worked so hard to create but also kills off all that lovely sweetness, leaving you with a flat, cooked flavour.
For coffee shop owners, perfecting latte art is a fantastic way to impress customers and build a loyal following. If you're looking for other ways to keep people coming back, learning about creating a coffee shop loyalty program is a great next step for growing your business.
At Seven Sisters Coffee Co, we believe great coffee deserves great milk. Explore our range of freshly roasted coffee beans—they're the perfect partner for your latte art practice. Find your next favourite coffee on our website.

