How to Make Espresso Without an Espresso Machine: Quick Guide
Fancy a proper, intense shot of espresso but don't fancy a massive machine hogging your kitchen counter? You're in the right place. It's entirely possible to create fantastic, espresso-style coffee with simple bits of kit you might already own, like an AeroPress, a classic Moka pot, or even a trusty French press.
The secret isn’t in owning expensive gear; it’s about nailing the fundamentals. Think fine grounds, a bit of pressure, and a concentrated brew ratio. Get those right, and you'll be pulling rich, café-quality shots right at home.
Your Guide to Machine-Free Espresso
There's a common myth that true espresso can only come from a hulking machine that pushes water through coffee at nine bars of pressure. While that's the industry standard, you can get incredibly close with some much more kitchen-friendly methods. Learning how to whip up a great espresso-like shot is all about technique, not technology.
Imagine making a rich, crema-topped coffee in your East Sussex kitchen. It’s a real game-changer when you consider the UK knocks back 98 million cups of coffee every single day. With Brits averaging about 1.5 cups per person daily, and a whopping 80% of us visiting coffee shops weekly, the desire for better home brewing has never been stronger.
This guide will show you how to elevate your daily coffee ritual, proving that exceptional taste is well within your grasp, no fancy machine required.
The Essentials of Espresso
Before we jump into the different brewers, let's quickly cover the three pillars that make an espresso shot what it is. This handy infographic breaks down the core elements you’ll be trying to replicate.
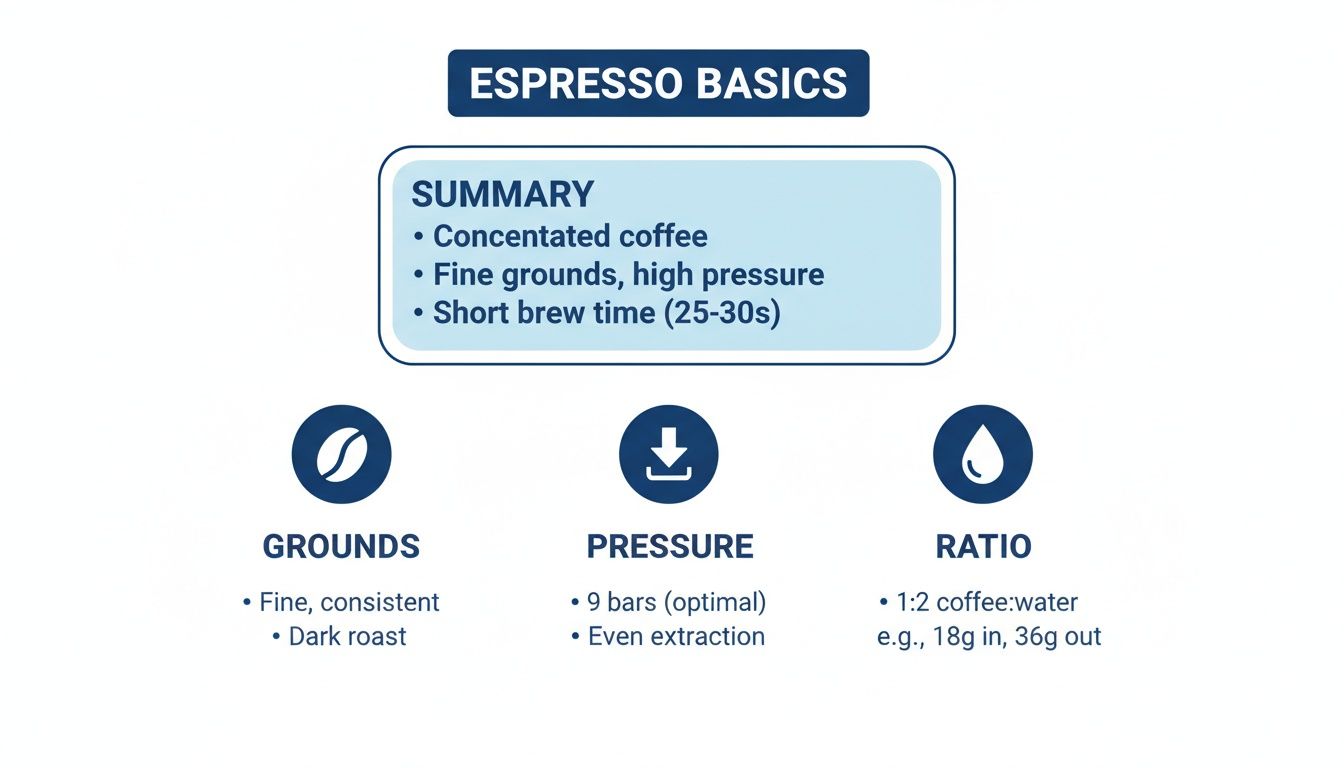
Getting the interplay right between your coffee grounds, the pressure you apply, and the ratio of coffee to water is the real secret here. Each method we'll look at handles these variables a little differently to produce that concentrated, flavour-packed brew we’re all after.
The goal isn't just to make strong coffee; it's to create a balanced, intense, and aromatic shot that captures the essence of true espresso. By focusing on quality beans and the right technique, you can produce a cup that rivals your favourite coffee shop.
If you're keen to broaden your horizons, you can also explore a diverse range of coffee brewing methods that will expand your home barista skills. This wider knowledge helps you appreciate how different techniques draw out unique flavours from the beans.
Espresso-Style Brewing Methods at a Glance
To help you choose the right tool for the job, here’s a quick rundown of the most popular ways to make strong, espresso-like coffee at home. This table compares them based on how they work, what they cost, and the kind of coffee they produce.
| Method | Pressure Level | Grind Size | Best For | Initial Cost |
|---|---|---|---|---|
| AeroPress | Low (Manual) | Fine to Medium-Fine | Versatility and a clean, bright shot | £30 – £40 |
| Moka Pot | Low (Steam) | Medium-Fine | A rich, robust, and classic Italian-style coffee | £20 – £50 |
| French Press | Very Low (Manual) | Coarse (for a hack) | A full-bodied, strong coffee concentrate for milk drinks | £15 – £40 |
| Manual Lever | High (Manual) | Fine (Espresso) | True espresso with crema for the dedicated enthusiast | £100 – £300+ |
Each of these methods has its own charm and delivers a slightly different result. Your choice will come down to your budget, how much effort you want to put in, and, of course, your personal taste.
In the next sections, we'll dive into each of these methods one by one. You'll get step-by-step instructions for the AeroPress, the classic Moka pot, and even a clever French press hack to get you started.
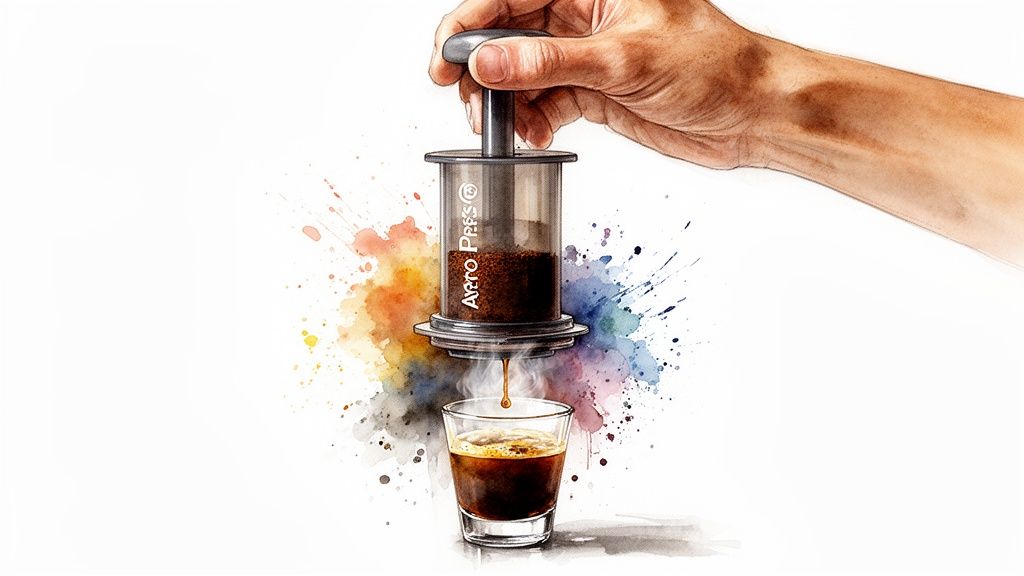
Mastering the AeroPress for Intense Espresso-Style Shots
The AeroPress has rightfully earned a devoted following among UK home brewers. It’s a wonderfully versatile and forgiving bit of kit that can produce a concentrated, clean, and surprisingly intense shot of coffee that gets remarkably close to the real thing. Its genius lies in using air pressure—created by you—to force water through finely ground coffee, resulting in a rich and full-bodied brew.
Unlike many other methods, the AeroPress gives you immense control over every variable, from water temperature to steep time. This makes it a fantastic tool for experimenting until you find the perfect recipe for your chosen beans. For an espresso-style shot, we're going to focus on the popular 'inverted' method. This clever trick prevents any coffee from dripping through prematurely, ensuring a full, even extraction.
Setting Up for Success: The Inverted Method
The inverted method is the secret to maximising pressure and creating that rich, espresso-like concentration. It might sound a bit technical, but it’s actually very straightforward. Instead of placing the AeroPress directly on your cup, you'll assemble it upside down on your counter.
Start by slotting the plunger into the brew chamber, pushing it in just enough to create a stable base. This simple flip is what lets you control the entire brewing process without losing a single drop of precious coffee before you’re ready to press. If you're new to this technique, you can find a more detailed walkthrough in our comprehensive guide on how to use an AeroPress, which covers both standard and inverted methods.
The Perfect Grind and Ratio
Getting that espresso-like punch really hinges on nailing your grind and ratio. For the AeroPress, you're aiming for a grind that’s finer than you’d use for a drip coffee maker but a touch coarser than a true espresso grind. Think of the consistency of table salt.
A quality burr grinder is your best friend here. It provides the consistency needed for an even extraction, which is something blade grinders just can't do. Blade grinders tend to produce a mix of fine dust and coarse chunks, which almost always leads to a brew that’s both bitter and sour.
For the coffee-to-water ratio, a great starting point for a single shot is:
- Coffee: 18 grams of finely ground coffee.
- Water: 60 millilitres (or 60 grams) of hot water.
This concentrated 1:3.3 ratio is what builds the syrupy body and intense flavour profile we're chasing.
Step-by-Step Brewing Process
With your setup ready, it's time to brew. The whole thing takes less than two minutes, making it one of the quickest ways to create a seriously high-quality coffee shot.
- Heat Your Water: Bring your water to a boil and then let it cool for about a minute. The sweet spot is around 92°C. Any hotter and you risk scorching the grounds, which will give you a bitter taste.
- Add Coffee and Water: With your AeroPress inverted, add your 18g of ground coffee. Start a timer and pour your 60ml of hot water over the grounds, making sure they are all saturated.
- Stir and Steep: Give the mixture a quick but vigorous stir for about 10 seconds. This ensures all the grounds get evenly saturated for a balanced extraction. Now, let it steep until your timer hits the 45-second mark.
- Prepare to Plunge: Securely screw the filter cap—with a pre-rinsed paper filter inside—onto the brew chamber. Carefully flip the entire AeroPress over onto a sturdy mug.
- Apply Pressure: Begin to press the plunger down with firm, consistent pressure. You should feel a bit of resistance. Aim for this plunge to take between 20 and 30 seconds. You’ll know you’re done when you hear a hissing sound.
The result in your cup is a clean, grit-free, and highly concentrated shot of coffee. The paper filter does an excellent job of trapping fine particles and excess oils, which is why AeroPress coffee is celebrated for its clarity of flavour. You might even notice a lovely layer of microfoam on top.
For brewing on the move, the AeroPress Go Coffee Maker from ADS Coffee Supplies is a brilliant, compact option that packs all this brewing power into a travel-friendly design.
Perfecting The Classic Moka Pot Brew
The Moka pot, an iconic piece of Italian design, is the original stovetop espresso maker and a staple in countless UK kitchens. For many of us, it’s the go-to for a strong, robust coffee that beautifully mimics the intensity of a true espresso. Its charm lies in its simplicity; it just uses steam pressure to push hot water up through a basket of coffee grounds, producing a rich, full-bodied brew.
But don't let that simplicity fool you. There's a fine line between a beautifully balanced shot and a bitter, metallic-tasting disaster. Mastering the Moka pot is all about getting a feel for its nuances and managing the key variables: heat, water, and grind. Get these right, and you'll be rewarded with a fantastic coffee concentrate that’s the perfect base for lattes, cappuccinos, or simply savoured on its own.
Preparing Your Moka Pot Correctly
Good prep is the first step to a great Moka pot brew. One of the most common mistakes I see is people using cold tap water in the base. This dramatically extends the time the pot spends on the heat, which can actually cook the coffee grounds and impart that nasty burnt, metallic flavour.
The fix is surprisingly simple: use pre-heated water. Just fill your kettle, bring it to a boil, and then carefully pour the hot water into the bottom chamber of your Moka pot. Fill it right up to the safety valve. This one trick significantly shortens the time on the hob, preserving the delicate flavours of your coffee.
Next, let's talk about the filter basket. Your grind needs to be medium-fine—a bit coarser than you'd use for a traditional espresso machine, but finer than for a drip filter. Fill the basket with your grounds until it's level with the top.
A critical point here is to avoid tamping the coffee. Unlike with an espresso machine, packing down Moka pot grounds creates too much resistance. This stops the water from flowing through evenly and can even cause a dangerous pressure build-up. Just level the grounds off with your finger or the back of a knife.
Mastering Heat Management on The Hob
Heat management is probably the most crucial skill in Moka pot brewing. Your goal is a gentle, steady extraction, not a violent coffee eruption. Place your assembled pot on a medium-low flame. The heat should be just enough to cover the base of the pot without licking up the sides.
Now, keep a close eye (and ear) on it. After a few minutes, you'll hear a gentle gurgling as the first drops of coffee begin to emerge from the spout. Soon after, a steady, rich, honey-coloured stream will begin to flow. This is the heart of your brew.
As the chamber fills, the stream will lighten in colour and the gurgling will get louder and more frantic. This is your cue to act fast. As soon as that sputtering starts, immediately take the Moka pot off the heat. Leaving it on any longer will only pull out bitter compounds, ruining the shot. For a more detailed walkthrough, you can explore our step-by-step article on how to master brewing with a Moka pot.
Some brewers even run the base of the pot under cold water to stop the extraction instantly. This is a great pro-tip to ensure you only capture the sweetest part of the brew.
The Final Result and Choosing Your Pot
The coffee you get from a well-handled Moka pot is strong, intense, and syrupy. While it doesn't produce the same thick, stable crema you get from a high-pressure espresso machine, you will get a lovely layer of foam created by the emulsification of coffee oils.
Because of its robust character, Moka pot coffee stands up beautifully in milk-based drinks. The intensity cuts right through the richness of steamed milk, creating a flavourful latte or flat white that rivals many you'd buy in a coffee shop.
If you're looking to get started with this classic method, you really can't go wrong with an iconic brewer. You can find timeless options like the Bialetti Moka Express at ADS Coffee Supplies. It’s a design that has remained largely unchanged for nearly a century for a very good reason—it just works. Investing in a quality Moka pot is a small price to pay for a lifetime of delicious, Italian-style coffee right at home.
The French Press Espresso Hack
What if you could pull a surprisingly potent, espresso-style shot from a piece of kit you already own? The humble French press, or cafetière as we often call it, is rarely the first thing that comes to mind for intense coffee. But with a few smart adjustments, it can deliver a remarkably rich and concentrated brew.
This little trick, the 'French press espresso hack', is for anyone who loves to experiment without splashing out on new gear. It’s a method born from pushing the boundaries of what this simple brewer can achieve. While it can't replicate the high pressure of an espresso machine, it cleverly manipulates the coffee-to-water ratio and grind size to mimic that powerful, full-bodied character.
Rethinking Your Ratio and Grind
The secret here is to forget everything you know about a standard French press brew. We’re ditching the typical, lazy 1:15 coffee-to-water ratio and getting much more aggressive, aiming for something closer to 1:7. This means you're using a lot more coffee for the amount of water, which is how we build that intense, almost syrupy body.
Your grind size needs a rethink, too. Instead of the usual coarse, breadcrumb-like texture, you’ll want to go for a medium-fine grind. It shouldn't be a fine powder like true espresso—that would just clog the filter and make plunging a nightmare—but it needs to be noticeably finer than your normal cafetière setting. This extra surface area is key for extracting flavour fast.
A word of warning: this method really puts your French press filter to the test. The plunge will feel much stiffer than usual. You have to press slowly and gently to avoid forcing gritty sediment through the mesh and into your cup.
The Brewing Process, Step-by-Step
This technique uses a much shorter brew time to dodge the bitterness that can easily creep in with a finer grind. From start to finish, you’re looking at about three minutes.
- Add Your Grounds: Start by tipping your medium-fine coffee into the cafetière. For a good, strong double shot, 30 grams of coffee is a solid starting point.
- Bloom the Coffee: Get your water to around 94°C. Pour just enough over the grounds to get them all wet—about 60 millilitres. Watch them bubble and expand. That’s the ‘bloom’, and it lets trapped CO2 escape, leading to a much better-tasting brew. Give it 30 seconds.
- Add Remaining Water and Stir: After the bloom, top it up with the rest of your hot water until you hit a total of 210 millilitres. A quick, gentle stir will make sure all the grounds are submerged and doing their job.
- Steep and Plunge: Pop the lid on but don't press down just yet. Let it all steep for a total of 2-3 minutes. Once the time is up, push the plunger down very slowly and steadily.
What to Expect in the Cup
Let’s manage expectations. This isn't going to give you the beautiful, golden-brown crema you see on a traditional espresso. Crema is a direct result of high-pressure extraction emulsifying the coffee oils, and a French press just can’t generate that kind of force.
What you will get is a heavy-bodied, rich, and deeply concentrated coffee shot. It’ll have more texture and feel less ‘clean’ than a shot from an AeroPress, as the mesh filter allows more oils and fine particles through. This rich concentrate is fantastic on its own if you love a bold cup, but it’s an absolutely brilliant base for milk drinks like lattes or flat whites.
For more tips on perfecting your regular brew, check out our guide on how to use a cafetière properly.
Getting Your Beans and Grind Right
Okay, you've picked your brewing method. Now for the most important part: the coffee itself. You can have the fanciest gear in the world, but if you start with stale, poor-quality beans, you’re just not going to get a good result. Your choice of coffee and how you grind it will make or break the flavour in your cup.
The journey to a brilliant espresso-style shot always starts with high-quality, freshly roasted beans. The stuff you find in the supermarket has often been sitting on a shelf for months, losing all the incredible aromas and complex flavours it once had. Buying from a local roaster—like us at Seven Sisters Coffee Co—guarantees you're getting beans at their absolute peak. Trust me, it makes a world of difference.
Selecting the Right Roast Profile
For that classic, rich espresso flavour you're chasing, a medium-to-dark roast is usually the way to go. These roasts bring out those deep, satisfying notes of chocolate, caramel, and nuts while softening the sharp acidity you might find in lighter roasts. This creates a balanced, full-bodied shot that’s absolutely perfect on its own or as the base for a latte or flat white.
Lighter roasts can work too, but they'll give you a much brighter, more acidic shot. While delicious in its own right, this profile can sometimes come across as a bit sour or thin when you brew it as a concentrated shot without the intense pressure of a commercial machine. If you want to go deeper into choosing the perfect beans, have a look at a comprehensive resource like Your Guide To The Best Coffee Beans For Espresso.
The Critical Role of a Consistent Grind
Now, let's talk about the grind. This is non-negotiable. To make a great espresso-style coffee at home, you need a fine, consistent grind. Those fine particles create the resistance needed for pressure to build up properly, whether you're plunging an AeroPress or brewing with a Moka pot.
If your grind is too coarse, the water will just rush straight through. The result? A weak, sour, and watery shot. Go too fine, and you risk clogging your brewer, which leads to a bitter, harsh, and over-extracted mess.
The goal is consistency. A uniform grind ensures every particle of coffee extracts at the same rate, giving you that balanced, delicious flavour we’re all after. This is where having the right equipment really matters.
For a detailed look at how different settings affect your brew, check out our complete coffee grind size guide to help you dial in the perfect texture for any method.
Why a Burr Grinder is a Worthy Investment
To get that crucial consistency, one of the single best upgrades you can make to your coffee setup is a quality burr grinder. Blade grinders are cheap, but they just smash the beans into uneven chunks and dust. A burr grinder, on the other hand, uses two revolving abrasive surfaces to crush beans into a perfectly uniform size.
- Blade Grinders: They're inexpensive but create a chaotic mix of boulders and fine dust. This leads directly to uneven, poor-tasting extraction.
- Burr Grinders: These are all about precision. You can select a specific grind size and get beautifully uniform particles for a balanced, delicious brew.
You don't have to break the bank, either. A good manual burr grinder is a fantastic starting point. Models like the Hario Skerton Pro Hand Grinder offer excellent grind quality for a reasonable price, giving you the control you need to perfect your shot.
Freshness is Everything: Store and Grind Correctly
Finally, let’s talk about protecting those beautiful beans you’ve just bought. Coffee’s biggest enemies are oxygen, light, heat, and moisture. Always store your whole beans in an airtight container somewhere cool and dark. Please, don't put them in the fridge or freezer!
And the most important rule of all? Grind your beans right before you brew. Once ground, coffee starts losing its aromatic compounds within minutes. Grinding on demand is a simple step, but it’s what separates a good cup of home-brewed espresso from a truly exceptional one.
Troubleshooting Your Home Brew

Even with the best beans and a solid technique, sometimes your brew just doesn't hit the mark. Don't worry, it happens to all of us. Learning to figure out what went wrong with a disappointing cup is a massive step towards becoming a truly confident home barista. It’s all about understanding what your coffee is trying to tell you.
Most of the time, the problem comes down to extraction. You can think of it as a spectrum: at one end, you’ve got sour, weak coffee (under-extracted), and at the other, harsh, bitter coffee (over-extracted). The magic happens right in the middle.
The flavour of your coffee is your best diagnostic tool. A quick taste can tell you exactly what you need to adjust for your next brew, turning a mistake into a valuable lesson.
Solving Sour or Acidic Coffee
If your shot tastes unpleasantly sour or acidic, that’s a dead giveaway for under-extraction. This simply means the water didn't have enough time or the right conditions to pull all the good stuff out of the grounds.
To fix this, you have a few levers to pull:
- Use a finer grind: A finer grind means more surface area, which helps the water extract flavours more quickly and efficiently.
- Increase your brew time: Give the water a bit more contact time with the coffee. Let it steep or extract for longer before you plunge or serve.
- Check your water temperature: Water that's too cool just won't do the job properly. For a deep dive, our guide on the best water temperature for coffee can help you get this spot on.
Taming Bitter or Harsh Coffee
On the flip side, if your coffee tastes bitter, harsh, or hollow, it's a classic sign of over-extraction. The water has spent too much time mingling with the coffee, pulling out unwanted bitter compounds that overwhelm the flavour.
The solution here is the complete opposite of fixing a sour shot:
- Use a coarser grind: This will slow the whole extraction process down.
- Decrease your brew time: Shorten the contact time between the water and the coffee grounds.
- Lower your water temperature slightly: Water that’s too hot can scorch the grounds and speed up extraction way too much.
Brewer-Specific Headaches
Beyond these general extraction issues, each brewing device has its own little quirks. Knowing how to handle them will save you a lot of frustration (and coffee).
For instance, if your AeroPress is incredibly difficult to plunge, your grind is almost certainly too fine, creating a solid puck of coffee that’s blocking the water. Back it off a notch.
If your Moka pot is sputtering violently and churning out burnt-tasting coffee, your heat is far too high. You’re essentially boiling the coffee. Turn it down to a gentle flame for a slower, more controlled brew that oozes out like thick honey.
Mastering these small adjustments is the real secret to consistently making great espresso-style coffee at home, no fancy machine required.
Your Espresso Questions Answered
Once you’ve got a handle on the methods, a few questions almost always come up. Here are some quick answers to the things we get asked most about making espresso-style coffee without a proper machine.
Can I Really Get Proper Crema?
This is the big one. That thick, stable crema you see on a shot from a commercial machine is the result of immense pressure—around 9 bars, to be exact. Replicating that at home without the right kit is, frankly, a tough ask.
Devices like the AeroPress can whip up a light, bubbly foam that looks a bit like crema, but it won't have the same rich texture or staying power. A Moka pot does a better job of creating a foamy layer, but it's technically an emulsion of coffee oils, not true crema. My advice? Stop chasing the perfect crema and focus on creating a rich, intensely flavourful shot instead. That's where the real magic is.
What Kind of Coffee Beans Are Best?
For that classic, bold espresso-style flavour, you can't go wrong with a medium-dark or dark roast. These blends are roasted to bring out those deep, satisfying notes of dark chocolate and caramel that really shine in a concentrated brew.
If you fancy something a bit brighter, a good single-origin from Brazil or Colombia is an excellent choice. But the single most important factor is freshness. Always, always buy whole beans and grind them just seconds before you brew.
The quality of your beans is the single biggest factor in the final taste. Starting with stale, pre-ground coffee will always lead to a disappointing cup, no matter how good your technique is.
Is It Worth Buying a Brewer if I Already Have a French Press?
It really depends on what you're looking for. The French press hack we covered is a brilliant way to dip your toes in the water using equipment you already own. It gets you surprisingly close.
But if you find yourself wanting more clarity, control, and consistency, then investing in a dedicated brewer is a fantastic next step. An AeroPress Go Coffee Maker or a timeless Bialetti Moka Express will genuinely elevate your home coffee game without breaking the bank.
At Seven Sisters Coffee Co, we source and roast the finest beans to help you create your perfect cup, no matter how you brew it. Explore our full range of freshly roasted coffees to start your journey. https://sevensisterscoffee.co.uk