Roast Coffee Home: A Beginner’s Guide to Roasting at Home in the UK
Roasting your own coffee is one of those things that, once you start, you'll wonder why you didn't do it sooner. It’s about taking those raw, green coffee beans and transforming them, with a little heat and a lot of attention, into the beautiful, aromatic brown beans that make your morning brew. The best part? You're in complete control of the final flavour.
Why Roasting Coffee at Home is a Game Changer
Stepping into the world of home roasting might feel a bit intimidating, but it's genuinely one of the most rewarding upgrades you can make to your coffee ritual. It’s more than just a hobby; it’s a way to connect deeply with the coffee you drink every day, turning a simple caffeine fix into a personalised craft.
The biggest draw for most people is the unbelievable freshness. As soon as coffee is roasted, it starts to lose its vibrant, complex aromas. By roasting your own, you get to brew beans at their absolute peak—often just a few days after they've been roasted. That's a level of freshness you simply can't find in a bag of shop-bought coffee.
Customise Your Perfect Cup
Beyond the freshness, home roasting puts you in the driver's seat. You become the artisan, deciding exactly how light or dark you want your beans.
- Flavour Profiling: Fancy a bright, acidic Ethiopian coffee with those classic fruity notes? A light roast will keep those delicate flavours front and centre. Or maybe you're craving a rich, chocolatey Sumatran? Taking it to a darker roast will develop those deep, bold characteristics.
- Full Control: You get to experiment and dial in the precise roast level that sings to your palate and suits your favourite brewing method, whether that's an AeroPress, V60, or a classic cafetière.
This level of control opens up a whole spectrum of tastes you can explore, turning your kitchen into your very own micro-roastery. Learning what is specialty coffee is a great first step in appreciating the incredible nuances you're about to unlock.
Here’s a look at the kind of high-quality green coffee beans you can start your journey with.
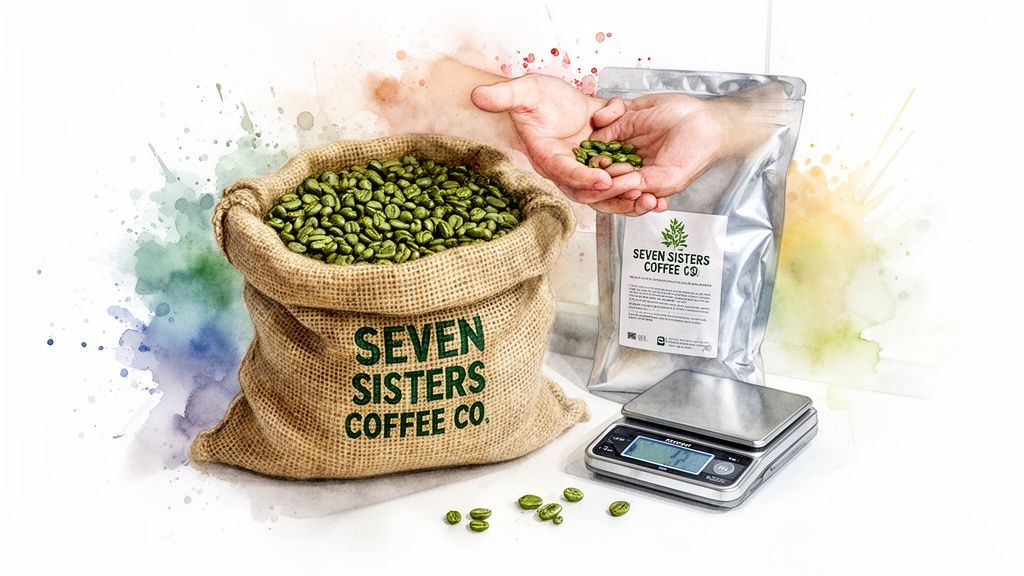
Starting with exceptional green beans, like the ones we source at Seven Sisters Coffee Co, is the foundation for a truly delicious final cup.
A Growing UK Trend
The rise of home roasting fits perfectly with a bigger shift we're seeing in UK coffee culture. A huge 65% of coffee is now consumed at home, and the average household is spending around £6.42 per week on their brews. This tells us people are looking for that café-quality experience without having to leave the house.
By roasting your own beans, you’re not just making another cup of coffee. You’re elevating a daily staple into an affordable, premium luxury that's crafted just for you.
Choosing Your Green Beans and Roasting Gear
The heart of an exceptional cup of coffee is, without question, the bean itself. Before you even think about firing up a roaster, you need to get your hands on the right raw material. Honestly, this choice is the single biggest factor in what your final cup will taste like, so it’s worth getting right from the start.
When you start looking for green beans, you’ll see two main types thrown around: single-origin and blends. A single-origin coffee comes from one specific farm or region, bottling up the unique taste of that particular place. Blends, on the other hand, mix beans from different places to create a more balanced, consistent flavour.
For your first few attempts, I’d strongly recommend starting with a single-origin bean. It’s the best way to really taste the distinct character of a specific growing region and understand how your roasting is shaping its natural flavours.
Selecting Your First Green Beans
Where a bean is from, the altitude it was grown at, and how it was processed all have a massive impact on its taste. For example, a high-altitude Ethiopian bean that’s been naturally processed (left to dry with the fruit still on) will usually give you bright, fruity, and floral notes—think berries and jasmine.
Take a Brazilian bean from a lower altitude that’s been pulp-natural processed, and you're in a completely different world. You’ll get nutty, chocolatey, and caramel flavours with a much heavier body. Roasting these two side-by-side is a real eye-opener and shows just how incredibly diverse coffee can be. Over at Seven Sisters Coffee Co, we have a curated selection of specialty coffee beans that are perfect for these kinds of home-roasting experiments.
My Advice: Don't be afraid to experiment. Buy smaller batches of a few different origins to figure out what you really enjoy. Roasting a chocolatey Brazilian and a fruity Ethiopian at the same time will teach you more about flavour than any book ever could.
To help you get started, here’s a quick guide to some popular beans that are great for beginners.
Choosing Your First Green Coffee Beans
This table breaks down a few excellent single-origin options to help you choose a batch that matches the flavour profile you're aiming for.
| Origin | Typical Flavour Profile | Recommended Roast Level | Best For |
|---|---|---|---|
| Ethiopia Yirgacheffe | Floral, citrus, tea-like, bright acidity | Light to Medium-Light | Pour-over lovers who enjoy delicate, aromatic cups. |
| Colombia Supremo | Balanced, nutty, caramel, mild fruity notes | Medium | An all-rounder that works beautifully for drip or cafetière. |
| Brazil Santos | Chocolatey, nutty, low acidity, full body | Medium to Medium-Dark | Fans of classic, rich coffee flavours and espresso. |
| Sumatra Mandheling | Earthy, spicy, cedar, heavy body | Medium-Dark to Dark | Those who prefer a bold, syrupy, and intense brew. |
Picking just one can feel daunting, but you can’t really go wrong. Each one will teach you something new about the roasting process.
Building Your Home Roasting Setup
Once you've got your beans, it’s time to think about gear. The good news? You don't need to spend a fortune to get started. You can ease into home roasting with things you might already own or can pick up cheaply.
Here’s a simple breakdown of what you'll need, separating the must-haves from the nice-to-haves:
- An accurate digital scale: This is non-negotiable. Consistency begins with measuring your green beans and your roasted output precisely. A good set of digital coffee scales will quickly become one of your most-used tools.
- A heat source and a roasting vessel: You’ve got options here. The easiest way in is a simple stovetop setup. A heavy-bottomed pan or a dedicated stovetop popcorn popper works wonders. It’s a very hands-on method that needs your full attention, but it’s incredibly effective.
- A cooling method: Roasting is an exothermic process, which means the beans keep cooking even after you take them off the heat. You need to cool them down fast. All it takes is two metal colanders and a fan to cool a batch in minutes.
- A timer: Your phone or any kitchen timer will do the job perfectly. Tracking your time is absolutely crucial for creating repeatable roast profiles later on.
As you get more into your new hobby, you might start looking at dedicated home roasters.
Dedicated Home Roasters
Purpose-built machines give you far more control and consistency than doing it by hand. They generally fall into two categories:
- Hot Air Roasters: These work a bit like a powerful popcorn popper, using a column of hot air to roast and circulate the beans. They’re brilliant for producing clean, bright flavours and are especially good for lighter roasts. You can find excellent options like the Cafemasy Hot Air Roaster to get started.
- Drum Roasters: These use a rotating drum to tumble the beans over a heat source, just like the big commercial roasters. They give you more nuanced control over the roast and are fantastic for developing body and sweetness, making them great for any roast level. Check out the popular Gene Café CBR-101 Home Coffee Roaster for an idea of what these can do.
But remember, you don't need a top-of-the-line machine from day one. Start simple. Master the basics of watching, listening, and smelling the roast. You can always upgrade your gear as your skills and passion grow.
Your First Home Roast: A Hands-On Guide
Right, this is where the real fun begins. You've got your green beans and your basic kit is ready to go. Now it’s time to apply some heat and transform those dense, grassy seeds into the aromatic, brittle beans we all know and love. The goal here isn’t perfection straight away; it's about building confidence by tuning into your senses. Your eyes, ears, and nose are your most valuable tools.
We're going to walk through three of the most popular ways to roast coffee at home, from the incredibly simple stovetop pan all the way to a dedicated air roaster. Each method has its own rhythm and quirks, but the fundamentals are the same across the board. Just remember, your first few batches are for learning and watching what happens. Don't stress about getting it perfect.
The process is straightforward: choose your beans, weigh them out accurately, and pick your roasting method. Following this simple flow helps build consistency right from the start.
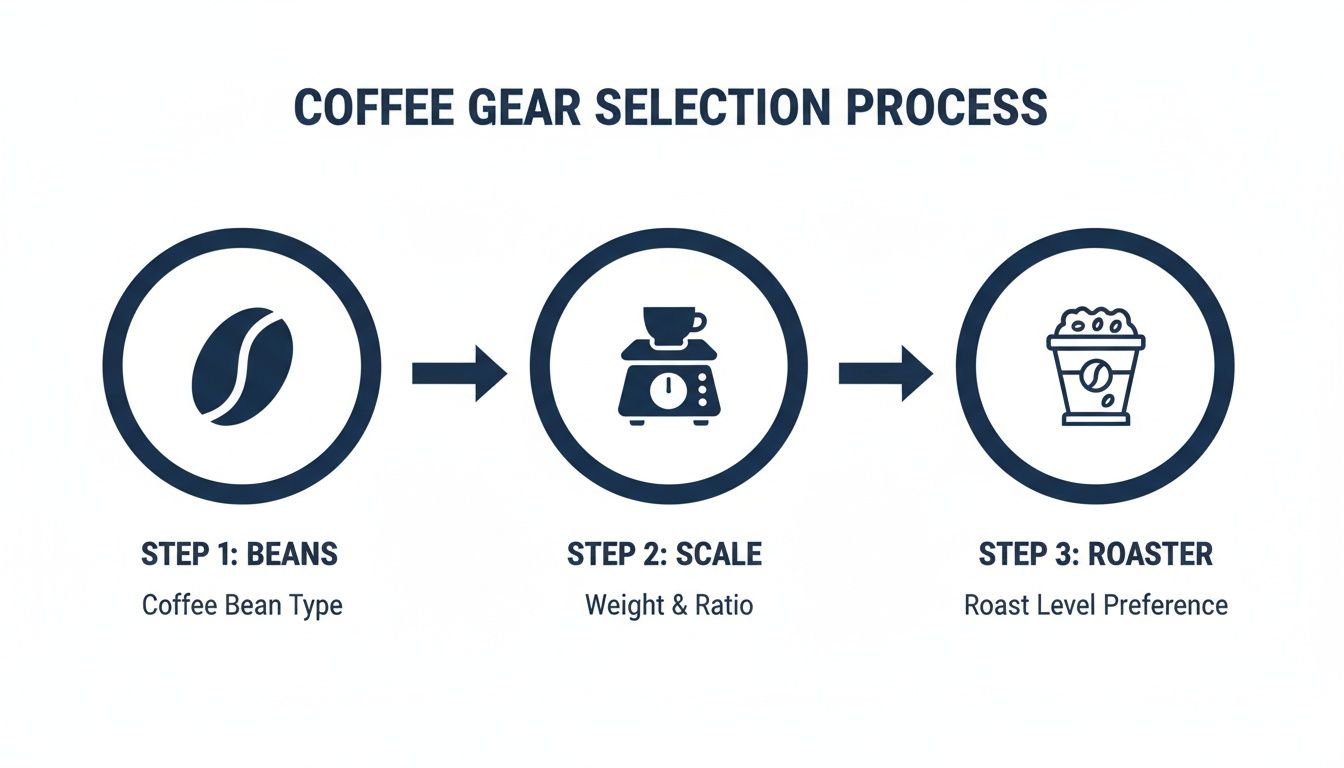
This simple workflow—Beans, Scale, Roaster—is the foundation of every successful home roast. It keeps your process repeatable and dead easy to track.
The Stovetop Pan Method
This is the old-school, hands-on way to roast coffee at home. All you need is a heavy-bottomed pan or a wok, a wooden spoon or whisk, and your cooker hob. It’s a beautifully raw and connected experience, but it absolutely demands your full attention.
Before you do anything else, think about safety and ventilation. Roasting produces smoke and chaff (the papery skin that flies off the bean), especially as you head into darker roasts. Open your windows, get your extractor fan on full blast, and be ready for a bit of a smoky, toasty aroma to fill the kitchen.
Start by preheating your pan over a medium heat. Add a single layer of green beans—don't overcrowd it—and start stirring immediately. And I mean continuously. Your goal is constant agitation to make sure the roast is even. If the beans sit still for even a few seconds, you'll scorch them.
You’ll quickly see the beans go through a few key stages:
- Drying Phase: The beans shift from green to a pale yellow and give off a grassy, hay-like smell.
- Browning: Next, they’ll start to tan and eventually turn a cinnamon brown, smelling more like toast or freshly baked bread.
- First Crack: This is the big one. The beans will start making an audible popping sound, a bit like popcorn. This is a critical marker that tells you the development phase has begun. Sugars are caramelising, and the real flavour is being created.
From the moment you hear that first crack, you’re on the clock. A light roast might only need 30-60 seconds after the first crack starts. For a medium roast, you might push it for another minute or two. The second you hit your desired colour, tip the beans straight into a metal colander and start cooling them down immediately.
The Air Popcorn Popper Method
Using a hot air popcorn popper is a brilliant and cheap way to dip your toes into dedicated roasting. These little machines are designed to heat and agitate kernels, which, funnily enough, is exactly what coffee beans need. Try to find an older model with side vents; some modern bottom-vent poppers can get too hot and shut off.
The setup couldn’t be simpler. Measure out a small batch of beans (usually around 80-100 grams) and pour them into the popper’s chamber. Make sure you place it near an open window or even do it outside—it will blow hot chaff everywhere.
Switch the machine on, and the magic happens. The hot air circulates the beans for you, so you don’t need to worry about stirring. Your job is just to watch and listen. The roast will move much faster than on the stovetop, often hitting first crack in just 3-5 minutes.
The real trick with a popcorn popper is listening for the first crack over the noise of the fan. Once it starts, you are only seconds away from a finished light roast. Be ready to unplug the machine and dump the beans for cooling the instant they reach your target shade of brown.
Because it’s so fast, this method is fantastic for producing bright, clean-tasting light roasts that are perfect for pour-over methods like a V60.
Using a Dedicated Home Roaster
Once you get the hang of it and crave more control and consistency, a dedicated home roaster is the natural next step. These machines, whether they're air roasters or drum roasters, give you precise command over variables like temperature and airflow. This opens up the world of creating and following specific roast profiles. If you want to dive deeper into how these variables shape flavour, our guide on understanding coffee roasting profiles offers a detailed look.
With a machine like the ones available from ADS Coffee Supplies, you can get a much cleaner and more repeatable process. These units often come with built-in chaff collectors and timers, making the whole experience less messy and far more controlled.
You’ll always follow the manufacturer's instructions, but your senses are still your primary guide.
- First, charge the roaster with your pre-weighed green beans.
- Start the roasting cycle, keeping an eye on the temperature if your machine allows it.
- Listen for the first crack and make a note of the time it happens. This is your most important data point.
- End the roast based on your target development time after the crack and the colour of the beans.
Most dedicated roasters also have a built-in cooling cycle, which is a game-changer. It rapidly brings the bean temperature down to stop the roasting process dead in its tracks. This critical step locks in all those delicate aromas and flavours you've worked so hard to develop. While these machines are more of an investment, they provide the consistency needed to truly perfect your craft.
From First Crack to Cooling Your Beans
Roasting coffee at home is all about learning to listen to what the beans are telling you. The real magic happens in the final few minutes, a frantic period where just a few seconds can be the difference between a bright, vibrant coffee and a flat, baked one. Getting it right comes down to reading the cues—sight, sound, and smell—especially the all-important "first crack".
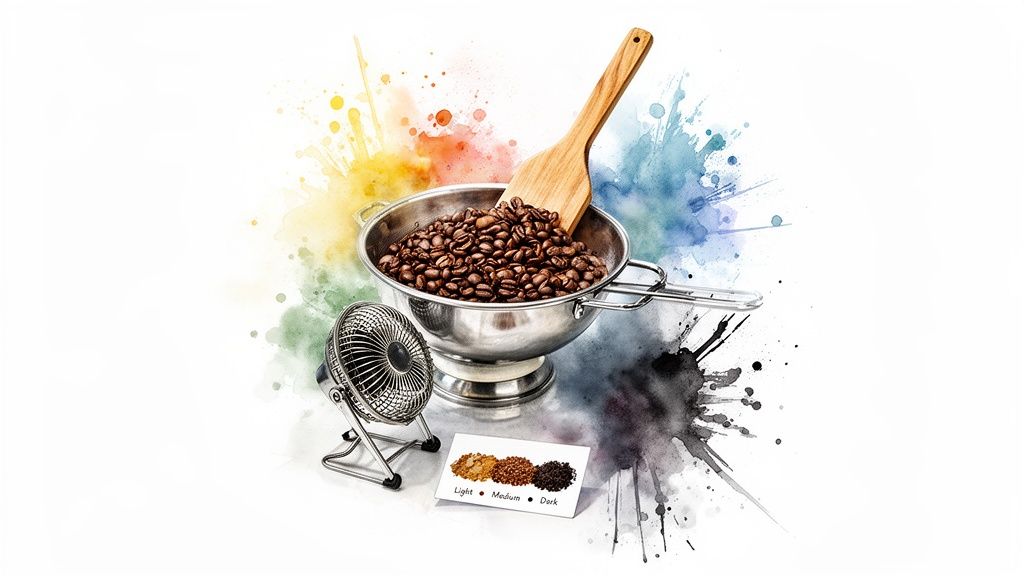
This setup, with colanders and a fan, is a perfect DIY solution for rapidly cooling your freshly roasted beans to lock in their flavour.
Understanding the Stages of Roasting
As the beans soak up heat, they go through a pretty dramatic transformation. The moment you hear that first pop, you’ve entered the development phase, which is where most of the flavour you'll taste is created.
If you stop the roast just after the first crack starts, you get a light roast, often called a 'Cinnamon' roast. The beans will be a pale brown colour with a dry, matte surface. This level is fantastic for highlighting the bright, acidic, and floral notes you find in beans from places like Ethiopia.
Let the roast go a bit longer, and you'll hit a medium or 'City' roast. You'll typically want to stop this just before the 'second crack' kicks in. The beans are a richer brown, a little bigger, and have a more balanced profile of sweetness, body, and acidity. It’s a really versatile roast that works for almost any brew method.
Keep going, and you're in dark roast territory. A 'French' roast, for example, is taken into and sometimes past the second crack. These beans are dark, almost black, and slick with oil. The bean's original character gives way to the deep, smoky, and bittersweet notes created by the roast itself.
Your personal taste is the ultimate guide. Start by aiming for a medium roast, as it’s a forgiving middle ground. From there, you can experiment with stopping the roast earlier or later to discover which flavour profiles you enjoy the most.
To help you get a feel for this journey, here's a simple guide to what you should be looking and listening for.
Visual Guide to Coffee Roast Levels
This table breaks down the key indicators for the most common roast levels, giving you a handy reference for your home roasting sessions.
| Roast Level | Visual Cue | Auditory Cue | Typical Flavour Notes |
|---|---|---|---|
| Light (Cinnamon) | Light brown, matte surface, no oil | Just after first crack starts | Bright acidity, fruity, floral, citrus |
| Medium (City) | Chestnut brown, slightly larger, minimal oil | End of first crack, before second crack | Balanced sweetness, caramel, nutty, rounded |
| Medium-Dark (Full City) | Darker brown, some oil spots visible | Beginning of second crack | Rich chocolate, spice, low acidity, heavy body |
| Dark (French) | Very dark brown, shiny with oil | Well into second crack | Smoky, bittersweet, carbon notes, thin body |
Each stage offers a completely different experience in the cup. The beauty of doing this yourself is the freedom to explore them all.
The Critical Cooling Process
Once your beans hit that perfect shade of brown, the job isn't quite done. They are incredibly hot and will continue to roast—or ‘bake’—from their own residual heat if you don't cool them down rapidly. This is arguably one of the most crucial steps to roast coffee at home successfully.
If you don't cool the beans quickly enough, you'll end up with a flat, lifeless coffee, undoing all your hard work. The goal is to get them down to room temperature in just a few minutes. This sudden stop locks in all the delicate aromatic compounds you've just created.
You don't need fancy gear for this. A popular and effective DIY method uses two large metal colanders. The second you stop the roast, tip the hot beans into one colander. Then, pour them back and forth between the two, ideally in front of a fan. The movement gets the heat out and also helps shake off any flaky chaff.
If you want to upgrade your setup, a dedicated cooling tray or other professional accessories can make things even more efficient. They often use powerful fans to pull cool air through the beans for a super-fast, consistent cool-down. Whichever route you take, fast cooling is non-negotiable for incredible flavour.
Resting, Storing, and Grinding for Peak Flavour
You’ve navigated the pops and cracks of the roast, cooled your beans to perfection, and now you're staring at your beautiful handiwork. It's incredibly tempting to grind them up and brew a cup straight away, but hold on. One of the biggest lessons in home roasting is learning the value of patience. The work isn't quite finished; your beans now need a crucial rest.
This resting period is known as degassing. Freshly roasted coffee is absolutely packed with carbon dioxide (CO2), a natural by-product of the roasting process. If you brew immediately, this excess gas gets in the way of proper extraction, creating a bubbly, uneven brew that often tastes disappointingly sour or underdeveloped. Giving your beans time to release this CO2 is essential for unlocking their full, intended flavour.
For most beans, a resting period of 24 to 72 hours is the sweet spot. Lighter roasts, which are denser, often benefit from a slightly longer rest—sometimes up to five days. During this time, the beans aren’t just releasing gas; complex aromatic compounds are also settling and developing, leading to a much more balanced and delicious cup.
The Best Way to Store Your Beans
Once your beans have had a chance to degas, the next priority is preserving that hard-won freshness. Oxygen, light, heat, and moisture are the sworn enemies of roasted coffee. Proper storage is all about creating a fortress against these elements.
The best solution by far is a dedicated airtight container. If you can, look for one with a one-way valve. This clever feature allows CO2 to continue escaping without letting destructive oxygen in. You can find a range of excellent coffee storage solutions perfect for keeping your home-roasted beans in peak condition.
- Location Matters: Keep your container somewhere cool and dark, like a kitchen cupboard, well away from the oven or any sunny windowsills.
- Avoid the Fridge: The refrigerator might seem like a good idea, but it's far too humid and can cause condensation that will completely ruin your beans. The freezer is also best avoided, as temperature fluctuations can damage the coffee's delicate cellular structure.
By following these simple steps, you can keep your home-roasted coffee tasting fantastic for up to four weeks, though you'll always notice the most vibrant flavours within the first two. For a more detailed breakdown, you can check out our complete guide on how to store coffee beans.
The Final Step: Grinding for Perfection
Grinding is the final, critical step before you brew, and it has a colossal impact on how your coffee tastes. Grinding just moments before you brew is non-negotiable if you want the best results. Pre-ground coffee loses its aromatic compounds incredibly quickly, resulting in a cup that tastes flat and lifeless compared to one made with freshly ground beans.
The UK's home coffee scene is booming. With rising café prices, a whopping 58.1% of consumers are now recreating coffee shop experiences in their own kitchens. This has led to more people investing in quality gear to elevate their home brew, moving beyond instant to appreciate the nuance of fresh coffee.
Pro Tip: If you can, invest in a quality burr grinder rather than a blade grinder. Burr grinders crush beans to a uniform size, which is essential for a clean, even extraction. Blade grinders just smash them into inconsistent pieces, leading to a muddled, unpredictable flavour. ADS Coffee Supplies offers a great selection of coffee grinders for every budget.
The size of your grind has to be matched to your brewing method. This is all about controlling the extraction time.
- Cafetière (French Press): This needs a coarse grind, similar to breadcrumbs, to prevent a silty, muddy cup.
- V60 or Drip Coffee: A medium grind, like granulated sugar, works best for a balanced pour-over.
- AeroPress: This method is famously versatile, but a fine to medium-fine grind is a great starting point for most recipes.
Getting the grind right is the final piece of the puzzle. It ensures you extract all the desirable sweetness and complexity from the beans you so carefully roasted, completing the journey from a simple green bean to a glorious cup.
Common Questions About Home Coffee Roasting
As you get ready to roast coffee at home, it’s completely normal to have a few questions rattling around. Roasting is a craft full of tiny details, and getting them right makes all the difference. To help you get started on the right foot, we’ve answered some of the most common queries we hear from new roasters.
How Much Smoke Does Home Roasting Create?
Let’s be honest: home roasting creates smoke. The real question is how much. A light, delicate roast will produce a surprisingly pleasant, sweet-smelling smoke that’s easy to manage. But as you push into darker territory, that smoke gets much thicker and more intense.
Good ventilation isn’t just a recommendation; it’s essential. Cracking a window and using a fan to direct the smoke outside is a simple and effective strategy. Roasting under your kitchen's extractor hood can also work a treat. If you've got the space, taking the whole operation outdoors to a patio or balcony is the easiest way to keep your kitchen smoke-free.
How Long Do Home Roasted Beans Stay Fresh?
Freshly roasted coffee is a living thing, and its flavour evolves. Your beans will hit their absolute peak between two to ten days after roasting. This is the 'degassing' period, where excess CO2 escapes, allowing the true, vibrant flavours to emerge.
Even after that window, your coffee will taste worlds better than most shop-bought bags for up to four weeks. But that initial period is where the magic truly is. To make sure every cup is at its best, try roasting smaller batches more often. And, of course, store your beans properly in an airtight container to lock in that freshness.
A Quick Tip: Resist the urge to grind your entire batch at once. As soon as you grind coffee, its aroma and flavour start to fade rapidly. Only grind what you need for your next brew to guarantee every cup is as incredible as the last.
Can I Use Any Green Bean for Any Roast Level?
Technically, you can, but you really shouldn't. The best roasters know that certain beans are practically born for specific roast profiles. Take a delicate, floral Ethiopian bean, for example. You’ll want to keep that at a light or medium roast to preserve its bright acidity and complex fruity notes, all of which would be completely bulldozed by a dark roast.
On the other hand, dense, robust beans from places like Brazil or Sumatra can handle the heat. They develop gorgeous, deep notes of chocolate and spice in darker roasts. While experimenting is half the fun, reading the bean descriptions is a fantastic shortcut. For instance, when you check out high-quality organic coffee beans from the UK, the tasting notes will give you a solid clue as to which roast level will make them sing.
What Is the Biggest Beginner Mistake?
The number one mistake we see beginners make is simply not paying close enough attention. The roasting process accelerates dramatically right at the end. The line between a perfect medium roast and a scorched, oily mess can be crossed in a matter of seconds. It's so easy to get distracted by your phone or a knock at the door.
Stay focused, especially as you approach first crack. Trust your eyes, ears, and nose, and be ready to start cooling the moment your beans hit the right colour. Another classic rookie error is cooling too slowly. If you let the beans sit in their own residual heat, they'll continue to 'bake' and the flavour will go flat, undoing all your hard work. Getting them cool quickly is just as crucial as the roast itself.
Ready to start your home roasting journey with the finest green beans? At Seven Sisters Coffee Co, we source exceptional single-origin beans perfect for every palate.