Your Ultimate Guide to the Hario V60 Pour Over
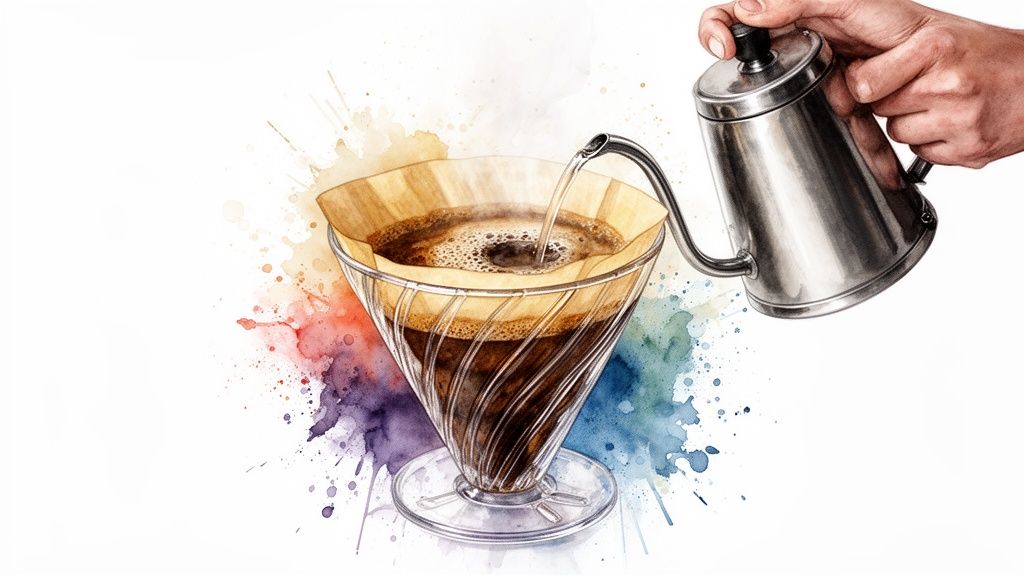
The Hario V60 is a classic for a reason. This manual pour-over method is loved by coffee pros and home brewers alike for the clean, bright, and wonderfully nuanced cups it produces. Its magic lies in its iconic 60-degree cone shape, a large single hole at the bottom, and distinctive spiral ribs. These features aren't just for show; they give you complete control over water flow and extraction, letting you craft a truly exceptional cup.
It’s this level of control that has made the V60 a firm favourite in UK homes and speciality coffee shops.
Why The Hario V60 Is A UK Coffee Favourite
The Hario V60 has truly cemented its place in British coffee culture. What started as a niche brewer is now a beloved tool for anyone serious about their coffee. Its popularity isn't a fleeting trend; it's a testament to the clarity and control it brings to brewing. For many, making a V60 coffee is a mindful morning ritual—a chance to connect with the process on a much deeper level.
Unlike automated machines that hide all the magic behind plastic and buttons, the V60 puts you squarely in the driver's seat. You're in charge of the grind, the water temperature, and, most importantly, the pour itself. This hands-on approach is exactly what allows you to unlock the unique and subtle flavours hidden within high-quality beans, like the ones we source at Seven Sisters Coffee.
The Genius in Simplicity
The V60’s design might look simple, but it’s incredibly effective. Every single element is precisely engineered to give you maximum influence over the final taste in your cup.
- The 60-Degree Cone: This specific angle is key. It encourages water to flow towards the centre, which extends the contact time between the water and the coffee grounds for a full, even extraction.
- A Large Single Hole: This feature is where you really get to play. You can alter the coffee’s character just by changing the speed of your pour. A faster pour typically creates a lighter body, while a slower, more deliberate one produces a richer, more intense flavour.
- Spiral Ribs: These ribs line the inside of the cone and serve a crucial purpose: they allow air to escape. This promotes an even expansion of the coffee grounds (the "bloom"), leading to a much cleaner and more balanced extraction.
A UK Brewing Phenomenon
Since it first landed on the British market around 2010, the V60 has seen a massive surge in popularity. Industry reports show that sales of manual pour-over equipment shot up by 45% between 2015 and 2020. By 2023, Hario V60 drippers accounted for roughly 32% of all home filter coffee makers sold in the UK, proving its enduring appeal.
The real beauty of the Hario V60 is how it transforms a daily routine into a craft. It’s not just about making coffee; it's about understanding the variables that create a delicious cup and tailoring them perfectly to your taste.
This level of control is what really sets it apart. While immersion methods have their own strengths, the V60’s percolation process is fantastic for highlighting the brighter, more delicate notes in a coffee. If you're curious about how it stacks up against other popular brewers, you might be interested in our guide comparing the V60 vs AeroPress. This little dripper prepares you to move from simply drinking coffee to truly crafting it.
Getting Kitted Out: Your Essential Hario V60 Toolkit
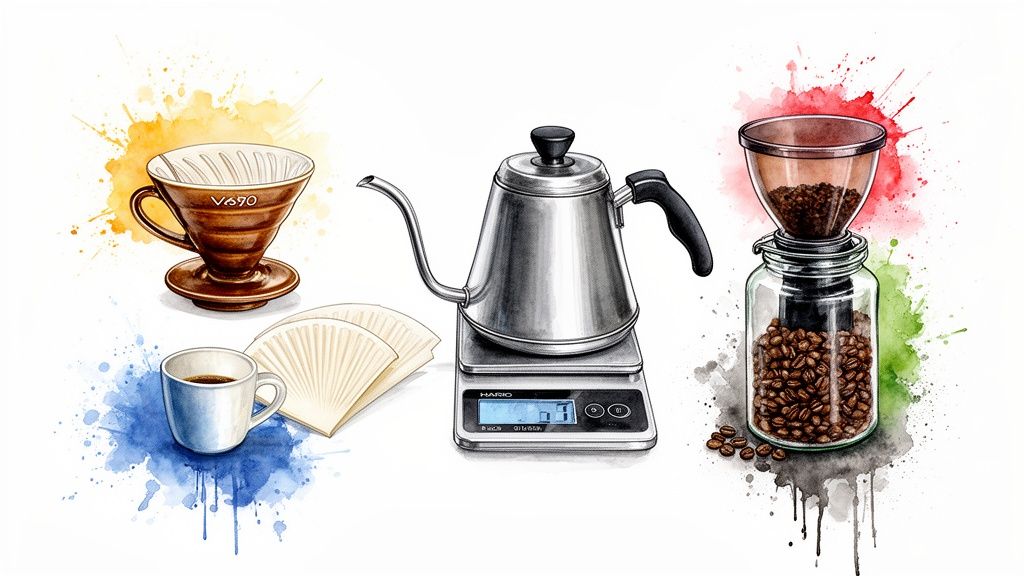
Before you can dive into that perfect pour, you need to get your gear in order. While the V60 dripper is obviously the star of the show, a few other key pieces will take your brew from just ‘good’ to genuinely exceptional. This isn't about collecting fancy gadgets; it's about building a reliable toolkit that gives you consistency and control.
Each bit of kit has a specific job, helping you manage the variables that make or break a great coffee. From water temperature to the exact weight of your beans, precision is what separates a forgettable cup from a memorable one.
The Non-Negotiables
For a quality Hario V60 pour-over, some items are simply essential. Trying to brew without them is like cooking without measuring spoons—you’re leaving far too much to chance.
- A Burr Grinder: Honestly, this is your most important investment. A good burr grinder gives you a consistent grind size, which is absolutely critical for an even extraction. Blade grinders just chop beans into random-sized bits, leading to a muddled cup with both bitter and sour notes.
- A Gooseneck Kettle: That long, thin spout isn't just for looks. It gives you incredible control over the flow and direction of your water. This precision is vital for saturating the coffee grounds evenly, especially during that all-important bloom phase.
- Digital Scales: Guessing your coffee-to-water ratio is a surefire way to get inconsistent results. A set of digital scales, ideally accurate to 0.1 grams, lets you measure your coffee and water precisely. This makes your delicious brew repeatable, time and time again.
- Hario V60 Filter Papers: Don't just grab any filter papers. The official Hario V60 filter papers are specifically designed to work with the dripper's unique shape and internal ribs, ensuring water flows at the right speed without adding any papery taste.
To make things even clearer, here's a quick checklist of the gear you'll need.
Your Hario V60 Pour Over Equipment Checklist
| Equipment | Why It's Essential | Recommended Link |
|---|---|---|
| Hario V60 Dripper | The cone-shaped brewer that defines the method, enabling precise control over flow and extraction. | Shop Hario Drippers |
| Burr Grinder | Ensures a uniform grind size for an even extraction, preventing bitter or sour flavours. | Shop Grinders |
| Gooseneck Kettle | Provides the slow, controlled pour needed to saturate the grounds evenly. A must-have for pour-over. | Shop Kettles |
| Digital Scales | Allows you to measure coffee and water with 0.1g accuracy, making your recipe repeatable. | Shop Scales |
| Filter Papers | Official Hario papers are designed for the V60's flow rate and won't impart a papery taste. | Hario V60 Filter Papers |
This setup gives you everything you need for a fantastic, consistent brew every single time.
Picking Your Perfect V60 Dripper
The Hario V60 itself comes in a few different materials, and your choice can come down to budget, durability, or how well it holds heat.
- Plastic: The most affordable and toughest option. It's great at retaining heat and is perfect if you're just starting out or want a dripper you can travel with.
- Ceramic: A classic choice that looks beautiful on any coffee bar. It holds heat exceptionally well but needs a good preheat and is more fragile.
- Glass: A stylish and easy-to-clean option that lets you watch the magic happen. Heat retention is good, but just like ceramic, you need to be a bit careful with it.
The V60's design is a masterclass in brewing science. Its iconic 60-degree cone, spiral ribs, and large hole at the bottom allow for a faster flow rate. This puts you, the brewer, in complete control of extraction time and the final flavour profile.
When the Hario V60 really took off in the UK around 2012, it was a game-changer for pour-over. Its V-shaped cone and large opening allow for filtration rates up to 30% quicker than older drippers. Funnily enough, the typical water hardness in UK cities like London actually pairs brilliantly with the V60, helping to hit those ideal extraction rates. You can dig deeper into the history and design of Hario V60 drippers on their website.
Dialling In Your Grind Size and Water Temperature
Once you’ve got your kit assembled, we get to the real heart of V60 brewing. You can have all the best gear in the world, but it won’t mean much without mastering two fundamentals: your grind size and your water temperature. Nailing these two elements is what elevates a brew from something flat or sour into coffee that’s genuinely special.
Think of grind and temperature as your main controls over extraction. The goal is to pull just the right amount of flavour from the grounds—not too little (which tastes sour) and not too much (which tastes bitter). Your grind size determines how quickly water flows through the coffee, while temperature affects how easily those delicious flavour compounds dissolve.
Nailing the Perfect Grind Size
Vague advice like "use a medium grind" is frustratingly unhelpful, isn't it? For a Hario V60, you're actually aiming for something more like a medium-fine consistency. The best comparison I can give you is caster sugar. It should feel a bit gritty between your fingers—definitely coarser than fine sand, but finer than the rock salt you’d find in a grinder.
If you go too coarse, like sea salt, the water will just rush through the coffee bed way too fast. This is called under-extraction, and it leads to a cup that tastes disappointingly sour, acidic, and thin. It simply hasn’t had enough contact time to pull out all the good stuff.
On the other hand, if your grind is too fine (think flour or powder), the water will get clogged up and struggle to pass through. This traffic jam causes over-extraction, where the water pulls out too many of the wrong compounds, leaving you with a brew that’s unpleasantly bitter and astringent. It’s all about finding that sweet spot in the middle.
Getting the grind right is arguably the single most important tweak you can make. One tiny adjustment on your burr grinder can be the difference between a brew that makes you wince and one that sings with the complex notes of your beans.
If you want to get a better visual on this, our comprehensive coffee grind size guide breaks it down even further for any brewer you might own.
Finding the Water Temperature Sweet Spot
Just as important as the grind is your water temperature. Use water that’s too cool, and you’ll get a weak, under-extracted coffee, no matter how perfect your grind is. But using water straight off the boil can actually scorch the grounds, introducing a bitter taste.
The ideal window for a Hario V60 is between 92-96°C. This range is hot enough to properly extract all those desirable flavours without scalding the coffee and ruining the delicate notes.
Here’s how to get there:
- With a Temperature-Control Kettle: This is the dream scenario. Just set your desired temperature, and you’re sorted. It’s the easiest way to guarantee consistency.
- Without a Special Kettle: No worries at all. Simply bring your water to a rolling boil, then take it off the heat. Let it stand for about 30-45 seconds before you start pouring. This will naturally bring it down into that perfect 92-96°C range.
Mastering these two variables gives you an incredible amount of control. When you start dialling in your grind and managing your water temperature, you stop just following a recipe and start actively shaping the flavour of your coffee. This is where the real fun begins.
A Reliable Hario V60 Brewing Recipe
Alright, we’ve covered the theory, so let's get our hands dirty and put that Hario V60 to work. This isn't just a list of instructions; think of it as your go-to starting point, a reliable and repeatable method for countless fantastic brews. We're going to use the classic 1:16 coffee-to-water ratio, which is a brilliant foundation for a balanced, flavourful cup.
For this recipe, we’re making a single serving: 15g of coffee to 240g of water. It's the perfect ratio for highlighting the delicate, interesting notes in single-origin beans without being too intense. Try to approach this less like a chore and more like a mindful ritual—the sights, sounds, and smells are all part of the experience.
This simple flowchart breaks down the core variables you'll be controlling during the brew, from the grind size right through to the water temperature.
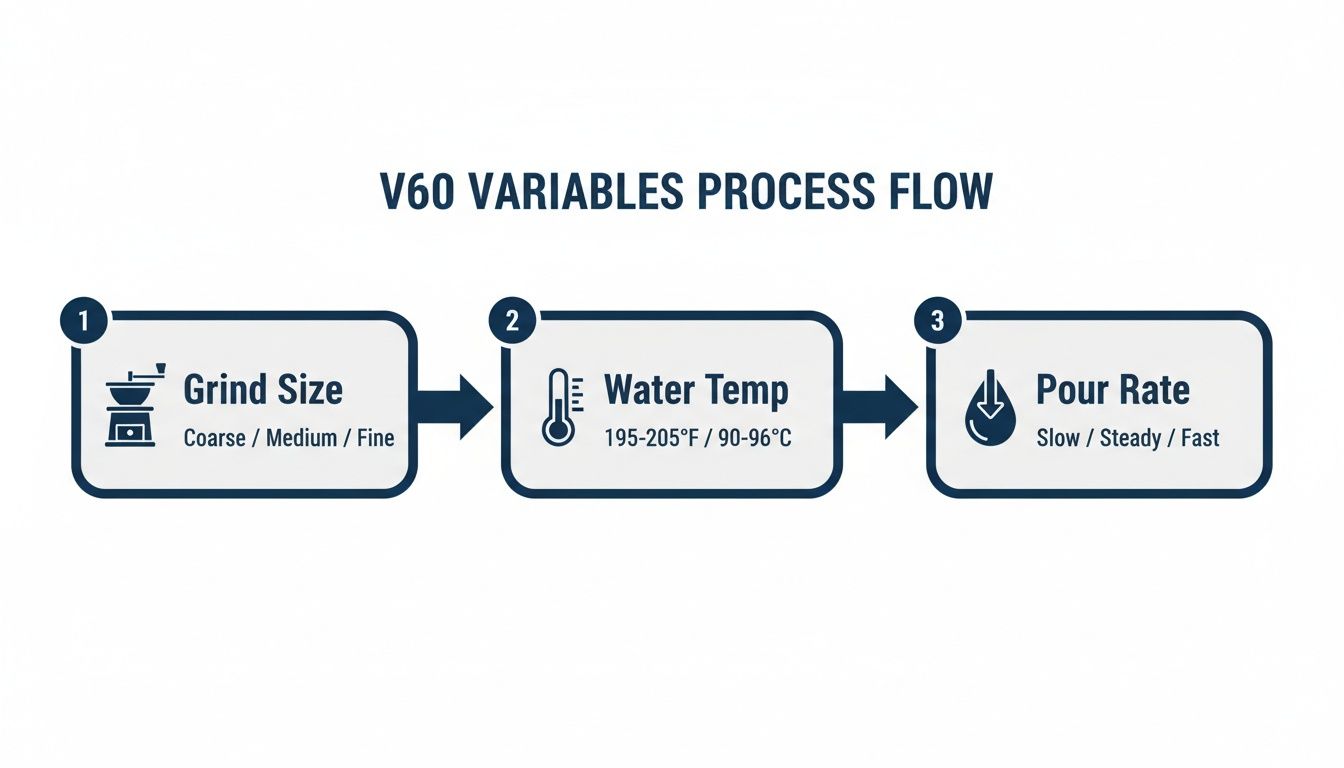
Mastering the flow from grinding your beans to managing the water temperature is the most direct path to controlling the final flavour in your cup.
The Pre-Brew Setup
Before a single drop of water hits the coffee, a little bit of prep work makes all the difference. This just makes sure your gear is ready and won't throw off the flavour of your final brew.
- Heat Your Water: Bring a bit more water than you need (around 350g) to a boil. Once it's boiled, let it sit for about 30-45 seconds to cool down into that sweet spot of 92-96°C.
- Rinse the Filter: Pop a paper filter into your V60 dripper and set it on top of your mug or server. Pour some of that hot water through, making sure to wet the entire paper. This little step gets rid of any papery taste and, just as importantly, preheats your dripper and whatever you're brewing into.
- Discard and Weigh: Tip out the rinse water. Now, add your 15g of medium-fine ground coffee to the filter. Give it a gentle tap or shake to create a flat, even bed of grounds. Place the whole setup onto your digital scales and press tare to set them back to zero.
I can't stress this enough: that initial rinse is non-negotiable. A cold dripper will suck the heat right out of your water, leading to a sour, under-extracted coffee. Preheating everything keeps your brew temperature stable from start to finish.
Mastering the Timed Pour
Now for the main event. The whole brewing process, from the first pour to the final drip, should take about 2 minutes and 30 seconds. We’ll do this in a couple of distinct stages to make sure we get a really even and complete extraction. The second you pour the first drop of water, start your timer.
The Bloom (0:00 – 0:45)
The bloom is easily the most dramatic-looking part of making a pour-over. It’s a small, initial pour that lets all the trapped CO2 gas rush out of the fresh coffee grounds.
Gently pour 50g of water over the grounds, moving in a circle to make sure you saturate everything evenly. You’ll see the coffee bed puff up and bubble—that’s a great sign of fresh coffee. Just let it sit and "bloom" for 45 seconds. This step is crucial for avoiding sourness and unlocking the coffee's full flavour potential.
The Main Pour (0:45 – 2:00)
Once the bloom has settled, it's time to add the rest of the water. The goal here is to pour slowly and consistently, keeping the water level in the dripper steady.
- From the 0:45 mark, start pouring again. Use a slow, controlled, circular motion, starting in the centre and spiralling your way out. Just try to avoid pouring directly onto the sides of the filter paper.
- Keep this up until your scales read 240g. You should be hitting this total weight right around the 2:00 mark.
The water should finish dripping through the grounds (what we call the "drawdown") at about 2:30. If it drains much faster, your grind is probably too coarse. If it takes a lot longer, it’s likely too fine. And if you're not one for weighing everything and prefer using scoops, our guide on how many tablespoons of coffee per cup can give you a decent starting point.
Give the finished coffee a little swirl to mix all those lovely flavours together. Now, sit back and enjoy the results of your hard work.
Troubleshooting Common V60 Brewing Problems
Even the most seasoned home barista has an off day. We’ve all been there – you follow the steps perfectly, but the result is just… disappointing. A frustrating brew isn’t a failure, though. Think of it as a valuable lesson in disguise. If your Hario V60 pour-over isn’t hitting the mark, this section is your diagnostic tool for figuring out what’s gone wrong and how to get back on track.
Every sip tells a story about the extraction process. Your first job is to identify the main flavour issue. Is it bitter, sour, or just disappointingly weak? From there, you can trace it back to the likely cause. The fix is usually just a simple tweak to one of your key variables.
Is Your Coffee Unpleasantly Bitter?
If your coffee leaves a harsh, dry, or astringent taste in your mouth, you're almost certainly dealing with over-extraction. This is what happens when water spends too much time mingling with the coffee grounds, pulling out all the good stuff and then starting on the unwanted bitter compounds.
The most common culprit here is a grind size that’s just too fine. It creates a dense coffee bed that slows the water down to a crawl, leading to a brew time that’s way too long.
The Fix: Try coarsening your grind slightly on your next attempt. Just one or two clicks coarser on your grinder can make a world of difference. This will let the water flow through more freely, cutting down the total contact time and leading to a much more balanced, sweeter cup.
When Your Coffee Tastes Sour
On the flip side, you might get a coffee that tastes sour, unpleasantly acidic, or thin, almost like biting into an unripe piece of fruit. This is the classic sign of under-extraction. It means the water hasn’t had enough time or energy to dissolve all the delicious sugars and complex flavours locked inside the coffee.
This can be caused by a grind that's too coarse, which lets the water rush through without picking up enough flavour. Another big factor could be your water temperature being too low to properly do its job. If you want to dive deeper into this, you can learn all about the best water temperature for coffee in our detailed guide.
A sour coffee is simply an undeveloped one. Think of it as a sign that all the sweet, complex notes are still locked inside the bean, just waiting for you to make the right adjustment to release them.
To get things back on track, you have two main options:
- Adjust the Grind: Make your grind setting a touch finer. This increases the surface area of the coffee and slows down the water flow, giving it more time to work its magic and pull out those sweeter notes.
- Increase Water Temperature: Check that your water is within that ideal 92-96°C range. Water that’s too cool just doesn’t have the energy to extract the good stuff properly.
Your Hario V60 Questions, Answered
Even with the perfect recipe in hand, a few questions always pop up when you're getting to grips with a new brewing method. Think of this as a quick-fire round of answers to the most common queries we get about the Hario V60—a handy reference you can come back to whenever you need it. We’ll cover everything from ratios to cleaning, making sure you feel confident with every pour.
What Is the Best Coffee to Water Ratio for a Hario V60?
A fantastic starting point for any V60 brew is a 1:16 coffee-to-water ratio. That just means for every 1 gram of coffee, you’ll want 16 grams (or millilitres) of water. For a single cup, this usually looks like 15g of coffee and 240g of water.
Of course, this is completely down to your personal taste. If you're after a stronger, more robust brew, try tightening that ratio to 1:15 or even 1:14. For a lighter-bodied cup that really lets those delicate notes sing, you could push it out to 1:17. We always suggest starting with 1:16 and tweaking from there to find what you love.
Why Does My V60 Coffee Taste Bitter or Sour?
The final taste of your brew is giving you direct feedback on your technique. If your coffee is unpleasantly bitter, astringent, or just tastes a bit hollow, it's almost certainly over-extracted. This usually points to a grind that's too fine, or a total brew time that's dragging on for too long. The simplest fix? Make your grind a little coarser.
On the other hand, if your coffee tastes sour or has a noticeable lack of sweetness, it’s likely under-extracted. This is often caused by a grind that's too coarse, letting the water rush through without enough contact time. Try making your grind finer to slow things down and hit that sweet spot.
Think of your coffee's taste as direct feedback. Bitterness is telling you, "Slow down, you're doing too much." Sourness is saying, "Speed up, I need more time with the water." Listening to these cues is the fastest way to dial in your brew.
Can I Use Pre-Ground Coffee with My Hario V60?
While you technically can, we strongly advise against it if you're chasing the best results. The Hario V60 is notoriously sensitive to grind size, and pre-ground coffee is rarely the right consistency for an optimal pour-over.
More importantly, coffee starts losing its vibrant flavour and aroma within minutes of being ground. Using freshly ground whole beans will make a world of difference—an improvement you'll taste in the final cup immediately.
How Do I Clean My Hario V60 Dripper?
Thankfully, keeping your V60 clean is incredibly simple. For the plastic, ceramic, and glass models, just toss the used filter and grounds, then give it a thorough rinse with hot water after each use. That’s usually enough.
For a deeper clean now and then, a bit of washing-up liquid and a soft sponge will do the trick. While all Hario V60 drippers are generally dishwasher safe, a quick rinse by hand is all it really needs to stay pristine.
Ready to start your Hario V60 journey with the best gear? Explore our curated selection of drippers, kettles, and scales at ADS Coffee Supplies. You can browse our full Hario collection here.