AeroPress Grind Size: The Definitive Guide to a Perfect Brew

The secret to a consistently brilliant cup of AeroPress coffee isn’t some complex, ten-minute recipe or ridiculously expensive beans—it’s the AeroPress grind size. If you’re just starting out, aim for a medium-fine grind, something that looks and feels a bit like table salt. This is the sweet spot that gives you the ideal balance of flavour for the brewer's quick and immersive style.
Why Grind Size Is Your Most Powerful Brewing Tool
Before you even think about twisting the dial on your grinder, it’s worth understanding why grind size has a bigger impact on your coffee's flavour than almost any other variable.
Think of each coffee bean as a tiny, locked capsule packed with all the good stuff—oils, acids, and sugars. Your goal as a brewer is simple: dissolve just the right amount of these compounds into hot water.
Grind size is the master key that unlocks all that flavour. When you grind your coffee, you dramatically increase its surface area, which controls how quickly water can get in and pull out those flavour compounds. It’s the same reason a spoonful of caster sugar dissolves in your tea instantly, while a solid sugar cube takes its sweet time.
The Science of Extraction
This whole process is called extraction, and finding the perfect balance is everything. Get it wrong, and you’ll end up with one of two pretty disappointing results:
- Under-extraction: This is what happens when your grind is too coarse. Water zips through the grounds too quickly, failing to grab enough of the sweet, desirable compounds. Your brew will taste disappointingly sour, acidic, and a bit thin.
- Over-extraction: This is the opposite problem, and it's caused by a grind that’s far too fine. The water hangs around for too long and pulls out too much, including unwanted bitter and astringent compounds. This leaves you with a harsh, chalky, and hollow-tasting cup.
The AeroPress's unique plunging method is more forgiving than many other brewers, as the pressure helps ensure a more even extraction. However, this forgiveness doesn't make grind size less important—it just gives you a wider 'sweet spot' to aim for.
Unlocking Your AeroPress Potential
Getting a handle on grind size is what will take you from a good cup of AeroPress coffee to a great one, every single time. It gives you precise control over the final taste, allowing you to fine-tune your brew to perfection.
While our general coffee grind size guide offers a fantastic overview, understanding the 'why' for your AeroPress is what empowers you to make smart adjustments on the fly. This foundation is crucial before we jump into the practical steps of dialling in your specific settings.
Your Starting Point for the Perfect AeroPress Grind
Alright, now that we've covered the theory behind extraction, let's get practical. When you're staring at all the numbers and notches on your grinder, knowing where to even begin can feel like half the battle. The good news is, there’s a well-trodden path that almost always leads to a great cup of AeroPress coffee.
For the vast majority of recipes you'll come across, the gold standard is a medium-fine grind.
This specific texture strikes the perfect balance for the AeroPress’s unique immersion-style brew. It creates just enough surface area to pull out all the rich, complex flavours within a typical 1-3 minute brew time, but it’s not so fine that you risk introducing harsh bitterness into your cup. It’s the sweet spot.
What Does Medium-Fine Look and Feel Like?
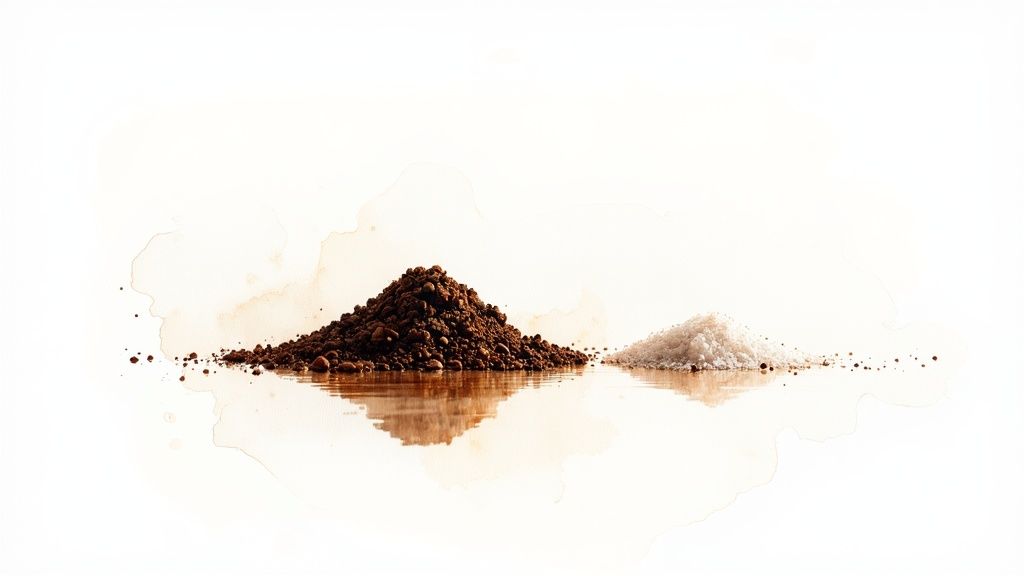
The most common comparison you'll hear is table salt, and for good reason—it’s a surprisingly accurate guide. If you tip a little of your ground coffee into your palm, the particles should have a similar size and feel. It won’t be powdery like flour (that's far too fine), but it won't feel coarse and chunky like sand, either.
This simple, tactile reference is incredibly handy, especially when you're setting up a new grinder or trying to nail down a recipe you found online. It gives you a reliable benchmark to get you in the right ballpark before you even add water.
To help you visualise and understand the differences, here’s a quick guide to some common grind sizes and how they typically affect an AeroPress brew.
AeroPress Grind Size Quick Reference Guide
This table provides a simple, at-a-glance comparison to help you match your grind size to your desired flavour profile. Use it as a starting point for your own experiments.
| Grind Size | Visual Texture | Typical Flavour Profile (Starting Point) | Ideal For |
|---|---|---|---|
| Fine | Powdered Sugar / Flour | Bright, high acidity; can be bitter or sour if not dialled in | Quick, espresso-style shots or recipes under 60 seconds |
| Medium-Fine | Table Salt | Balanced, sweet, and complex; the "gold standard" | Most standard and inverted recipes (1-3 minute brews) |
| Medium | Granulated Sugar | Mellow, rounded; less intense flavour | Longer immersion times or larger "bypass" style brews |
| Coarse | Sea Salt / Coarse Sand | Light-bodied, tea-like; can taste weak or under-extracted | Cold brew concentrates or experimental long brews |
This visual guide should make it easier to identify where your grind currently sits and how a small adjustment might change your final cup.
A consistent grind is absolutely crucial. A good burr grinder ensures all your coffee particles are a uniform size, which is the secret to a clean, balanced, and repeatable brew. Blade grinders, on the other hand, create a chaotic mix of dust and boulders, leading to messy, uneven extraction.
The medium-fine grind, which sits somewhere between 400–600 microns, has become the undisputed starting point for AeroPress lovers across the UK. It’s the perfect middle ground between a super-fine espresso grind and a much coarser filter setting, giving you the best of both worlds for this brewing method.
Finding Your Baseline on a Burr Grinder
While "table salt" is a great visual cue, the next step is translating that to your grinder's settings. Of course, every grinder is calibrated a bit differently, but we can offer some solid starting points for popular models you’re likely to have on your kitchen counter.
Here are a few suggested settings to hit that medium-fine sweet spot:
- Wilfa Svart: A great place to start is with the red marker right in the middle of the 'AEROPRESS' text on the hopper. You can find the Wilfa Svart Coffee Grinder here.
- Baratza Encore: Aim for a setting somewhere between 12 and 16. This is a widely recommended range. Find the Baratza Encore ESP Coffee Grinder on our site.
- Comandante C40: Try around 18-24 clicks from the tightest setting (zero).
- Timemore C2/C3: Start with 13-16 clicks from fully closed. Check out the Timemore Chestnut C3 Hand Grinder.
Remember, these are just starting points. Things like the density of the bean or how dark it's roasted will mean you'll need to make small tweaks, which we'll dive into next. The goal here is to give you a confident first step and take the guesswork out of that first brew.
If you're weighing up your options, our guide on choosing a hand grinder vs an electric coffee grinder can give you some more context. From this solid, medium-fine baseline, you’re perfectly set up to start experimenting and dialling in your perfect cup.
Tweaking Your Grind for Different AeroPress Recipes
The AeroPress isn't just a coffee maker; it's a playground. Its sheer versatility means you can pull anything from a quick, punchy shot to a long, mellow filter-style brew. But here’s the catch: each recipe demands its own specific grind size to really sing. Sticking to one grind setting while you switch up your technique is like trying to use the same gear to climb a steep hill and race on a flat road—it just won’t get you the best results.
Your medium-fine baseline is a brilliant place to start, but let's look at how to adapt it for some of the most popular recipes out there. The moment you change your brew time or your method, your grind needs to follow suit to keep that extraction perfectly balanced.
Standard vs. Inverted Method
Two main techniques dominate the AeroPress world: the standard (or 'classic') way and the inverted method. They might look similar at a glance, but the way they handle the coffee and water has a direct impact on the grind you should be using.
- Standard Method: This is the classic approach. You pop the AeroPress on top of your mug, add your coffee and water, then plunge. A little bit of coffee will start dripping through the filter almost immediately, a process sometimes called 'bypass'. A solid medium-fine grind is your best friend here, as it slows that drip-through just enough without making the final plunge a workout.
- Inverted Method: For this one, you start with the AeroPress upside down. This creates a full-immersion environment where not a drop of coffee can escape until you flip it over and press. Because all the water is in contact with all the coffee for the whole brew time, extraction happens a little more intensely.
To sidestep over-extraction and the bitterness that comes with it, it’s a good move to coarsen your grind by one or two clicks from your standard setting when using the inverted method. This small tweak compensates for that longer, uninterrupted contact time.
Getting to grips with both the standard and inverted methods is a fantastic way to broaden your coffee skills. If you're after a detailed walkthrough, you can explore our complete guide on how to use an AeroPress, which breaks down the basics of both techniques.
Grinding for Speciality AeroPress Recipes
Once you move beyond the two core methods, a whole world of creative recipes opens up. Each one is designed to pull something different out of the coffee, and each one needs a thoughtful tweak of your grinder dial. If you're keen to experiment, a versatile brewer like the AeroPress Coffee Maker is the perfect tool for the job.
The 'AeroPress Espresso' Shot
This is a crowd favourite. The goal is to create a short, highly concentrated coffee that has the strength and body of a true espresso. To get there, you need to extract a massive amount of flavour in a seriously short time—often under 60 seconds.
This calls for a much finer grind, something getting close to what you'd use for a proper espresso machine. You'll need to dial your grinder several clicks finer than your medium-fine baseline. This move dramatically increases the coffee's surface area, letting the water rip out all that intense flavour in a flash. Just be warned: the plunge will be much tougher, so slow and steady pressure is key.
Bypass or 'Americano-Style' Brews
On the other end of the scale, you have bypass recipes, which are all about making a larger, filter-style cup. These methods often use a standard dose of coffee but a much longer steep time, before you dilute the final brew with extra hot water (that's the 'bypass' part).
For these long-haul immersion recipes (we're talking 3-5 minutes), you'll want to switch to a medium to medium-coarse grind. This stops the coffee from over-extracting during that extended steep, keeping bitterness out of the picture and giving you a cleaner, more delicate cup. Start by going 3-5 clicks coarser than your baseline and see how it tastes.
How to Dial In Your Grind by Taste and Feel
Grinder settings are just numbers on a dial; your palate is the real judge. Moving beyond prescribed recipes is all about learning to listen to what the brew is telling you. This hands-on process of ‘dialling in’ is what separates a good cup from a consistently great one.
The best place to start is by brewing a cup with your baseline medium-fine grind and tasting it carefully. Your taste buds will give you all the clues you need to make the right adjustment. It's a simple troubleshooting framework that works every time.
Interpreting the Taste of Your Brew
Think of your first sip as a diagnostic tool. Coffee flavour generally exists on a spectrum from sour to bitter. Your goal is to land right in that sweet spot in the middle.
Here’s how to translate what you’re tasting into direct action:
- If your coffee tastes sour, sharp, or thin: This is the classic sign of under-extraction. The water didn't have enough time or surface area to pull out the sweet compounds, leaving you with mostly acids. The fix is simple: grind your coffee finer on your next attempt.
- If your coffee tastes bitter, harsh, or chalky: You've gone too far the other way into over-extraction. The fine grind allowed the water to pull out too much, including those unpleasant bitter compounds. The solution? Grind your coffee coarser.
Making these small, taste-led adjustments is the secret to unlocking a coffee's full potential. A quality burr grinder makes this process far more precise and repeatable, giving you the control to make those tiny, impactful changes.
Remember to change only one variable at a time. If you adjust your grind, keep your coffee dose, water temperature, and brew time exactly the same. That way, you know for sure any change in taste is a direct result of your grind adjustment.
Using Physical Feel as a Guide
Beyond taste, the physical act of brewing gives you another layer of sensory feedback. The resistance you feel when you press the plunger is a direct indicator of your grind size and how well the extraction is going.
Pay close attention to the plunge. A well-dialled-in AeroPress grind size should offer a gentle, steady resistance, typically taking around 20-30 seconds to press fully. If your experience is different, that’s another clue.
- The Plunge is Too Fast: If the plunger slides down with almost no effort, your grind is likely too coarse. Water is just rushing through the coffee bed without building any pressure, leading to that sour under-extraction we just talked about.
- The Plunge is Too Hard: On the flip side, if you’re really struggling to press the plunger down, your grind is almost certainly too fine. The coffee grounds have created a dense, compact puck that’s blocking the water flow, which will result in a bitter, over-extracted cup.
This decision tree shows how you can use your brewing goals to guide your initial approach, whether you're aiming for a standard cup, an inverted brew, or a strong espresso-style shot.
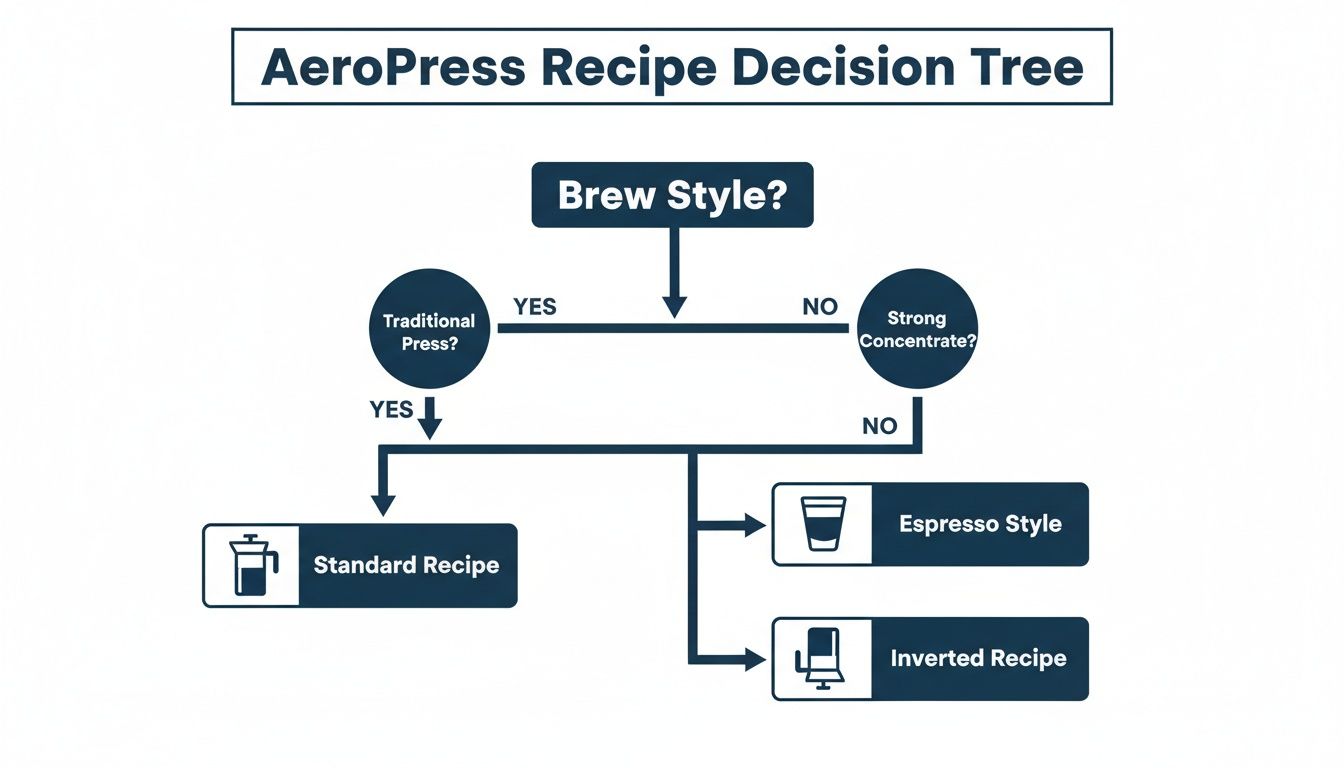
As the chart shows, different AeroPress methods call for distinct starting points for your grind, which you can then fine-tune using taste and feel. And of course, the freshness of your beans plays a huge role in this process; if you want to get that right, you might find our guide on how to store coffee beans properly useful.
By combining taste with these physical cues, you move from just following a recipe to having a real conversation with your coffee.
Matching Your Grind Size to Your Coffee Beans
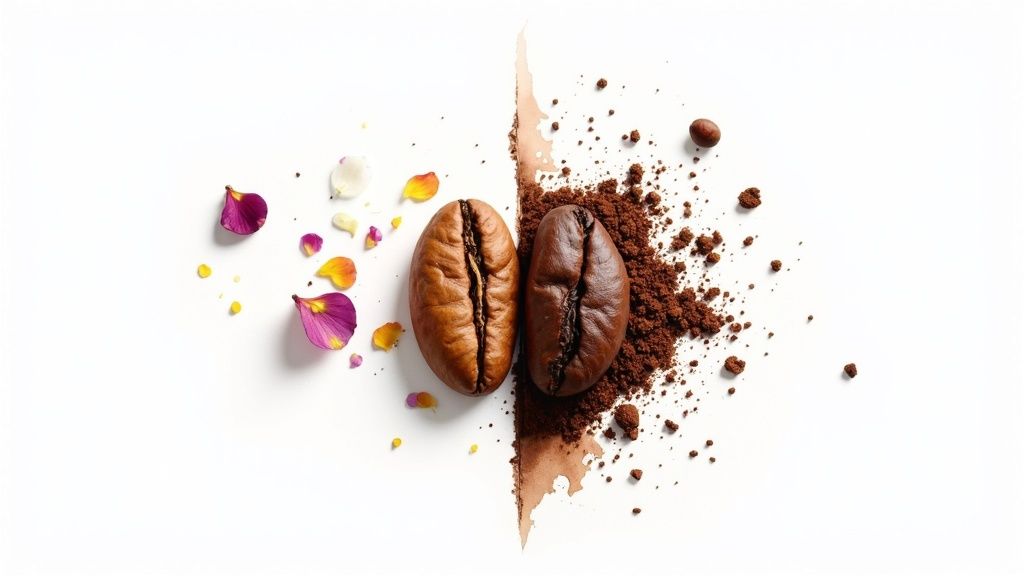
It’s a simple truth in coffee: not all beans are created equal. Their origin, how they were processed, and especially their roast level all play a huge part in how they’ll behave in your AeroPress. A one-size-fits-all approach to grind size will only get you so far.
To really unlock the unique character of a particular coffee, you need to adapt your grind setting to respect its differences. The roast level is probably the biggest factor here, as the roasting process completely changes the bean's physical structure, affecting both its density and how easily its flavours are extracted.
Light Roasts vs Dark Roasts
Light Roasts: These beans are dense and much less porous because they’ve spent less time in the roaster. This structure makes it harder for water to penetrate and extract all those delicious flavour compounds. To compensate, light roasts almost always need a finer grind.
Going finer increases the coffee's surface area, giving the water more to work with during the short AeroPress brew time. It's the key to pulling out the bright, complex, and often floral or fruity notes that light roasts are famous for, helping you avoid a disappointingly sour, under-extracted cup.
Dark Roasts: On the other end of the spectrum, dark roasts are more brittle and porous. They’ve spent much longer in the heat, making them far more soluble. This means their flavours are extracted very easily—sometimes too easily.
Using a fine grind on a dark roast is a recipe for a bitter, ashy brew. To avoid this over-extraction, you’ll want to use a coarser grind. This slows everything down, allowing you to capture the rich, deep notes of chocolate and caramel without any of that harsh bitterness creeping in.
Think of it like this: a light roast is a tightly locked treasure chest that needs a more intricate key (a finer grind) to open. A dark roast is a chest that's already slightly ajar, requiring a gentler touch (a coarser grind) to avoid spilling its contents.
Practical Examples with Seven Sisters Coffee
Let’s put this into practice with a couple of coffees. Say you’re brewing two very different beans from our fantastic selection.
- For a floral Ethiopian Yirgacheffe (a classic light roast): You’d want to start a few clicks finer than your usual medium-fine baseline. This adjustment will help highlight its delicate, tea-like body and vibrant citrus notes.
- For a rich, earthy Sumatran Mandheling (a typical dark roast): Here, you should start a few clicks coarser. This will bring its deep, syrupy body and chocolatey sweetness to the forefront while keeping any potential bitterness in check.
Making these small adjustments based on the bean allows you to tailor your AeroPress grind size to the coffee's unique potential. It’s this thoughtful approach that ensures you're always brewing the best possible version of that coffee. For more specific pairing tips, check out our guide on the best coffee for AeroPress.
Still Have Questions About AeroPress Grind Size?
Even with the best guides in hand, a few questions always seem to surface when you're deep in the process of perfecting your brew. Let's tackle some of the most common queries we get about dialling in that perfect AeroPress grind.
Can I Get Away With a Blade Grinder for My AeroPress?
Technically, yes, but if you're chasing a truly delicious and consistent cup, we'd strongly urge you not to. A blade grinder doesn't actually grind your beans; it violently smashes them into a chaotic mess of fine dust and coarse chunks.
This unevenness is a recipe for a poor extraction. The super-fine dust over-extracts almost instantly and turns bitter, while the larger pieces under-extract and taste sour. For the kind of control needed to make an AeroPress sing, a quality burr grinder is the single best investment you can make for your coffee setup.
How Much Should I Tweak My Grinder Setting at a Time?
When you’re dialling in your grind size, the key is to think small. A single 'click' or 'notch' on a decent burr grinder can make a surprisingly noticeable difference to the flavour in your cup.
The trick is to make just one tiny adjustment at a time. Brew another cup, keeping everything else—your dose, water temperature, and brew time—exactly the same. Give it a taste before you even think about changing anything else. If you make big jumps in your settings, you’ll almost certainly overshoot that perfect sweet spot and end up chasing your tail.
The goal here is to be methodical and patient. Small, incremental changes are how you lock in that perfect taste without getting completely lost.
Does the Age of My Coffee Beans Affect the Grind Size?
It absolutely does. As roasted coffee gets older, it gradually off-gases carbon dioxide (CO2), becoming more porous and soluble in the process. This means you often need to grind slightly coarser for older beans to get the same extraction you had when they were fresh.
If you find your daily brew suddenly tastes a bit harsh or bitter using the exact same settings, try coarsening your grind by just one click. On the flip side, very fresh beans are much denser and might need a slightly finer grind to extract all their delicious flavours properly.
Ready to put all this knowledge into practice with beans that truly shine in an AeroPress? Here at ADS Coffee Supplies, we proudly stock a fantastic range from Seven Sisters Coffee Co.
Explore the full Seven Sisters Coffee Co collection and find the perfect bag to start experimenting with your grind.