How to Make Cortado at Home: Your Ultimate UK Barista Guide

Making a cortado at home is all about that beautiful balance: equal parts rich espresso and silky, steamed milk. This precise 1:1 ratio is what makes the drink so special. It creates a perfect harmony where the authentic flavour of the espresso gets to shine without being drowned out.
Why the Cortado Is a Home Barista Favourite
Welcome to your complete guide for crafting the perfect cortado, right from your own kitchen. Think of this less as a rigid recipe and more as a masterclass in balancing intense espresso with beautifully textured milk. The cortado, originally from Spain, has become a firm favourite in UK coffee shops for a good reason—it’s adored by anyone who wants a strong yet incredibly smooth coffee.
Its name comes from the Spanish verb cortar, which means "to cut." This perfectly captures how the steamed milk ‘cuts’ through the espresso’s intensity and acidity. The result is a drink that’s:
- Punchier than a latte: With much less milk, the complex profile of your espresso beans remains the star of the show.
- Smoother than a macchiato: It has more milk than a macchiato, which is really just an espresso ‘marked’ with a tiny dollop of foam.
- Perfectly balanced: That 1:1 ratio creates a synergy between coffee and milk that many people, myself included, find absolutely spot on.
This drink really does occupy the sweet spot in the coffee world, something you can read more about in our guide to the different types of coffee drinks.
The Rise of At-Home Coffee Crafting
The buzz around making cortados at home is part of a much bigger shift we’re seeing in the UK. While Brits get through an astonishing 98 million cups of coffee every day, the ever-rising cost of a café coffee has spurred a wave of home brewing enthusiasm. With prices out and about climbing steeply since 2022, learning to make your favourite drinks at home is not just a rewarding new skill, but a pretty smart financial move too. You can get more details on the nation’s coffee habits in this comprehensive report.
A cortado is the perfect drink for the home barista. It’s simple enough to get right without a professional setup, yet sophisticated enough to feel like a real café indulgence. It truly is the best of both worlds.
Before you even think about grinding those beans, getting your head around this concept of balance is the key to success. This guide will walk you through every single step, making sure you can confidently whip up this exceptional drink whenever the craving hits.
Equipping Your Home Coffee Bar
Before you can pull that perfect shot, let's get your toolkit sorted. Making a genuine cortado at home really comes down to having the right gear, but don't worry—you don't need a full-blown café setup on your countertop. You have more flexibility than you might think, with some fantastic options out there for every budget and level of ambition.
To truly elevate your morning ritual, you'll need the right tools. You can find all the essential home coffee equipment to build out your ideal coffee bar. From the machine that brews your coffee to the glass you serve it in, every piece has a role to play.
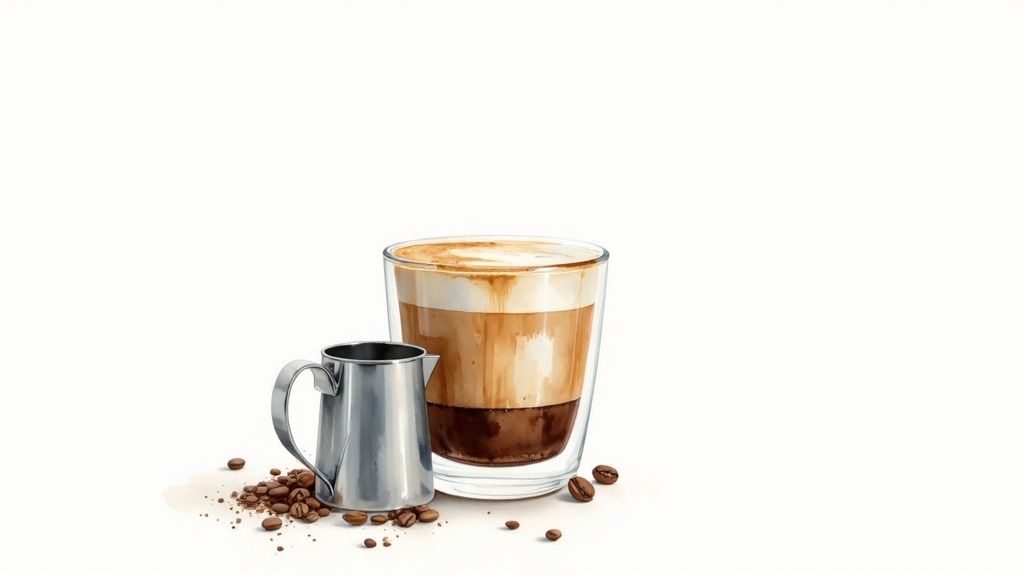
Creating Espresso-Style Coffee
The heart of any cortado is a concentrated, flavour-packed shot of coffee. A traditional espresso machine is the gold standard for that unmistakable pressure and texture, but it's by no means your only path to success.
Here's a breakdown of the most common methods people use to get that espresso-like base at home.
| Brewing Method | Pros | Cons | Best For |
|---|---|---|---|
| Espresso Machine | Authentic texture, rich crema, powerful flavour. | Higher cost, requires learning and maintenance. | The dedicated home barista seeking café-quality results. |
| Moka Pot | Affordable, produces strong and concentrated coffee. | Lacks the high pressure and crema of true espresso. | Those wanting a classic, budget-friendly stovetop option. |
| AeroPress | Versatile, quick, and creates an intense, espresso-like shot. | Smaller volume, more manual effort involved. | Coffee lovers who enjoy experimenting and need a portable brewer. |
Each of these methods can produce a fantastic cortado base. It really just comes down to your budget, counter space, and how deep you want to dive into the world of coffee making.
The Essential Tools For Milk Texturing
Getting that signature silky, velvety milk is just as crucial as the coffee itself. The goal is microfoam—a smooth, wet-paint-like texture—not the stiff, bubbly foam you'd find on a traditional cappuccino.
Many espresso machines come with a built-in steam wand, which is the ideal tool for creating perfect microfoam. If your machine doesn't have one, or you're using a Moka pot or AeroPress, don't fret. An electric milk frother is an excellent substitute that can heat and texture your milk with the press of a button. For a more hands-on, budget-friendly approach, a simple manual frother can also get the job done with a bit of practice.
Key Accessories You Cannot Skip
Beyond the main brewing and frothing gear, a few smaller items make a massive difference in your consistency and quality. Think of these not as optional extras, but as fundamental parts of your setup.
Consistency is the key to mastering any coffee drink. A good grinder and a reliable scale aren't just for coffee geeks; they are the tools that allow you to repeat your successes and diagnose your failures.
A quality burr grinder is probably the single most important investment you can make. Freshly ground beans deliver far more flavour and aroma than anything you can buy pre-ground. More importantly, burr grinders give you a consistent particle size, which is absolutely essential for a balanced extraction.
Next, a digital coffee scale with 0.1g accuracy is non-negotiable for precision. It allows you to measure your coffee grounds and the final liquid output, helping you nail that all-important 1:1 ratio every single time.
Finally, consider the glass. While any small glass will do, serving your cortado in a traditional Gibraltar glass completes the authentic experience. These sturdy, bevelled glasses are the perfect size and shape, adding a touch of classic café style to your homemade creation.
Nailing the Perfect Espresso and Milk Ratio
The true soul of a great cortado is precision. Unlike a forgiving latte where you can get away with a bit more milk, the cortado’s whole identity is wrapped up in the careful balance between espresso and milk. Getting this relationship right is what turns a simple milky coffee into something special.
It all starts with the beans. While you can technically use any coffee, medium-dark or dark roasts really shine in a cortado. Their deeper, more robust notes of chocolate, caramel, and nuts are strong enough to cut through the milk's sweetness, making sure the coffee flavour stays front and centre. A lighter, more acidic single-origin can be lovely too, but it creates a much brighter, tangier drink.
Dialling In Your Espresso Shot
The foundation of any good cortado is a perfectly pulled double espresso. We’re not just making coffee here; we’re aiming for a rich, syrupy shot with a thick, stable crema that delivers a concentrated punch. This is where your technique really comes into play.
Your target for a double shot is an extraction time of around 25-30 seconds. This is the sweet spot for a balanced extraction.
- Too fast (under 20 seconds)? Your espresso will likely taste sour and thin. The water just hasn't had enough contact time to pull out all the good stuff from the grounds.
- Too slow (over 35 seconds)? You're probably heading into bitter, harsh territory. This is a classic sign of over-extraction, where you start pulling undesirable compounds into the cup.
A digital scale is non-negotiable for this. For a standard double shot, you'll typically start with 18-20 grams of finely ground coffee to get about 36-40 grams of liquid espresso in the cup. This 1:2 ratio of coffee in to espresso out is a fantastic starting point for most beans.
If you want to go deeper on this, check out our complete guide on how to dial in your espresso ratio.
Mastering Velvety Milk Texture
Once your espresso is tasting great, it's time to focus on the milk. A cortado needs microfoam—that’s steamed milk with a glossy, wet-paint-like texture. It should be silky and pourable, not the stiff, airy fluff you might see on an old-school cappuccino. This texture is what allows the milk to blend seamlessly with the espresso.
Temperature control is everything. You're aiming for that perfect window between 60-65°C.
Go much hotter than 68°C, and the milk proteins start to break down. You'll lose all that natural sweetness, and the texture will become thin and watery. A milk thermometer is your best friend here until you get a feel for it by touch.
To get steaming, first, give your steam wand a quick purge to clear out any condensed water. Dip the tip just below the surface of the milk and turn on the steam. You want to hear a gentle hissing sound for just a few seconds as you introduce a little air—this is the 'stretching' phase. Then, dip the wand a bit deeper and angle your jug to get a whirlpool going. This vortex is what breaks down any big bubbles and creates that signature velvety microfoam.
The All-Important 1:1 Ratio
With your perfect espresso and silky milk at the ready, the final step is bringing them together with precision. The classic cortado is all about a strict 1:1 ratio of espresso to milk.
So, if you pulled a 40ml double espresso, you'll add exactly 40ml of steamed milk. The final drink is small and potent, usually served in a 120-150ml glass, which really lets that rich coffee flavour dominate.
This ratio is what defines the drink. While some cafés might stretch it to a 1:2 ratio, the purist's cortado is always 1:1. A standard UK double shot usually gives you 50–80ml of espresso, which, when mixed with an equal volume of milk, creates that classic 100–140ml drink.
It’s this attention to detail that separates a good coffee from an unforgettable one. That perfect harmony—a powerful espresso presence, softened by just a touch of sweet, creamy milk—is what makes the cortado so special.
A Practical Walkthrough for Assembling Your Cortado
Alright, you’ve got the theory down for a great espresso shot and beautifully steamed milk. Now for the fun part: bringing it all together. This is where a little bit of technique, timing, and practice turns good coffee into a genuinely exceptional cortado.
Let's break down the whole workflow into a simple, repeatable routine. Getting a smooth process nailed down is the real secret to making a cortado at home that’ll give any top-tier coffee shop a run for its money.
Setting the Stage for Success
Before you even think about hitting the ‘on’ button, a couple of quick prep steps can make a world of difference. Professional baristas are all about efficiency and readiness, and you can bring that same mindset into your own kitchen.
First things first, get your glass warm. A cortado is a small drink, which means it loses heat fast. Pouring your masterpiece into a cold glass will instantly knock the temperature down and dull those lovely, delicate flavours. Just fill it with hot water from the kettle and let it sit while you sort everything else out.
Next, get your milk station ready. Pour the right amount of cold milk into your steaming jug and have it sitting next to your machine, good to go. Having it pre-measured means you aren't scrambling around while your perfect espresso shot is sitting there, losing its crema.
This simple infographic really captures the heart of a cortado: that perfect 1:1 ratio.

It’s a great visual reminder that the drink’s identity is all about combining one part perfectly pulled espresso with one part beautifully textured milk.
The Brewing and Steaming Sequence
With your station set up, it's time for the main event. The trick here is timing and coordination, especially if you're using a single-boiler machine where you can't brew and steam at the same time.
Your first move should always be grinding the beans. Freshness is everything, so only grind what you need, right before you brew. You're aiming for that fine, almost powdery texture that’s just right for espresso.
Dose your grounds into the portafilter, give it a tap to settle them, and tamp down with firm, level pressure. This creates a solid, even coffee puck—absolutely vital for preventing channelling and getting a balanced extraction. If you’re using a Moka pot or AeroPress, this is your moment to get it prepped.
Now, lock the portafilter into the group head and pop your pre-heated, empty glass onto a scale underneath it. Start pulling the shot straight away. The idea is to get that perfect extraction directly into the glass you’ll be drinking from. For a deeper look at getting this just right, you might want to check out our detailed guide on how to make an espresso.
Pro Tip: Always purge your steam wand for a second or two before and after steaming. It clears out any trapped water before you start and blasts out any milk residue when you’re done. It's a small step that makes a big difference to performance and hygiene.
The second your espresso shot finishes, it’s time to steam the milk. You need to move quickly here, as that beautiful crema won't wait around. Plunge the steam wand tip just below the surface and get that vortex spinning to create silky microfoam. Keep a hand on the side of the jug to feel the temperature, and stop when it gets too hot to comfortably hold (around 60-65°C).
The Final Pour and Presentation
You’re on the home stretch. You have the two key players ready: a rich, fragrant espresso in your glass and a jug of velvety, steamed milk. The last step is to combine them with a bit of care to get that seamless blend that makes a cortado so special.
First, give the milk jug a gentle swirl on the counter. This polishes the milk, making sure the microfoam is perfectly mixed in and has a glossy, wet-paint look. If you spot any bigger bubbles, a firm tap of the jug on the worktop should sort them out.
Now, tilt your glass of espresso at a slight angle. Begin pouring from a little height, letting the milk slice through the crema. As the glass starts to fill, bring the spout of the jug right down close to the surface of the coffee. This little change in height is what helps you pour some simple latte art if you're feeling fancy.
For a classic cortado, a simple dot or a heart in the centre is perfect. As you get to the top, straighten the glass and pour more directly into the middle. The key is a steady, controlled hand. Don’t rush it. You're aiming for a completely blended drink, not distinct layers. And that's it—your cortado is ready to be enjoyed immediately.
Exploring Cortado Variations and Advanced Tips
Once you've nailed the classic cortado, you start to see just how much creative space there is to play with. This is where you move past simply following a recipe and begin making the drink truly your own. Think of it as turning your kitchen into a personal coffee lab, where you can experiment with different milks, temperatures, and even a few subtle flavour twists to find what you love.
It’s amazing how small changes can create a completely different drink. Whether you're swapping dairy for a plant-based alternative or adding a hint of spice, each little adjustment helps you refine your craft and dial in your perfect cortado.
Navigating the World of Dairy-Free Milks
The explosion of milk alternatives has been a game-changer for home baristas. The catch? Not all milks behave the same way under steam. Their different protein and fat contents mean you’ll need to adjust your technique a bit to get that silky, perfect microfoam.
- Oat Milk: This is the go-to for most baristas, and for good reason. It steams beautifully and creates a creamy texture that’s incredibly close to dairy milk. For best results, grab a "barista edition" oat milk—it's specifically formulated to stop it from splitting in hot coffee.
- Almond Milk: Can be a little more temperamental. It has a tendency to curdle if you get it too hot, so a gentle touch is key. Keep an eye on the temperature and try not to push it past 60°C. When you get it right, it adds a lovely nutty undertone to the drink.
- Soya Milk: A really solid, reliable option. Its high protein content means it froths up nicely. It does have a distinct flavour, so just make sure it’s a taste you enjoy with your chosen coffee.
It’s interesting to see how these alternatives are becoming more and more popular, especially with younger coffee drinkers. While older generations still drink more coffee overall, recent UK coffee consumption stats show that younger crowds are far more likely to experiment with speciality drinks and alternative milks.
Introducing the Iced Cortado
On a warm day, an iced cortado is hard to beat. It’s a wonderfully simple and refreshing take on the classic, giving you that same bold coffee flavour but with a crisp, cooling finish. The trick is to cool the espresso down quickly to lock in its flavour without watering it down too much.
To make one, pull a double shot of espresso directly over a few ice cubes in a shaker or a tough, sturdy glass. Pour in an equal measure of cold milk (about 40ml) and then shake it or stir it vigorously until it's perfectly chilled. Strain it into a fresh glass filled with ice, and you've got the ideal summer coffee.
Advanced Flavour Infusions and Bean Selection
When you're feeling confident with the basics, you can start playing around with subtle flavour additions. The aim here is to complement the coffee, not overwhelm it.
A single drop of high-quality vanilla syrup or a tiny dash of cinnamon added to the milk before you steam it can introduce a fantastic new dimension. The heat from the steam infuses the flavour gently, making it feel like a natural part of the drink.
Your choice of coffee beans is another massive factor. Just swapping your usual blend for a new single origin can completely reinvent the drink. A bright, fruity Ethiopian bean will give your cortado an almost tea-like quality. On the other hand, a robust, chocolatey Brazilian blend will create something much richer and more traditional. Don't be shy about experimenting with different origins and roast profiles.
Even if you don't have a steam wand, you can still get a fantastic texture. If you’re having trouble getting your milk right, our guide on frothing milk without a steam wand has some great tips using tools you probably already have in your kitchen.
For those of you working with different milks, getting the temperature just right is crucial for that perfect silky texture. Every milk type has its own sweet spot.
Milk and Milk Alternative Steaming Guide
| Milk Type | Ideal Steaming Temperature | Texture Notes | Pro Tip |
|---|---|---|---|
| Whole Dairy Milk | 60-65°C | Creates rich, creamy, and stable microfoam. The high fat content makes it very forgiving. | Aim for a glossy, wet-paint-like finish. Don't overheat, or it will lose its sweetness. |
| Oat Milk (Barista) | 55-60°C | Steams exceptionally well, producing a smooth and velvety texture similar to whole milk. | Less heat is needed. Pushing it too far can make the foam a bit bubbly and thin. |
| Almond Milk | 55-60°C | Can be thin and prone to splitting. Requires gentle aeration to build a light, airy foam. | Steam slowly and avoid overheating at all costs to prevent curdling. A wider-tipped steam wand can help. |
| Soya Milk | 60°C | High protein content helps it create a dense, stable foam, but it can become stiff if overworked. | Introduce air early in the process, then focus on incorporating it for a silky result. |
Getting to know how each milk behaves is part of the fun. A little practice is all it takes to start pouring consistently beautiful cortados, no matter what kind of milk you're using.
Having Trouble? Your Cortado Questions Answered
Even when you’ve got the steps down, a few tricky issues can pop up. It happens to everyone. Think of this as your personal barista helpline, ready to sort out those common hurdles standing between you and the perfect cortado.
From a bitter espresso shot to milk that just won't play ball, a few small tweaks to your technique can make a world of difference. Nailing these details is the final step in turning a good cortado into a great one.
Why Does My Espresso Taste Bitter or Sour?
Getting the espresso flavour just right is probably the biggest challenge for any home barista. If your shot tastes unpleasantly sharp or harsh, it’s almost always down to extraction time or how coarse (or fine) your coffee is ground.
-
Bitter Espresso: This is a classic sign of over-extraction. It means the water spent too long with the coffee, pulling out nasty, bitter compounds you don't want. The fix? Try making your grind a little coarser or simply shorten your extraction time.
-
Sour Espresso: The opposite problem—this points to under-extraction. The water rushed through the coffee grounds too quickly, leaving all the sweeter, more balanced flavours behind. You’ll want to use a finer grind to slow the water down, or you could try increasing your dose of coffee.
A consistent grind is the absolute foundation of good espresso. If you're constantly fighting bitterness or sourness, take a hard look at your grinder. A quality burr grinder, like the ones from ADS Coffee Supplies, gives you the control you need to solve these issues for good.
How Can I Get Silky, Not Bubbly, Milk?
Achieving that velvety microfoam is a skill that definitely takes practice. If your milk is coming out too thin or has big, ugly bubbles floating on top, the problem is likely your aeration technique or temperature control.
Your goal is to introduce just a tiny bit of air right at the start of the steaming process—that gentle ‘hissing’ sound should only last for a few seconds. After that, it’s all about creating a whirlpool in the jug. This vortex breaks down any large bubbles and folds the air into the milk, creating that smooth, glossy texture we’re after.
If the milk is watery, you probably didn't introduce enough air. Too bubbly? You aerated for too long or didn't get a good vortex going. And don't forget the temperature; milk heated past 68°C loses its structure and all its natural sweetness.
Isn't a Cortado Just a Small Flat White?
Ah, the great debate of the UK coffee scene. While they’re similar—both use beautifully textured microfoam instead of stiff froth—they are absolutely not the same drink.
The real difference lies in the ratio of coffee to milk.
- A cortado is all about that strict 1:1 ratio of espresso to milk. This creates a small, potent drink where the coffee is front and centre.
- A flat white has a lot more milk, usually with a ratio closer to 1:3 or 1:4. The result is a larger, creamier, and more milk-forward drink that softens the espresso flavour.
So, while both are fantastic, the cortado is the undisputed champion for anyone who wants the espresso’s character to be the star of the show.
Ready to perfect your home brewing setup? Explore the full range of grinders, espresso machines, and barista tools at Seven Sisters Coffee Co and start crafting café-quality coffee today. Find everything you need at https://sevensisterscoffee.co.uk.