How to Make a Macchiato at Home: A Quick Guide

Learning how to make a macchiato at home is simpler than you might think. At its heart, it’s just a beautifully balanced combination of bold espresso and a touch of frothed milk. This guide will walk you through crafting both the classic Espresso Macchiato and its creamier cousin, the Latte Macchiato, using kit you probably already have in your kitchen.
Your Guide to Café-Quality Macchiatos at Home

Ready to skip the coffee shop queue and create a perfect macchiato in your own kitchen? You're in the right place. The word 'macchiato' means 'marked' or 'stained' in Italian, which perfectly captures the essence of this drink—it's either espresso 'marked' with milk, or milk 'marked' with espresso. It's a beautifully simple coffee that really lets the quality of your beans shine through.
This guide is designed for UK coffee lovers, breaking down the entire process into easy, actionable steps. We’ll explore the two main types you need to know:
- Espresso Macchiato: A potent, espresso-forward drink with just a dollop of milk foam to soften its intensity.
- Latte Macchiato: A milder, milkier, and visually striking layered drink where steamed milk is 'marked' by the espresso.
Whether you're an experienced home barista with a fancy machine or a beginner using a simple Moka pot, you’ll find everything you need to succeed right here.
Getting the Basics Right
The heart of any good macchiato is a fantastic shot of espresso. Honestly, getting this right is the most crucial step. You don't need a professional setup to do it, and learning how to make the perfect espresso is a skill that will elevate all your homemade coffees. A traditional macchiato uses a 25–30 ml shot, which is easily achievable with most home brewing methods.
A common mistake is thinking a macchiato is just a tiny latte. In reality, it’s all about the distinct ratio of coffee to milk, designed to highlight the espresso's flavour rather than drown it.
This focus on quality coffee fits perfectly with our national habits. With around 98 million cups of coffee drunk daily across the UK, more and more of us are looking to replicate that café experience at home. While instant coffee still has its place, the growing love for ground coffee and pod machines shows a clear shift towards better home brewing.
Why Bother Making a Macchiato at Home?
Crafting your own macchiato offers so much more than just convenience. It gives you complete control. You get to choose your favourite beans, tweak the milk-to-coffee ratio until it's just right for you, and play around with different milks, from whole dairy to oat or almond.
We’ll cover all the essential techniques, from pulling a rich, syrupy espresso shot to mastering the art of milk frothing—even if you don't own a steam wand. By the end of this guide, you’ll be making macchiatos that are easily on par with your favourite local café.
To help you decide where to start, here's a quick look at how the two main types of macchiato stack up against each other.
Espresso Macchiato vs Latte Macchiato
This table offers a quick comparison to help you choose which macchiato suits your taste before you start brewing.
| Characteristic | Espresso Macchiato | Latte Macchiato |
|---|---|---|
| Primary Flavour | Strong, espresso-forward | Mellow, creamy, and milk-forward |
| Construction | Espresso base, marked with a spot of milk foam | Steamed milk base, marked with espresso |
| Appearance | Dark with a small white dot of foam | Layered, with milk at the bottom and a dark spot on top |
| Ratio (approx.) | 90% espresso, 10% milk foam | 80% milk, 20% espresso |
| Best For | Those who love the bold taste of pure espresso | Drinkers who prefer a gentler, milkier coffee |
| Glass/Cup | Small espresso cup (demitasse) | Tall glass to show off the layers |
Whether you're after a quick, intense hit of coffee or a smooth, layered drink to sip on, there's a macchiato for you. Now, let's get into the specifics of how to make each one.
Gathering Your Essential Tools and Ingredients
Before diving in, getting your kit and ingredients ready makes the whole process feel less like a chore and more like a craft. Knowing how to make a macchiato at home all starts with your setup. The good news? You don’t need a sprawling, café-style station to pull off a beautiful drink.
The Heart of the Matter: Espresso Brewers
At its core, a macchiato is all about that perfect shot of espresso. While a fancy espresso machine gives you ultimate control and consistency, it’s by no means the only way to get that rich, concentrated coffee base.
Here are a few solid options:
- Espresso Machines: This is the gold standard for a reason. They give you precise control over pressure and temperature, producing that authentic, crema-topped shot. If you're weighing your options, our guide on choosing between an espresso machine vs a bean-to-cup model for home use is a great place to start.
- Moka Pot: A true classic. This stovetop brewer creates a beautifully strong, espresso-like coffee. It's an affordable and charmingly traditional method that gets you incredibly close to the real deal.
- AeroPress: This versatile little gadget is a favourite among coffee lovers. It uses air pressure to brew a clean, flavourful, and concentrated shot. It’s a fantastic, low-cost alternative that punches well above its weight.
If you’re working with a smaller kitchen, finding the right gear is key. It's worth exploring some of the best compact kitchen appliances to find tools that fit your space without creating clutter.
The Perfect Milk and Foam
Next up is the milk—the element that literally "marks" your espresso. The milk you choose has a huge impact on the final texture and flavour of the foam. To get that silky microfoam, a good quality stainless steel milk jug is absolutely essential.
Don't underestimate the importance of your milk jug. Its shape is designed to create the perfect vortex for steaming. Plus, the stainless steel lets you gauge the temperature by touch—you want it hot, but not so hot that you can't comfortably hold it.
Here’s a quick rundown of the most popular milk choices:
- Whole Milk: The classic choice. Its high-fat content creates the richest, creamiest, and most stable foam, making it the easiest to work with.
- Semi-Skimmed Milk: A decent middle ground. It still froths up quite well but produces a lighter foam with a less creamy taste.
- Oat Milk (Barista Edition): The undisputed champion of plant-based milks. Barista blends are specifically formulated with extra oils to create a superb, glossy microfoam that can easily rival dairy.
- Almond Milk: This one can be a bit trickier. It often produces larger, less stable bubbles, so definitely look for a barista-specific version for better results.
Choosing Your Coffee Beans
Finally, let's talk beans. Because a macchiato is so espresso-forward, the character of your coffee is completely exposed—there's nowhere to hide!
A medium-to-dark roast is usually the way to go. It provides a robust, low-acidity base that pairs beautifully with that touch of milk. Look for beans with tasting notes of chocolate, nuts, or caramel for a classic, comforting macchiato flavour.
Freshly roasted beans will always give you the best results, so make sure to check the roast date on the bag. Anything roasted within the last few weeks is ideal.
Crafting the Classic Espresso Macchiato
This is the real deal, the original macchiato, a purist's dream. Forget those giant, syrupy drinks you see elsewhere; this is a masterclass in beautiful simplicity. A true Espresso Macchiato is just a shot of rich, intense espresso 'marked' with a small dollop of milk foam. The result is a potent and perfectly balanced coffee experience.
The magic is all in the precision. This isn't a mini cappuccino or a tiny latte. It’s a bold, espresso-forward drink where the foam has one job: to gently cut through the intensity of the coffee, adding just a hint of sweetness and a velvety texture without overpowering the bean's true character.
Pulling the Perfect Espresso Shot
The heart and soul of your macchiato is a single shot of espresso, which should weigh in at around 25-30ml. Getting this right at home is a skill that will completely elevate your coffee game. It all boils down to juggling three key variables: grind size, tamping pressure, and extraction time.
- Grind Size: You’re aiming for a fine grind, something with the texture of table salt. If it’s too coarse, the water will rush through, leaving you with a weak, sour shot. Too fine, and you’ll choke the machine, ending up with a slow, bitter extraction.
- Tamping Pressure: Be firm and consistent. When you tamp the ground coffee in the portafilter, apply even pressure to create a level puck. This ensures water flows through evenly, extracting all those delicious flavours.
- Extraction Time: A well-pulled shot should take about 25-30 seconds from the moment you hit the button. This timing is your best clue that the grind and tamp are spot-on.
Getting these elements right is what creates a balanced, beautiful shot. For a much deeper dive, you can check out our complete guide on how to dial in your espresso ratio.
The drive to perfect these techniques at home often mirrors what UK coffee lovers experience in high-street cafes. Data shows that in 2025, over 7.9 million adults in the UK bought coffee out-of-home weekly. With chains like Costa holding a 38.3% market share, many people become accustomed to a certain quality and then aim to replicate it themselves. This is why understanding the precise 25–30 ml espresso and 10–20 ml foam ratio is so vital for the home barista. Read the full research about the UK coffee market.
Creating the Ideal Milk Foam
Once your espresso is ready, it's time for the 'mark'. You only need a tiny amount of foam—just a teaspoon or two is more than enough. The goal here is a silky microfoam, which is made up of tiny, uniform bubbles that give it a glossy, wet-paint-like texture.
Using a Steam Wand
If your espresso machine has a steam wand, you’re all set.
- Pour a small amount of cold milk into your stainless steel milk jug.
- Give the steam wand a quick purge to clear out any trapped water.
- Dip the tip just below the surface of the milk and start steaming. You only need to stretch the milk for a few seconds to introduce air.
- Then, submerge the wand a bit deeper to create a whirlpool. This vortex will break down any larger bubbles and create that silky texture you're after.
- Stop when the jug feels hot to the touch, which is usually around 60-65°C.
Using a Handheld Frother
No steam wand? No problem at all. A simple handheld frother can do a fantastic job.
- Gently heat a small amount of milk in a mug or a small saucepan. Just don't let it boil.
- Pour the warm milk into a slightly larger container to give it some room to expand.
- Pop in your handheld frother and whisk away until you have a stable, rich foam.
With your espresso pulled and your foam ready, gently spoon one or two teaspoons right into the centre of the crema. That's it. Your perfect, classic Espresso Macchiato is ready to enjoy.
Building a Beautifully Layered Latte Macchiato
If you’re after a milder, milk-forward drink that’s also a real showstopper, the Latte Macchiato is for you. It elegantly inverts the classic macchiato process: instead of marking espresso with milk, you start with steamed milk and 'mark' it with a shot of espresso. The result is a stunning, three-tiered coffee that’s as beautiful to look at as it is to drink.
Unlike its punchy, espresso-first cousin, the latte macchiato is a much gentler affair. It’s a fantastic choice for a relaxed afternoon, where you can properly savour the creamy texture and subtle coffee notes. The trick to getting those perfect, Instagram-worthy layers? It all comes down to your preparation and pouring technique.
Mastering the Milk Foundation
First things first, let's get the milk right, as it’s the most critical step. You'll need about 150-180ml of cold milk in a jug. This gives you enough volume to create a generous, fluffy layer of foam. The goal here is to heat the milk while incorporating plenty of air to build a substantial foam cap on top of the liquid.
If you’re using a steam wand, you'll want to keep the tip near the surface for longer than you might for a flat white. Really focus on stretching the milk to create that airy foam. For those with a handheld frother, just whisk the warmed milk until its volume has almost doubled. You can dive deeper into the ideal temperatures and techniques in our guide on how to steam milk perfectly at home.
The secret to distinct layers is patience. Once frothed, pour the milk into a tall, clear glass and just let it be for about a minute. This crucial pause allows the heavier steamed milk to settle at the bottom while the light, airy foam rises to the top, creating the perfect two-layer canvas for your espresso.
The Art of the Slow Pour
Once your milk has settled, it’s time to pull your espresso shot. A standard 25-30ml shot is perfect. Now for the key moment: a slow, steady pour directly into the centre of the foam. Don't rush this part.
Aim for the very middle of that foam cap. As you pour, the denser, hot espresso will pierce through the light foam and settle neatly between the foam and the hot milk below. This creates that beautiful, dark middle band, giving you the classic three-tiered effect:
- Bottom Layer: Hot steamed milk.
- Middle Layer: The rich, dark espresso shot.
- Top Layer: Light, airy milk foam.
This simple infographic breaks down the core components of the classic espresso macchiato, showing the simple yet precise combination of elements.
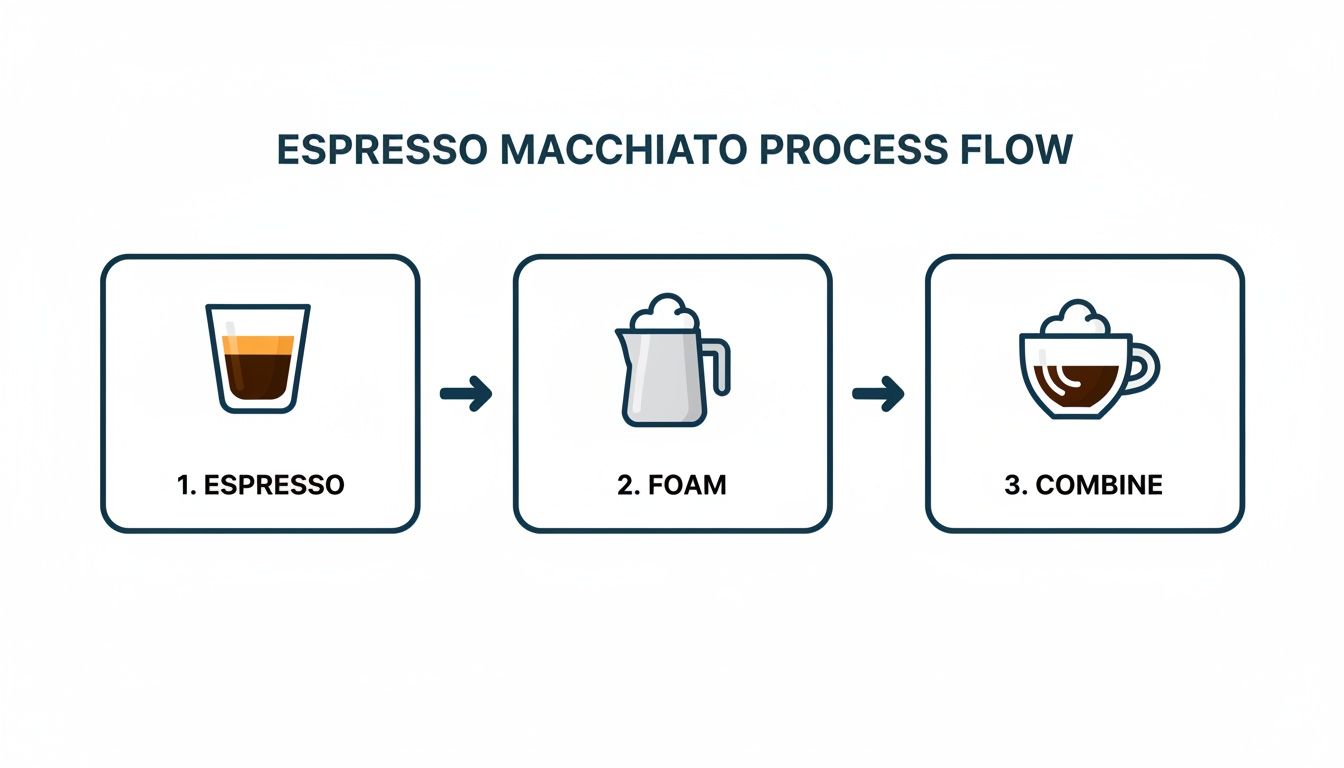
While the image shows the Espresso Macchiato's structure, the principle of combining distinct elements applies perfectly to the Latte Macchiato—just in reverse. It’s all about making sure each component is prepared correctly before bringing them together.
Getting Creative and Fixing Common Macchiato Mishaps
Once you’ve got the classic espresso and latte macchiatos down, a whole world of delicious variations opens up. Honestly, moving beyond the basics is where the real fun begins when you're making coffee at home. It’s all about tweaking things until you find a drink that’s perfectly you.
One of the most popular coffee shop staples you can easily whip up is the Iced Caramel Macchiato. It looks impressive, but it’s surprisingly straightforward.
Start by adding a pump of vanilla syrup to a tall glass. Next, fill it right up with your milk of choice and plenty of ice. Slowly pour a fresh shot of espresso over the top—this creates that beautiful layered effect—and finish with a generous drizzle of caramel sauce. Simple as that.
Solving Common Macchiato Problems
Even the most seasoned home baristas run into trouble now and then. If your macchiato isn’t quite hitting the spot, a few small adjustments can make a world of difference. Let's walk through some of the most frequent frustrations.
Espresso Tastes Bitter or Sour
This is a classic one. If your espresso tastes overwhelmingly bitter, it's almost certainly over-extracted. This usually means your coffee grind is too fine, or the shot is pulling for too long (think well over 30 seconds).
On the flip side, a sour or disappointingly weak shot is under-extracted. This often points to a grind that’s too coarse or a brew time that's way too short.
- For bitterness: Dial your grinder to a slightly coarser setting.
- For sourness: Go for a finer grind to slow down the water and get a better extraction.
Milk Foam is Too Bubbly or Just… Flat
The texture of your milk foam is absolutely crucial for a good macchiato. If it’s coming out with huge, airy bubbles instead of a silky microfoam, you’re probably introducing too much air right at the start.
If it's flat and lifeless, you might not be stretching the milk enough, or—and this is a big one—your milk wasn't cold enough to begin with.
A key takeaway from my years of experience is that frothing always works best with cold milk, straight from the fridge. The colder the milk, the more time you have to build that perfect, velvety texture before it gets too hot.
Time to Get Creative With Flavours
The Iced Caramel Macchiato is just the beginning. The simple, elegant structure of a macchiato makes it a fantastic canvas for all sorts of other flavours. You can easily swap out the vanilla and caramel for other syrups and sauces to invent your own signature drink.
Why not give these a try?
- Hazelnut Syrup: For a nutty, comforting flavour that pairs beautifully with a good espresso.
- Cinnamon or Spiced Brown Sugar Syrup: This is perfect for adding a touch of autumnal warmth, any time of year.
- White Chocolate or Mocha Sauce: Ideal if you're in the mood for something richer and more decadent.
Playing around with different flavour combinations is a brilliant way to build your skills. If you find yourself enjoying those richer, chocolatey coffees, our guide on how to make a delicious mocha at home is a great next step on your home barista journey.
Don’t be afraid to experiment. This is your coffee, after all. Mix and match until you find a combination that makes you genuinely excited for your morning cup.
Your Macchiato Questions Answered
We get a lot of questions from home brewers trying to perfect their macchiato, so we've put together answers to a few of the most common ones. Getting these details right can really elevate your coffee game.
Can I Use Pre-Ground Coffee for My Macchiato?
You absolutely can, but if you’re chasing exceptional flavour, nothing beats freshly ground beans. The moment coffee is ground, it starts losing the aromatic compounds that give it life. Using pre-ground coffee, especially if it’s been open for a while, can leave your espresso shot tasting a bit flat.
If pre-ground is your only option, make sure you grab a bag marked as an 'espresso' grind. But honestly, the single biggest upgrade you can make to your home setup is grinding your beans just before you brew. A decent burr grinder gives you incredible control over the fineness, letting you dial in the perfect shot for your specific machine.
What Is the Best Milk for a Macchiato?
For that classic, luxurious microfoam, whole milk is the undisputed champion. The higher fat content helps create a stable, velvety foam that’s not just rich in taste but also a dream to pour.
That said, plenty of other milks do a fantastic job:
- Semi-skimmed milk will froth up nicely, but the foam will be lighter and a bit more airy.
- Barista-edition oat milk is the king of plant-based alternatives. It steams beautifully, creating a creamy and surprisingly stable foam.
- Soya and almond milks are also decent options, though you’ll get the best results if you stick to the ‘barista’ versions designed for frothing.
The real secret weapon here is temperature. Always, always start with fridge-cold milk. This gives you a much longer window to stretch the milk and create that silky texture before it gets too hot and the proteins start to break down.
How Is a Macchiato Different from a Cortado?
Ah, the classic confusion! It’s easy to mix these two up. They’re both small, intense espresso drinks, but the real difference is all about the ratios.
A macchiato is an espresso that’s simply been ‘marked’ with a dollop of milk foam—we’re talking just 10-20ml. The espresso is still the hero of the drink. A cortado, on the other hand, is a much more balanced affair, with a roughly equal 1:1 ratio of espresso to steamed milk. It’s a smoother, milkier drink that softens the espresso’s intensity far more than a macchiato does.
Ready to brew with beans that truly make a difference? At Seven Sisters Coffee Co, we source and roast exceptional coffees perfect for your homemade macchiato. Explore our collection of freshly roasted coffee beans today.