How to Brew with a Moka Pot: A Complete Guide
Learning how to use a moka pot is one of the easiest ways to make rich, intense coffee at home without needing a load of fancy equipment. This classic Italian coffee maker uses pressurised steam to push out a strong, aromatic brew that lands somewhere between a bold filter coffee and a proper espresso.
Why the Moka Pot Belongs in Your Kitchen
Before we jump into the how-to, it’s worth taking a moment to appreciate why this little stovetop brewer has earned its spot in kitchens all over the world. There's a satisfying ritual to using a moka pot that's just as rewarding as the coffee itself. Its timeless, art deco design is instantly recognisable, but the real magic is in its simplicity and the unique quality of the coffee it makes.
People often call it 'stovetop espresso', and while it doesn’t pack the same high-pressure punch as a commercial machine, it gets you a similarly concentrated and flavourful result. It’s the perfect middle ground for anyone who finds filter coffee a bit too light but isn’t quite ready to splash out on a pricey espresso setup. That accessibility is a huge part of its charm.
The Rise of a Kitchen Icon
The moka pot has seen a real surge in popularity across the UK. Recent surveys show that around 12% of UK households now own one, a decent jump from just 7% in 2018. This is partly down to a growing interest in speciality coffee and the fact that moka pots are so affordable. In fact, 38% of owners are firing theirs up at least three times a week.
This trend points to a bigger shift towards more hands-on, authentic coffee brewing at home. The moka pot delivers this in spades, offering a process that is both engaging and deeply satisfying.
The beauty of the moka pot is its ability to produce a consistently rich and robust cup with minimal fuss. It bridges the gap between everyday coffee and speciality brewing, making it an indispensable tool for any coffee lover.
What to Expect from This Guide
Getting the hang of this brewer is a real game-changer, and this guide will give you a clear roadmap to success. We'll walk through everything you need to know, from the essential gear to the final pour. Once you understand the fundamentals, you can sidestep the common pitfalls and brew brilliant coffee every single time.
You'll soon see why it’s considered one of the best coffee brewing methods out there for home coffee lovers. Let's get started.
Getting Your Moka Pot Brewing Essentials
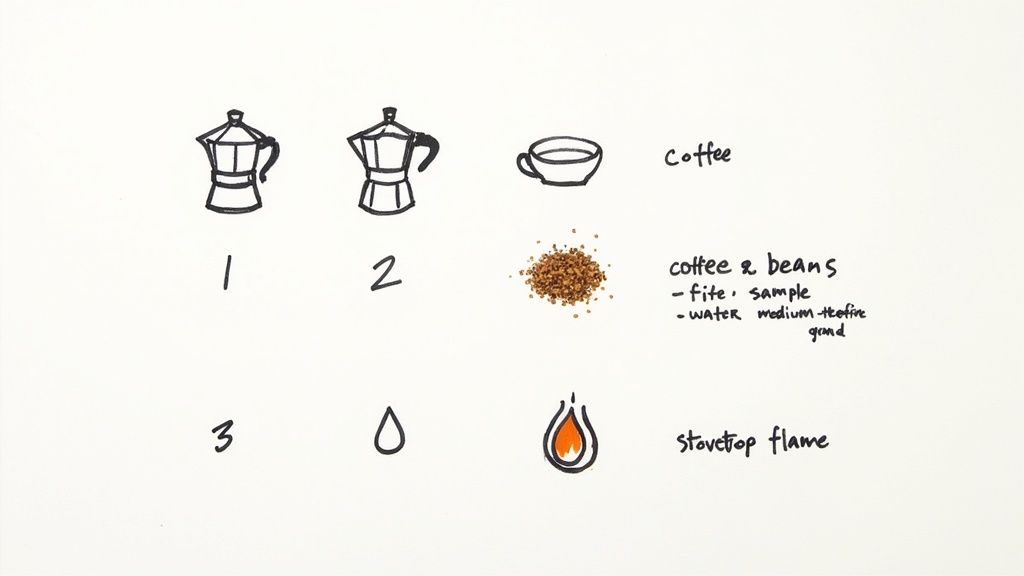
Before a single drop of water hits the heat, the secret to a brilliant moka pot brew is already decided by your setup. Think of this as your pre-flight check; getting the right tools and ingredients lined up from the start is the best way to sidestep common mistakes before they even have a chance to happen.
First up, the star of the show: the moka pot itself. They come in all sorts of sizes, most commonly 1-cup, 3-cup, and 6-cup, but don't let those numbers fool you. A moka pot ‘cup’ is really a small, potent shot of coffee, somewhere around 30-50ml—a world away from your standard kitchen mug.
Choosing the Right Moka Pot Size
Think honestly about how you drink your coffee. A 3-cup model is just about perfect if you’re making a strong, mug-sized Americano for one (just add hot water) or sharing a couple of small, intense coffees. The 6-cup, on the other hand, is much better for serving a few friends or for those mornings that demand a serious caffeine boost.
It's really important to buy the size you'll actually use day-to-day. Moka pots are engineered to work best when filled properly, so trying to brew a half-empty pot just won't give you the results you’re after.
The Most Important Ingredient: Coffee
The coffee you choose will make or break your brew. Simple as that. For a moka pot, you're looking for a consistent, medium-fine grind. If you can, picture the texture of table salt—it’s that sweet spot right between the fine powder needed for espresso and the coarse grit of a cafetière grind. This specific texture allows hot water to push through the grounds evenly without stalling.
Of course, the beans themselves matter just as much as the grind. You need a coffee that can hold its own against the intensity of this brewing method. For a deep dive into what works best, have a look at our guide to the best coffee for a moka pot to find the perfect pairing for your palate.
The core principle of a good moka pot brew is consistency. Consistent grind size, consistent water quality, and consistent heat are the three pillars that support a delicious, repeatable result every single time.
Water and a Reliable Heat Source
Finally, let’s talk about the last two pieces of the puzzle: water and heat. Switching to filtered water is such a simple change, but it makes a world of difference. It gets rid of the chlorine and excess minerals that can build up as scale inside your pot and, worse, leave an unwanted taste in your final cup.
You also need a heat source you can control. A gas hob is fantastic for its precision, but a good electric or induction hob works perfectly well (just make sure your pot is compatible). The goal is to apply gentle, steady heat—not a sudden, aggressive blast that will scorch the coffee and ruin the whole thing. With these essentials sorted, you’re all set to get brewing.
Dialling In Your Grind and Dose
Getting your grind and dose right is where you truly start to influence the final flavour in your moka pot. Honestly, these two variables are the most powerful tools you have for dodging a bad brew. They're the difference between a rich, balanced coffee and one that's disappointingly weak or aggressively bitter.
Mastering a moka pot brew starts long before the water even gets warm; it begins at the grinder. The sweet spot you're aiming for is a medium-fine grind. Rub some between your fingers – it should feel similar to table salt. It sits perfectly in that middle ground between the powdery fineness of an espresso grind and the much grittier texture you'd use for a cafetière.
If you really want to get into the weeds of how this affects different brewing styles, our complete coffee grind size guide breaks it all down.
Why Grind Size is Non-Negotiable
The texture of your coffee grounds directly controls how the water extracts flavour. It's a simple but critical concept.
If your grind is too fine, almost like flour, it will compact into a dense brick in the filter basket. This chokes the pot, restricting water flow and forcing it through at too much pressure. The result? A harsh, burnt, and unpleasantly bitter cup. This is probably the single most common mistake people make with a moka pot.
On the other hand, if the grind is too coarse, the water will just rush through the grounds without a second thought. It won't have enough contact time to pull out all the desirable sugars and oils, leaving you with a brew that tastes weak, sour, and just plain underdeveloped. That 'table salt' texture really is your golden ticket to a balanced, flavourful extraction every time.
A common misconception is that a finer grind equals stronger coffee. With a moka pot, the opposite is true. The right grind size unlocks flavour; the wrong one just creates bitterness.
The Art of Dosing Without Tamping
Once you've nailed the grind, it's time to dose. This just means filling the filter basket correctly.
The rule here is beautifully simple: fill the basket until it's level with the top. Give it a gentle tap on the side to help the grounds settle evenly. Whatever you do, do not tamp or press the coffee down.
Tamping is a technique reserved for high-pressure espresso machines. A moka pot operates at a much lower pressure, somewhere around 1.5 bars. Tamping the grounds creates a dense puck that the water just can't penetrate properly. This resistance builds up excessive pressure and leads straight back to that harsh, bitter over-extraction we're trying so hard to avoid.
Just fill, level, and you're good to go.
Moka Pot Grind Size Troubleshooting
Sometimes things still go a bit sideways. It happens! Use this quick reference to diagnose and solve common problems that pop up when your grind isn't quite right.
| Symptom | Likely Cause (Grind) | How to Fix It |
|---|---|---|
| Coffee tastes harsh and bitter | Too fine | Adjust your grinder to a coarser setting, aiming for that table salt texture. |
| Brew is weak, sour, or watery | Too coarse | Go a bit finer on your grinder. This will slow the water down and increase extraction. |
| Pot sputters aggressively | Too fine or tamped | Make sure the grounds aren't compacted. Loosen the grind and just fill without pressing. |
| No coffee comes out | Extremely fine | Your grind is like powder and has blocked the filter. Time to start over with a much coarser setting. |
Think of this table as your first port of call. A small adjustment to your grinder setting is often all it takes to turn a frustrating brew into a fantastic one.
The Hands-On Moka Pot Brewing Method
Right, we’ve covered the essentials. Now it’s time to get our hands dirty and actually brew some coffee. This is a practical walkthrough you can follow along with in your kitchen to turn those perfectly ground beans into a rich, aromatic cup.
Prepping and Assembling the Pot
First things first, and this is a big one: the water. Don't just fill the base with cold tap water. Instead, boil your kettle and let it cool for a moment until it's just off the boil, somewhere around 95°C.
This one simple tweak is a total game-changer. Starting with hot water drastically shortens the time your moka pot spends on the hob. This is crucial because it stops the metal body from getting scorching hot and 'cooking' your delicate coffee grounds before the brewing even begins—a classic mistake that leads to that nasty metallic taste. If you want to dive deeper into the science, our article on the best water temperature for coffee is a great read.
Now, carefully pour the hot water into the bottom chamber, filling it right up to the line just below the safety valve. Take your filter basket, now full of those lovely Seven Sisters Coffee grounds, and slot it snugly into place.
Screw the top chamber on nice and tight to get a good seal—use a tea towel to hold the hot base so you don't burn your hands. Pop the assembled moka pot on the hob over a medium-low heat. Patience is your best friend here; a gentle, steady heat is always better than a roaring flame.
The goal is to heat the water steadily, not violently. Rushing the process with high heat is the quickest route to a bitter, over-extracted brew. Let the pressure build gradually for a smoother, more balanced flavour.
Watching for the Perfect Extraction
After a minute or two, you’ll begin to hear a gentle gurgling as the pressure builds and the first drops of coffee start to emerge from the spout. This is where you need to pay close attention. You’re looking for a steady, rich stream of coffee that has the colour of dark honey.
This is the heart of the extraction, the moment all those delicious, complex flavours are being drawn out. It’s a quiet, beautiful process that signals everything is going exactly to plan. The incredible aroma filling your kitchen is your first reward.
This visual guide shows the spectrum from a coarse grind that leads to a weak brew, to the ideal salt-like texture, and finally a fine grind that can choke the pot.
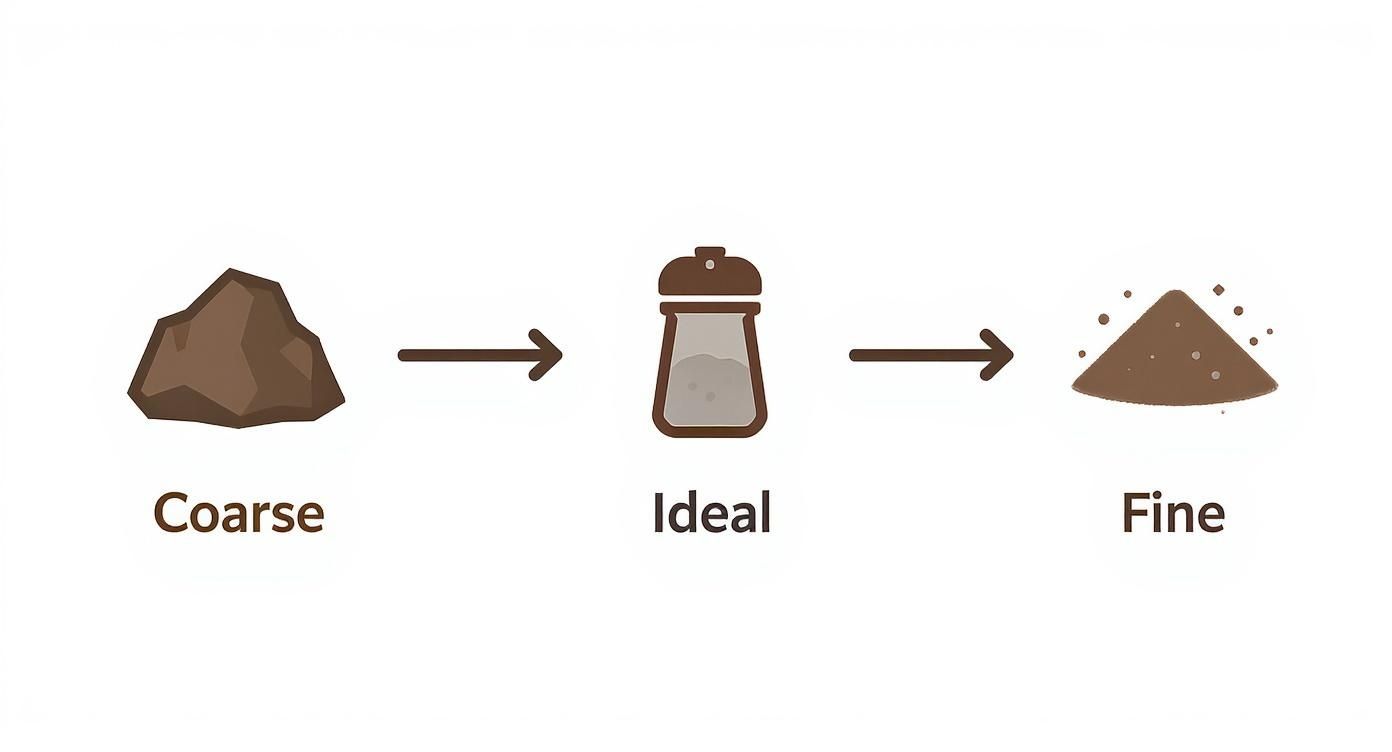
As the infographic shows, that ideal moka pot grind sits in a very specific sweet spot, steering clear of the problems caused by grinds that are either too coarse or too fine.
The most critical moment of the entire brew is knowing when to stop. As the coffee stream starts to lighten to a pale, straw-like colour and begins to sputter and hiss, that's your cue. Immediately remove the pot from the heat.
That sputtering sound tells you the water level has dropped below the funnel, and now it's mostly steam being forced through the grounds. This final phase extracts the harshest, most bitter compounds. Letting it continue will ruin all your hard work. By pulling it off the heat at the first sputter, you capture only the best parts of the brew, ensuring a perfect, flavourful cup every single time.
Solving Common Moka Pot Problems
Even with the best intentions, a moka pot brew can sometimes go sideways. Don't worry, every frustrating cup is a learning opportunity. Most issues that crop up when you're getting the hang of a moka pot are easily diagnosed and simple to fix once you know what to look for.
Let's break down the most common problems you're likely to face. Instead of guessing, we'll connect the symptom directly to its cause, giving you a clear, actionable solution to get your next brew back on track.
Why Does My Coffee Taste Bitter?
This is, without a doubt, the number one complaint from new moka pot users. An intensely bitter, almost burnt taste is a sure sign of over-extraction. It means the hot water has stripped too many harsh compounds from the coffee grounds.
There are usually two main culprits behind this unpleasant flavour:
- Excessive Heat: If your hob is turned up too high, the water boils too aggressively. This superheated steam essentially scorches the coffee, resulting in a bitter mess. The solution? Always use a gentle, medium-low heat.
- Brewing for Too Long: Remember that sputtering, gurgling sound? That’s your signal to stop. Leaving the pot on the heat past this point forces steam, not water, through the grounds, extracting only the most bitter elements.
What Causes Weak and Watery Coffee?
On the other end of the flavour spectrum is a brew that’s thin, sour, and just plain disappointing. This is a classic case of under-extraction, where the water hasn't had enough contact time or resistance to pull out the coffee's desirable oils and sugars.
This issue almost always comes down to a problem with your coffee grounds.
First, check your grind size. If it’s too coarse, water will just rush through it without grabbing much flavour. You're aiming for that consistent, table salt-like texture.
The second cause is often an under-filled filter basket. Moka pots are designed to work with a full dose. If the basket isn’t filled level to the top, the water finds the path of least resistance and bypasses most of the grounds, resulting in a weak, flavourless cup.
Your moka pot is a tool of precision, not approximation. Proper grind size and a full, level dose aren't just suggestions—they are the foundational requirements for a balanced extraction.
Dealing with Leaks and Sputtering
A moka pot that sputters violently from the start or, even worse, leaks from the middle seal can be alarming. This tells you that pressure is struggling to escape properly through the coffee grounds and is finding another way out.
The most common reason for this is a grind that is too fine or has been tamped down. This creates a dense, compacted puck of coffee that the water simply cannot penetrate. The pressure has to go somewhere, leading to leaks or aggressive sputtering. Always avoid tamping and ensure your grind isn't powdery like an espresso grind.
Another potential issue is a worn-out or dirty gasket. The rubber seal in the middle ensures a tight fit. If it's old, cracked, or has coffee residue on it, it won't create a perfect seal, causing steam and water to leak out the side. A quick clean or a simple replacement will solve this immediately.
How to Clean and Maintain Your Moka Pot
Proper care is the secret weapon for a moka pot that brews delicious, clean-tasting coffee for years. You might have heard the old myth that you should never really wash it, letting it "season" over time. Frankly, that's terrible advice. All it does is allow old, rancid coffee oils to build up, making every single brew taste bitter and stale.
A simple daily cleaning routine is non-negotiable if you want the best flavour. This quick habit prevents the mineral build-up and oxidation that can completely ruin your coffee, which is a particular risk with traditional aluminium models.
Your Daily Cleaning Ritual
The whole process is incredibly straightforward and takes less than a minute.
Once your moka pot has cooled down enough to handle safely, take it apart. You should have three main pieces: the bottom water chamber, the filter basket, and the top collection chamber.
Give every part a thorough rinse with warm water. There's no need for soap in your daily clean; the main goal is just to wash away all the used coffee grounds and any leftover oils. Pay a bit of extra attention to the filter screen on the underside of the top chamber, as fine grounds love to get stuck there.
Drying is the most critical step. Leaving an aluminium pot wet is a recipe for oxidation, which will give your coffee an unpleasant metallic tang. Always, always dry each component completely with a cloth before putting it back together.
Performing a Deeper Clean
Every few weeks, it's a good idea to give your pot a more thorough clean. This will tackle any stubborn oils and prevent limescale from building up. A simple solution of one part white vinegar to two parts water works wonders.
- Take the Pot Apart: Unscrew the top section and carefully remove the rubber gasket and the filter screen beneath it.
- Give it a Soak: Let all the metal parts sit in the vinegar solution for a couple of hours.
- A Gentle Scrub: Use a soft brush or cloth to gently scrub away any lingering residue. Focus on the inside of the chambers and the filter screen.
- Rinse and Dry: Rinse everything extremely well with fresh water to get rid of any vinegar smell, and then dry it all completely.
If you're facing some serious mineral deposits, our guide on how to descale a coffee machine has more in-depth techniques that work just as well here.
Finally, keep an eye on the rubber gasket. Over time, it will naturally harden and compress, which stops it from creating a proper seal. If you ever spot steam or water leaking from the middle of the pot while it's brewing, that's your sign—it's time for a replacement. A new gasket is a cheap and incredibly easy fix to keep your moka pot brewing perfectly.
Your Moka Pot Questions Answered
Even after you’ve dialled in your technique, a few questions always seem to bubble up when you're getting to grips with a moka pot. Let’s tackle some of the most common ones that go beyond the basic brewing steps.
Can I Make a Half Pot of Coffee?
This is easily the most frequent question we hear, and unfortunately, the answer is a firm no. Moka pots are specifically engineered to work with a full chamber of water and a completely filled basket of coffee grounds.
Trying to brew a half-pot throws off the entire pressure dynamic needed for a good extraction. You’ll almost always end up with a weak, watery, and disappointingly underdeveloped brew. If you need smaller servings, the only real solution is to invest in a smaller-sized moka pot to keep those crucial ratios correct.
Is Moka Pot Coffee the Same as Espresso?
While it’s often called ‘stovetop espresso’, what you’re making is technically a different drink altogether. The real difference comes down to one thing: pressure. A moka pot brews with a relatively gentle pressure of around 1.5 bars.
A professional espresso machine, on the other hand, forces water through the coffee puck at a much higher pressure, typically 9 bars or more. This is why your moka pot brew is rich, concentrated, and intense, but it won’t have that signature thick crema or the syrupy body of a true espresso.
Think of moka pot coffee as espresso's powerful, rustic cousin. It delivers a similar intensity and depth of flavour but with its own unique character and texture, making it a distinct and beloved brewing method in its own right.
Why Has My Aluminium Pot Gone Dark Inside?
Seeing the inside of your shiny new aluminium pot start to darken can be a bit alarming, but don't worry—it’s actually a good thing! That discolouration is a natural patina created by hardened coffee oils that build up over time.
This layer effectively seasons the pot. More importantly, it acts as a protective barrier, preventing the aluminium from oxidising. If it oxidises, it can impart a noticeable metallic tang to your coffee. So, when you clean your pot, just give it a simple rinse with warm water. Avoid using harsh detergents or steel wool, as you’ll scrub away that beneficial, flavour-protecting layer you’ve worked to build up.
Ready to put your knowledge into practice with beans that are perfect for a moka pot? Seven Sisters Coffee Co offers a fantastic range of single origins and blends, roasted to bring out the best in your stovetop brewer. Explore our coffee selection and find your new favourite.