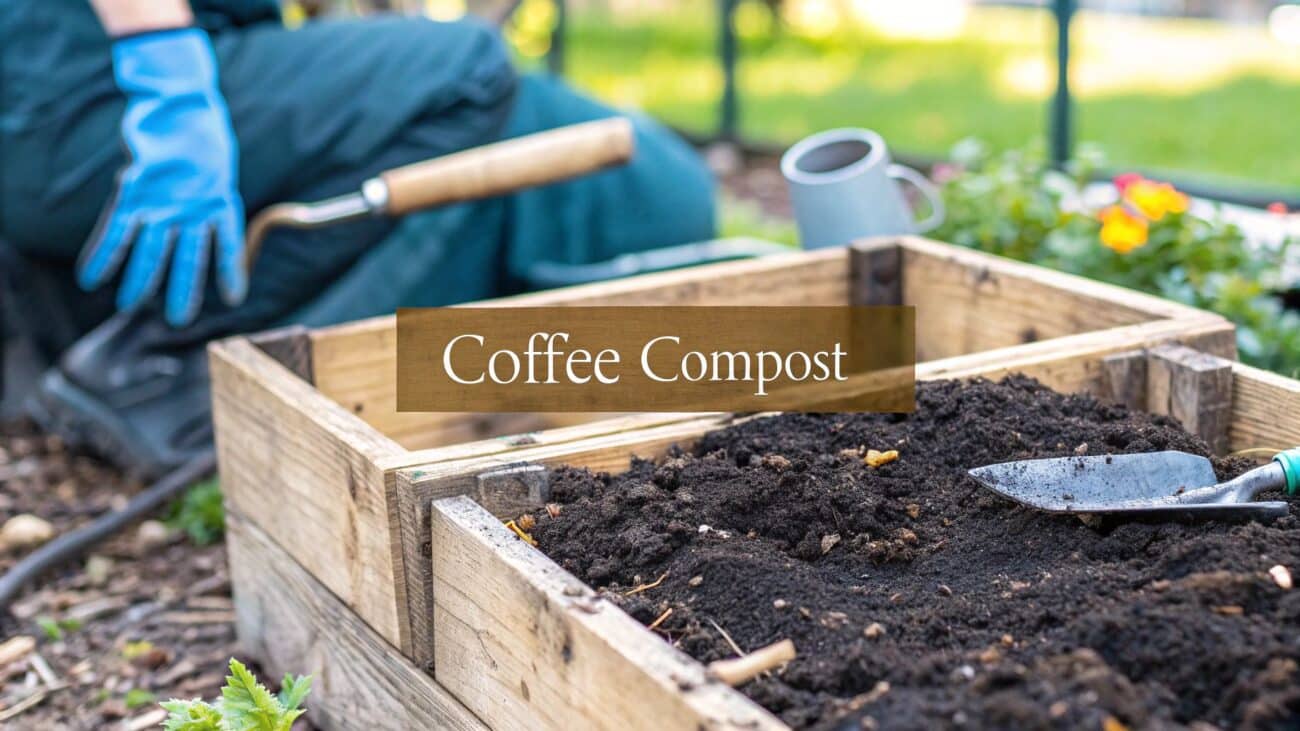
Your Guide to Composting Coffee Grounds at Home

Yes, you absolutely can, and should, compost your coffee grounds. It’s one of the best things you can do for your garden and a ridiculously easy way to reduce your household waste. Those used grounds are packed with nitrogen, a vital nutrient for healthy soil, making them a fantastic 'green' material for any compost pile.
Instead of chucking them in the bin, you can turn that daily coffee habit into something genuinely valuable for your garden.
Why Your Morning Coffee Is a Gardener's Best Friend
That daily cafetière or espresso shot produces more than just a delicious brew; it creates a powerful garden resource that most people simply throw away. For the majority of used coffee grounds, the journey ends in a black bin bag, destined for a landfill. This seemingly harmless habit has a surprisingly big environmental footprint right here in the UK.
The Hidden Cost of Coffee Waste
We’re a nation of coffee lovers, and the scale of our consumption is massive. The UK gets through nearly 35 billion cups of coffee every year, which translates to over 250,000 tonnes of spent coffee grounds. That’s a staggering amount of organic waste.
When all that coffee ends up in a landfill, it decomposes anaerobically (without oxygen). This process releases methane, a greenhouse gas far more potent than carbon dioxide. It’s a huge missed opportunity; instead of contributing to climate change, those grounds could be enriching our gardens and allotments.
Thinking about the impact of coffee waste versus the benefits of composting can really put things into perspective. Here’s a quick look at the two very different outcomes for your used grounds.
Coffee Grounds Waste vs Compost Benefits
| Impact Area | Landfill Outcome (Negative) | Compost Outcome (Positive) |
|---|---|---|
| Greenhouse Gas Emissions | Produces methane, a powerful greenhouse gas, as it decomposes without oxygen. | Sequesters carbon in the soil, actively reducing your carbon footprint. |
| Soil Health | Offers zero benefit. It's just waste taking up space. | Enriches soil with vital nutrients like nitrogen, improving plant growth. |
| Waste Management | Adds to the UK's massive landfill burden, contributing to environmental strain. | Reduces household waste, turning a byproduct into a valuable resource. |
| Garden Ecosystem | No impact. It's a dead end for a useful material. | Fosters beneficial microorganisms, improves soil structure, and attracts worms. |
As you can see, the choice is pretty clear. Composting isn't just a slightly better option; it transforms a negative into a powerful positive for your garden and the planet.
Transforming Waste into Black Gold
Composting your coffee grounds is a simple, effective alternative. It’s a natural process that turns a common kitchen byproduct into what seasoned gardeners lovingly call ‘black gold’. This dark, crumbly, nutrient-rich material is one of the best things you can add to your soil.
By adding coffee grounds to your compost heap, you're not just cutting down on bin day collections; you're actively creating a high-quality, natural fertiliser that will help your plants thrive. It’s a perfect closed-loop system in your own back garden.
Adding this homemade compost to your soil brings a whole host of benefits:
- Improves Soil Structure: It helps bind together loose, sandy soils and breaks up heavy clay, improving aeration and drainage. Your plant roots will thank you.
- Boosts Nutrient Content: Coffee grounds are an excellent source of nitrogen, which is crucial for lush, green leaf growth.
- Encourages Microorganisms: Good compost introduces a thriving ecosystem of microbes that help plants absorb nutrients more effectively.
- Shrinks Your Carbon Footprint: You directly cut down on landfill waste and the methane emissions that come with it.
A Practical and Rewarding Habit
Making this part of your daily routine is surprisingly easy. The grounds from your morning brew can be collected in a small caddy right next to your kettle, along with other kitchen scraps. Of course, great coffee starts with great beans, and ensuring you look after them properly from the start makes all the difference. You might find our guide on how to store coffee beans useful for keeping them fresh before you even brew.
Imagine your flowerbeds looking more vibrant or your vegetable patch producing a bigger harvest, all thanks to something you used to throw away without a second thought. Composting your coffee grounds isn't just about diverting waste; it's about unlocking its hidden potential to breathe new life into your garden.
How to Prepare Coffee Grounds for Composting

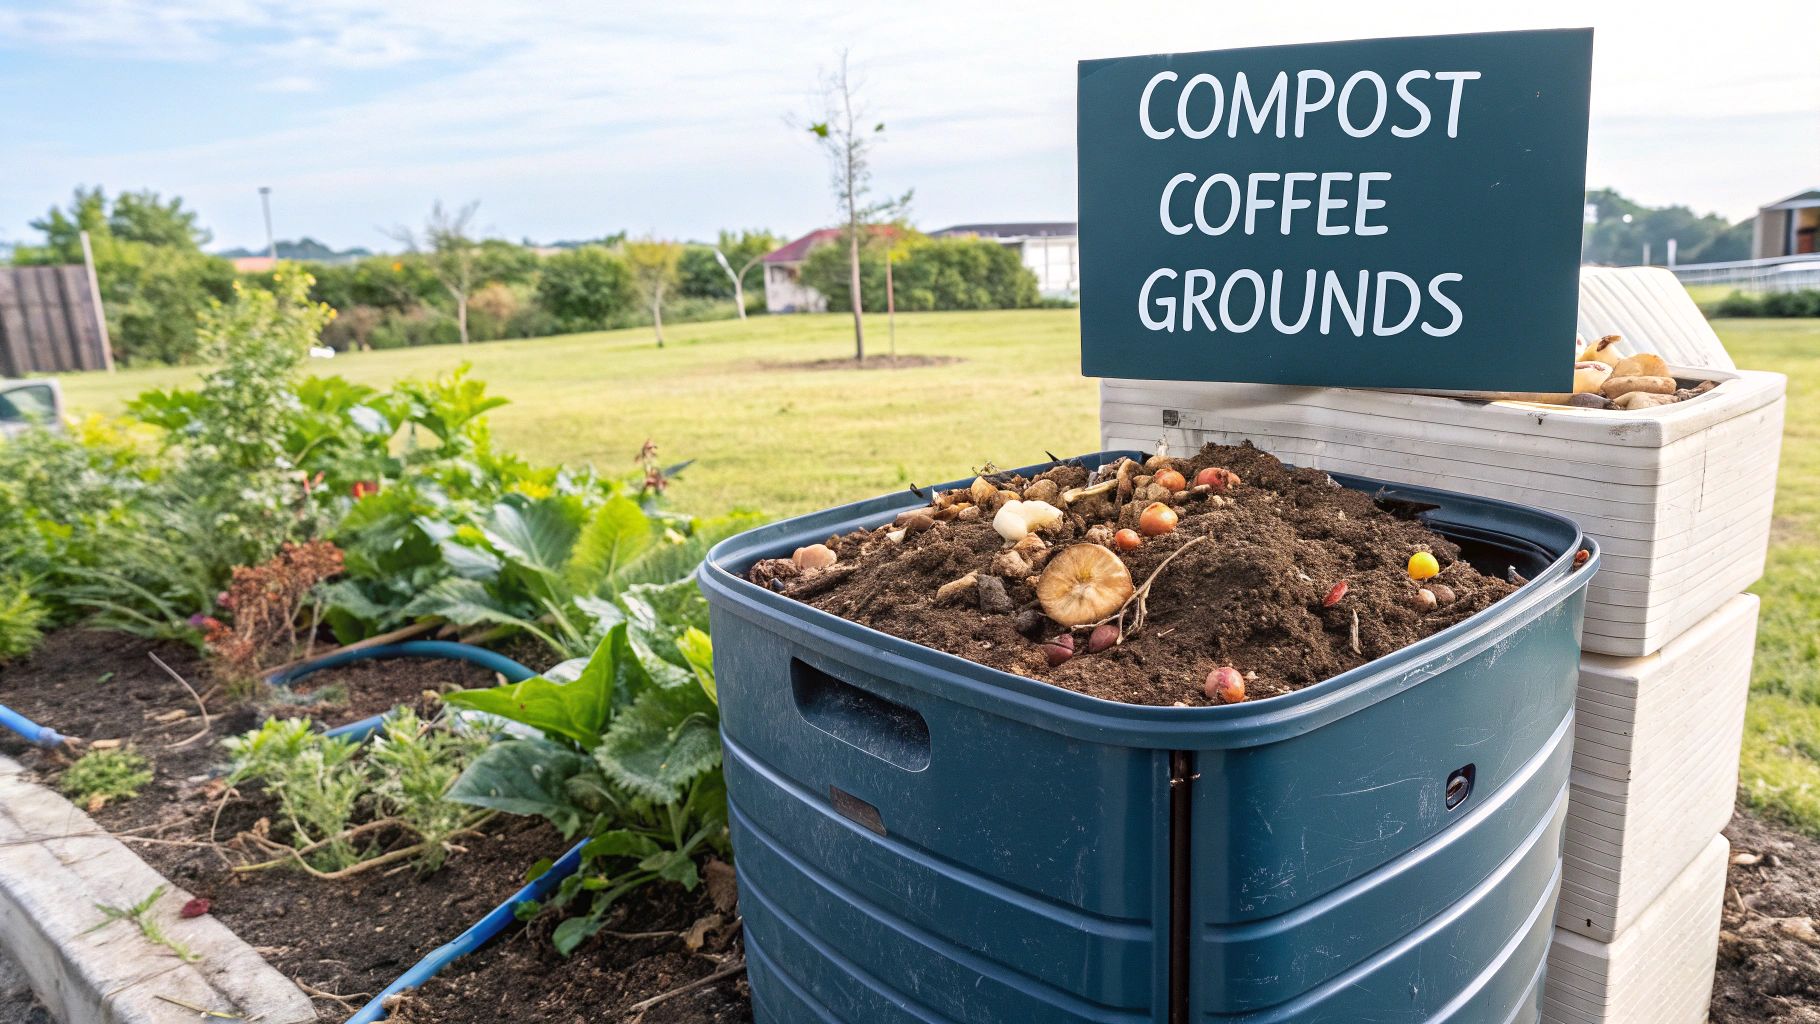
Great composting starts long before your coffee grounds ever touch the pile. How you collect and handle them in the kitchen can make a real difference to the health of your compost, but don't worry—it’s surprisingly simple and slips right into your daily coffee routine.
The main goal is to stop the grounds from turning into a mouldy, clumpy mess before you have a chance to add them to your bin. A small kitchen caddy with a lid is perfect, but an old ice cream tub or any container you can seal works just as well. Simply scoop your used grounds in after you brew and pop the lid on.
To Dry or Not to Dry?
This is one of the most common questions I hear: do the grounds need to be dry? The short answer is no, you don't need to. Wet grounds are perfectly fine to add straight to your compost bin.
Spreading them out on a tray to dry is an extra step that honestly isn't necessary for successful composting. The only exception is if you're collecting a huge batch at once—say, a big bag from your local café. In that case, letting them air out for a day can stop them from compacting into a dense, airless layer in your compost.
There's a persistent myth that coffee grounds are highly acidic and will ruin your compost. While fresh coffee beans are acidic, the brewing process neutralises most of it. Used grounds typically have a pH between 6.5 and 6.8, which is almost neutral and absolutely ideal for a happy compost pile.
Dealing with Filters and Pods
What about the paper filter from your V60 or drip machine? Good news: it can go straight into the compost with the grounds. Paper filters are a 'brown' (carbon-rich) material, which conveniently helps balance the nitrogen-rich 'green' coffee grounds. Just give them a quick tear to help them break down a bit faster.
Be careful about what your coffee comes in, though:
- Paper Filters: Unbleached paper filters are the best choice, but most modern white filters are fine, too.
- Compostable Pods: Look for official certifications like 'TÜV AUSTRIA OK compost'. Many pods labelled "compostable" are only suitable for industrial facilities, not your garden bin.
- Plastic or Aluminium Pods: These are a definite no. They will not break down and will just contaminate your compost.
Storing Your Grounds Before Composting
Let's be realistic—you’re probably not trekking out to the compost bin every single morning. Storing grounds for a few days is completely fine, but you want to avoid them going mouldy. An airtight container kept somewhere cool and dark, like under the sink, will keep them in good shape for up to a week.
If you do spot a bit of mould, don't panic. A small amount of white or greenish fuzz is just nature doing its thing and won't harm your compost. However, if your container is starting to look like a solid block of blue fur, it's best to add it with a generous layer of dry 'browns' like cardboard or dead leaves to make sure it gets properly aerated.
Getting these simple prep steps right is just as important as your brewing technique. For tips on making the perfect cup every time, our complete guide on how to brew coffee has you covered. Nailing the preparation sets you up for creating fantastic, nutrient-rich compost for your garden.
Building Your Coffee-Infused Compost Pile
Creating a successful compost pile is less about rigid rules and more like being a chef for your garden—it’s all about getting the recipe right. The secret lies in balancing two types of ingredients: carbon-rich ‘browns’ and nitrogen-rich ‘greens’. This balance is what fuels the microscopic organisms that break everything down into that beautiful, dark, nutrient-rich humus.
Your used coffee grounds are a star player in this recipe. Don’t let their colour fool you; they fall squarely into the ‘green’ material category. They’re absolutely packed with nitrogen, which is essential for getting your compost pile active and properly heated up.
Understanding The Greens and Browns Ratio
To really get things cooking, you need a lot more browns than greens. A good rule of thumb to start with is a ratio of roughly three parts brown material to one part green material by volume. I like to think of it as building a lasagne; you’ll be creating distinct layers to build up your pile.
This isn’t an exact science, so don't get stressed about precise measurements. The goal is simply to provide a good mix of fuel (carbon from the browns) and fire (nitrogen from the greens).
-
Green Materials (Nitrogen-Rich): These are the fresh, often wet materials that provide the protein for all those helpful microbes.
- Used coffee grounds and their paper filters
- Grass clippings
- Fruit and vegetable scraps from your kitchen
- Tea bags (just make sure they're plastic-free first)
- Fresh plant trimmings
-
Brown Materials (Carbon-Rich): These are typically dry, woody materials that provide energy and, crucially, structure, which ensures good airflow.
- Dry, fallen leaves
- Shredded newspaper or plain cardboard (avoid glossy magazines)
- Straw or hay
- Wood chippings or sawdust (from untreated wood only)
- Crushed eggshells
Nailing this balance is the key to a pile that smells earthy and wonderful, not sour or unpleasant. Nine times out of ten, an imbalance here is the root cause of common composting problems.
Layering Your Compost for Success
Whether you have a simple heap in the corner of your garden, a rotating tumbler, or a dedicated wormery, the layering principle stays the same. The whole idea is to avoid creating dense, compacted mats of any single material. Those mats block oxygen and can slow everything right down.
When you add your coffee grounds, never just dump them in as one big, solid clump. Instead, make sure you sprinkle them in a thin layer over the existing surface. A great way to begin any new pile is with a solid base of browns.
A simple layering 'recipe' might look something like this:
- Start with Browns: Begin your pile with a thick layer (a few inches) of twigs and shredded cardboard. This creates an airy foundation and helps with drainage.
- Add Your Greens: Next, add a thinner layer of your green materials. This is where your kitchen scraps and, of course, your coffee grounds go.
- Cover with Browns: Always finish by covering your fresh green layer with another layer of browns, like dry leaves or ripped-up newspaper. This simple step helps contain odours and keeps pests away.
This whole process is captured nicely in the infographic below, showing the simple flow from collecting your grounds to maintaining the pile.
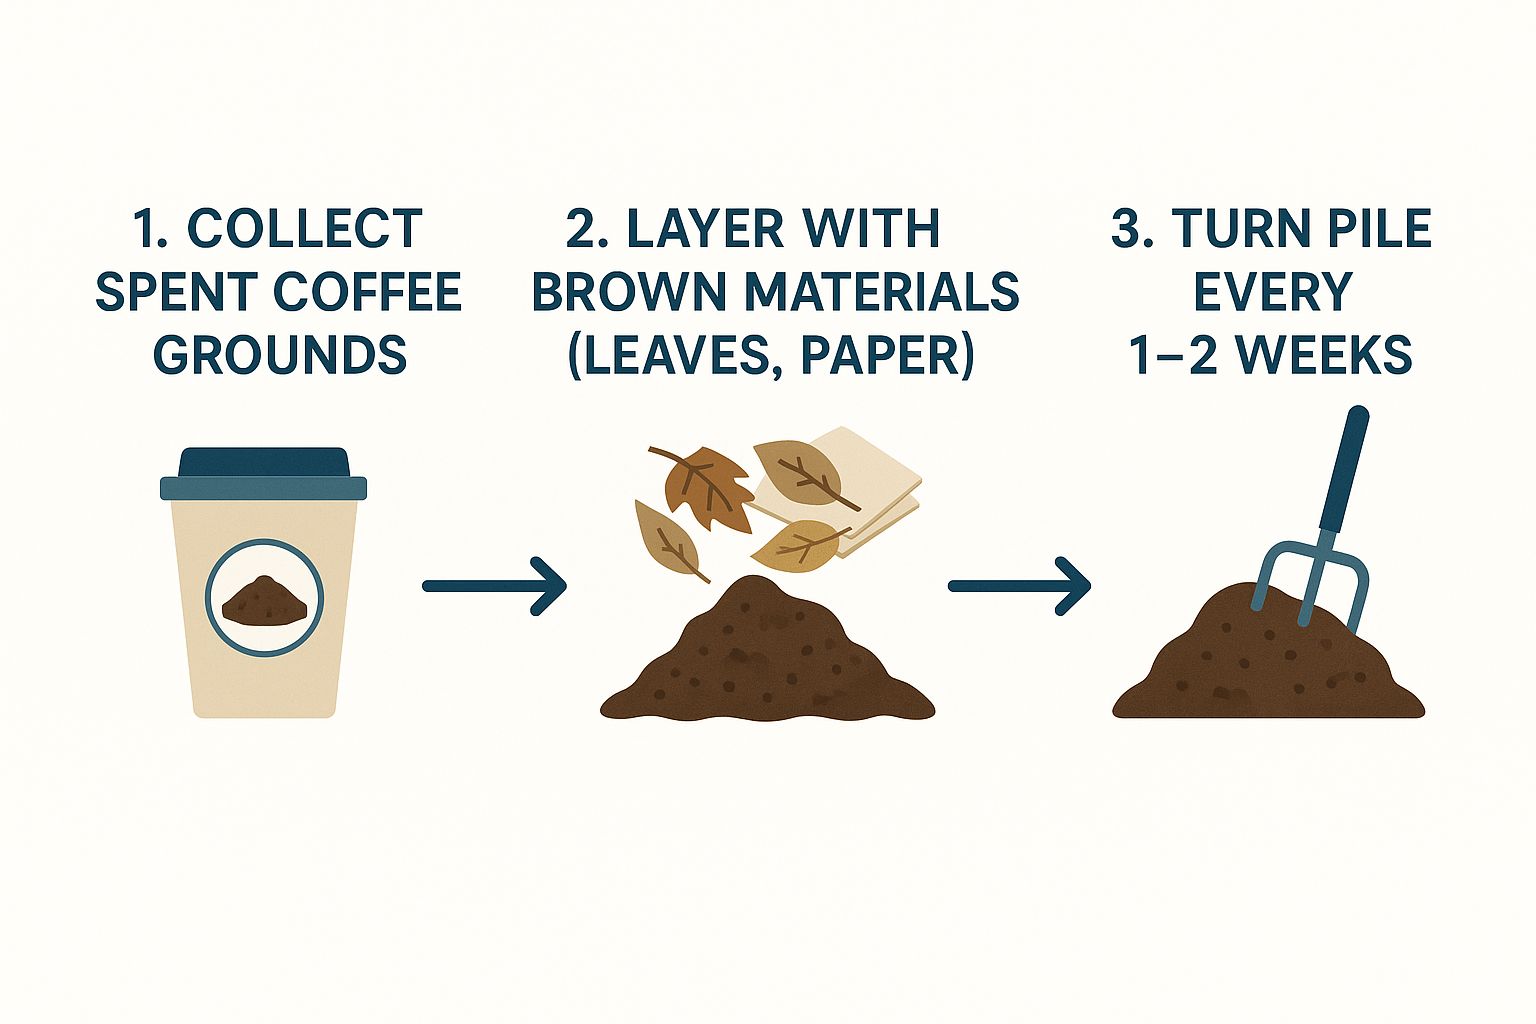
This straightforward cycle of collecting, layering, and turning is the core rhythm of successful composting. It's what ensures all those materials break down efficiently into black gold for your garden.
Real-World Examples in Different Compost Systems
How you apply these principles might change a little depending on your setup. If you're using a compost tumbler, the process is almost identical. Add your layers of greens and browns, then just give the tumbler a few good spins every couple of days. This mixes everything thoroughly and aerates the pile without you having to do any heavy lifting with a garden fork.
For those with a wormery (vermicompost), coffee grounds are a fantastic addition, but you have to use a bit of moderation. The worms love them, but too much at once can make the bedding acidic. A good practice is to sprinkle a small amount over the surface once a week and mix it in gently.
Pro Tip: Keep a bag of dry leaves or a stack of cardboard right next to your compost bin. This makes it incredibly easy to follow the 'cover your greens' rule every single time you add kitchen scraps, which is the easiest way to maintain a healthy balance in your pile.
No matter your method, the visual cues will tell you if you're on the right track. A healthy, active pile should feel damp like a wrung-out sponge, have a pleasant, earthy smell, and might even generate a little steam in the centre.
Just as you learn to perfect your brewing methods, like those in our guide on how to make cold brew coffee, you'll soon get a feel for what your compost pile needs to thrive.
How to Maintain and Troubleshoot Your Compost
A compost pile is a living, breathing system, but thankfully, it’s not a demanding one. With a little bit of attention, you can keep the decomposition process humming along smoothly. The two most important jobs are turning and watering—simple tasks that make all the difference.
Think of turning your compost as giving it a good stir. It mixes everything together, distributes moisture evenly, and—most importantly—introduces vital oxygen to the microorganisms doing all the hard work. This aeration is the secret to preventing foul odours and seriously speeding up the whole process.
So, how often should you get the fork out? For a hot, active pile, a thorough turn every one to two weeks is ideal. If you're using a compost tumbler, a few spins every two or three days will do the trick. You’ll notice the pile shrinks after turning, which is a fantastic sign that everything is breaking down nicely.
Getting the Moisture Level Just Right
Moisture is the other piece of the puzzle. Your compost should feel like a well-wrung-out sponge: damp to the touch, but not soaking wet. If you grab a handful and give it a firm squeeze, you should only get a drop or two of water out of it.
During long, dry spells in the summer, you might need to give your pile a light sprinkle with a hose. On the flip side, if you’ve had a particularly soggy week, try adding a thick layer of dry "browns," like shredded cardboard, to soak up the excess. Nailing this balance is a huge part of successful composting.
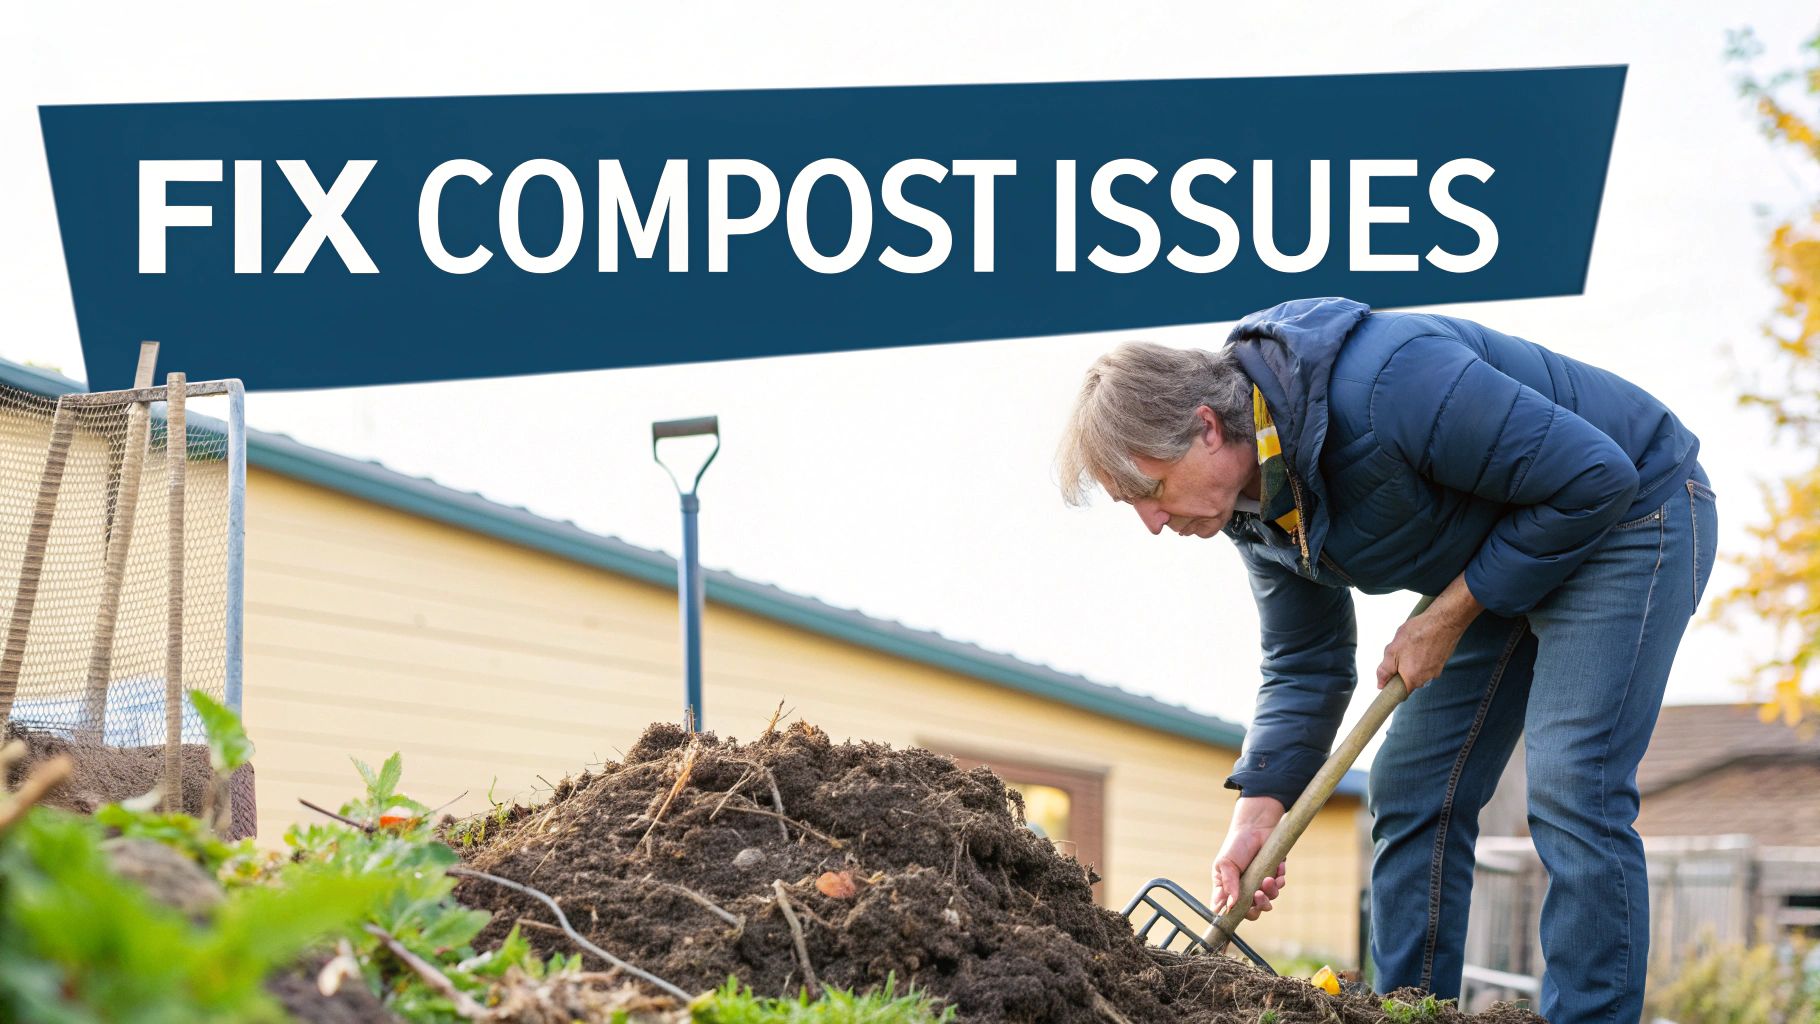
A Simple Diagnostic Guide for Common Problems
Even the most well-tended compost can hit a snag. The good news is that most problems are easy to spot and even easier to fix. Your pile will give you clear signals when something is off, usually through its smell, appearance, or a general lack of activity.
A healthy compost pile should have a pleasant, earthy smell, a bit like a forest floor after it rains. If it starts to smell unpleasant—like ammonia or rotten eggs—it’s telling you that the balance of ingredients or conditions needs a tweak.
Don't be discouraged if you run into an issue; it's all part of the learning curve. This quick troubleshooting guide will help you identify and solve the most common composting challenges.
Common Compost Problems and Solutions
| Symptom | Likely Cause | Effective Solution |
|---|---|---|
| The Pile is Smelly | Too much green material (like grass clippings or coffee grounds) and not enough air. | Mix in a generous amount of brown materials like dry leaves, shredded newspaper, or cardboard to absorb excess nitrogen and improve airflow. Turn the pile thoroughly. |
| The Pile is Slimy | Far too much moisture and a severe lack of oxygen, often from too many wet kitchen scraps. | Add dry, bulky browns like wood chippings or torn-up cardboard. Turn the pile completely to break up any compacted, slimy clumps and introduce air. |
| The Pile Isn't Heating Up | The pile is either too small, too dry, or doesn't have enough nitrogen-rich green material. | Add more greens like coffee grounds or fresh plant trimmings to fuel the microbes. If it's dry, give it a light watering. A pile needs to be at least one cubic metre to retain heat effectively. |
| It's Attracting Pests | Exposed food scraps are the most common culprit, especially cooked food, meat, or dairy (which should be avoided). | Always cover new additions of kitchen scraps with a thick layer of brown material. Ensure your compost bin has a secure lid if you have persistent visitors like rats. |
Tackling Specific Issues Head-On
Let's walk through a real-world example. Imagine you've been diligently adding your coffee grounds and kitchen scraps, but you notice a distinct, sharp smell of ammonia when you get close to the bin. This is a classic sign of too much nitrogen. Your coffee grounds, while fantastic, need their carbon-rich counterparts.
The immediate fix? Stop adding "greens" for a week. Instead, mix in a big batch of shredded cardboard and dry leaves. Turn it all really well, and the smell should vanish within a few days as the balance is restored.
Another common scenario is a pile that just seems dormant. You’re adding materials, but nothing is happening—it isn't shrinking, it isn't warm, and it still looks like a heap of garden waste. This almost always comes down to a lack of moisture. Grab a handful from the centre; if it feels dry and crumbly, the solution is simple. Water it gently with a hose while turning it with a fork to make sure the moisture gets distributed evenly. This little drink will rehydrate everything and kick-start the microbial activity again.
Composting is an art, not an exact science. Learning to read these simple cues will quickly make you a confident composter, turning everyday waste into black gold for your garden. If you're a pour-over coffee fan, remember that even small additions like used paper filters help. You can find excellent, compostable options like these Hario V60 filter papers that break down perfectly alongside your grounds.
Harvesting and Using Your Finished Compost
After months of patiently layering, turning, and waiting, the moment you’ve been working towards has finally arrived. This is where all that effort pays off, transforming kitchen scraps and garden waste into the ‘black gold’ that gardeners rave about.
The whole process of composting coffee grounds and other organic bits isn't a race; it can take anywhere from a few months to a full year. It all depends on how big your pile is and how active it gets. But when it's done, you'll know.
Recognising When Your Compost Is Ready
Forget strict timelines—your own senses are the best tools you have for telling when the compost is ready. Look for a few key signs that the decomposition process has wrapped up and it's ready to feed your garden.
- Look: Finished compost should be a deep, dark brown or black. It'll have a fine, crumbly texture, a lot like rich soil. You shouldn't be able to spot any of the original materials you threw in, like vegetable peelings or those old coffee grounds.
- Smell: Take a good whiff. It should smell wonderfully earthy and sweet, like a forest floor after it rains. If you catch any sour or ammonia-like smells, it's not quite done yet and needs a bit more time to mature.
- Feel: When you scoop some up, it should feel light and crumbly. It will be damp but definitely not soggy. Crucially, it won't be warm in the centre any more, which tells you the intense microbial party has wound down.
It's amazing to see the transformation. The heap of scraps that you started with will have shrunk by as much as 50%. This massive reduction in volume is one of the clearest signs that the decomposition is complete, leaving you with a dense, nutrient-packed amendment for your soil.
How to Harvest and Sieve Your Compost
Once you're happy it's ready, it's time to get it out. If you have a continuous pile, you'll want to harvest from the bottom, which is where the oldest and most broken-down material will be. Most compost bins have a little hatch at the base specifically for this job. Just slide it open and scoop out the good stuff.
For a really fine, professional-looking finish—perfect for potting mixes or sprinkling on the lawn—you might want to sieve it. It's a simple step:
- Shovel the compost onto a garden sieve or a homemade screen (hardware cloth stretched over a wooden frame works a treat).
- Shake it or rub it through the mesh into a wheelbarrow or onto a tarp waiting below.
- The lovely, fine material that falls through is your finished product, ready to go.
Don’t just throw away the lumpy bits left in the sieve, like small twigs or avocado pits. Chuck them back into your active compost bin! They're full of beneficial microbes and will act as brilliant 'starters' to help get your next batch going.
Putting Your Homemade Black Gold to Use
You've done it. You’ve created a powerful, all-natural fertiliser from stuff you would have otherwise thrown away. Now for the really fun part: letting it work its magic in your garden.
Here are a few of my favourite ways to use it:
- Enrich Your Vegetable Patch: Before you plant anything, dig a generous layer of compost (2-3 inches deep) into the top few inches of your soil. This gives hungry plants like tomatoes and courgettes a slow-release source of nutrients to feast on.
- Create a Supercharged Potting Mix: For your pots and containers, mix your sieved compost with regular potting soil. I find a ratio of about one part compost to two or three parts potting soil is a fantastic blend for holding moisture and boosting nutrients.
- Top-Dress Your Lawn: In the spring or autumn, lightly sprinkle a thin layer of sieved compost across your lawn and gently rake it in. It acts as a natural feed, encouraging thick, green growth without any harsh chemicals.
- Apply as a Protective Mulch: Spread a layer of compost around the base of your shrubs, flowers, and perennials. This mulch is great for keeping the soil moist, keeping weeds down, and slowly feeding your plants as it continues to break down.
A Few Common Questions About Composting Coffee Grounds
Even with the best intentions, questions always pop up when you start a new gardening project. Composting coffee grounds is pretty straightforward, but a few queries crop up time and again. Let's run through the most frequent ones so you can get composting with complete confidence.
One of the biggest worries I hear from gardeners is whether they can simply add too much coffee. It’s a brilliant source of nitrogen, but like anything in a good compost recipe, balance is everything.
Can I Add Too Many Coffee Grounds to My Compost?
In a word, yes. You can definitely overdo it. While coffee grounds are a fantastic addition, they’re a potent 'green' material. Tipping a huge, unmixed quantity into your bin can create a dense, soggy layer that quickly becomes anaerobic (lacking oxygen).
That’s when you get nasty smells and decomposition grinds to a halt. A good rule of thumb is to keep coffee grounds to no more than 20-25% of your total compost volume. This ensures they provide that welcome nitrogen boost without overwhelming the essential carbon-rich 'brown' materials.
If you’ve scored a big bag of used grounds from a local café, just add them in stages. Layer them thinly with plenty of shredded cardboard, twigs, or dry leaves to maintain that crucial airflow and keep things balanced.
Should I Add Worms Directly to My Coffee Compost?
This depends entirely on your setup. For a traditional hot compost pile, adding worms isn't necessary—in fact, the heat can be far too intense for them. In a hot pile, the real work is done by microorganisms like bacteria and fungi.
However, if you're running a cooler, slower pile or a dedicated wormery (vermicomposting), then worms are your star players. Worms absolutely love coffee grounds, but only in moderation. The grounds can make their environment a touch acidic if you add too many at once. Just sprinkle a small amount over the surface each week and mix it in gently. They'll process it efficiently, turning it into incredibly valuable worm castings.
How Does the UK's Coffee Habit Affect This?
It’s worth pausing to think about the sheer scale of our national coffee habit. The UK's coffee shop market is valued at a staggering £15 billion, but that comes with a hefty environmental price tag. We generate over 2.5 billion disposable cups and more than half a million tonnes of used grounds every year, with much of it ending up in landfill.
By composting at home, you're directly tackling a small but meaningful part of this national waste problem. You can dig deeper into the impact of UK coffee waste in this detailed report on the reuse of coffee grounds.
Are There Any Plants That Dislike Coffee Grounds?
This is a common myth that really needs clearing up. By the time your coffee grounds have fully broken down in the compost, their pH is nearly neutral. The finished product is a balanced, stable humus that’s beneficial for almost all plants.
It’s true that applying fresh, uncomposted grounds directly to the soil can temporarily inhibit the growth of some delicate seedlings, mainly due to the caffeine. But once composted, these compounds are completely broken down, making the final compost safe and beneficial for everything from acid-loving blueberries to alkaline-preferring lavender.
The composting process works its magic, neutralising any potentially harsh elements and leaving only the good stuff behind. For more general advice and coffee-related tips, feel free to check out the other articles on our coffee blog.
At Seven Sisters Coffee Co, we believe great coffee should be a force for good, from the first sip to the final grounds. Our commitment to sustainability and exceptional quality means you can enjoy an incredible brew while knowing you're making a positive choice for the planet. Explore our range of ethically sourced coffees today at https://sevensisterscoffee.co.uk.