How to Brew Coffee at Home A Definitive Guide

Brewing truly great coffee at home isn’t about fancy gadgets; it’s about mastering a few key fundamentals before water ever touches the grounds. It all starts with two non-negotiables: high-quality, fresh beans and pure, properly heated water. Get these right, and you’ve built the foundation for every delicious cup that follows.
The Foundations of Flawless Coffee
Before you even think about brewing methods, let’s talk ingredients. A perfect cup isn’t the result of a complicated machine; it’s the product of excellent raw materials handled with care. The single most impactful upgrade you can make to your coffee routine is switching from pre-ground to fresh, whole beans.
Once coffee is ground, it starts losing its aromatic compounds and vibrant flavours to oxidation almost immediately. Grinding just before you brew is the only way to preserve those delicate notes the roaster worked so hard to develop.
When it comes to storage, keep your whole beans in an airtight container away from light and heat. Please, never put them in the freezer—the moisture will ruin them faster than you can say “espresso.”
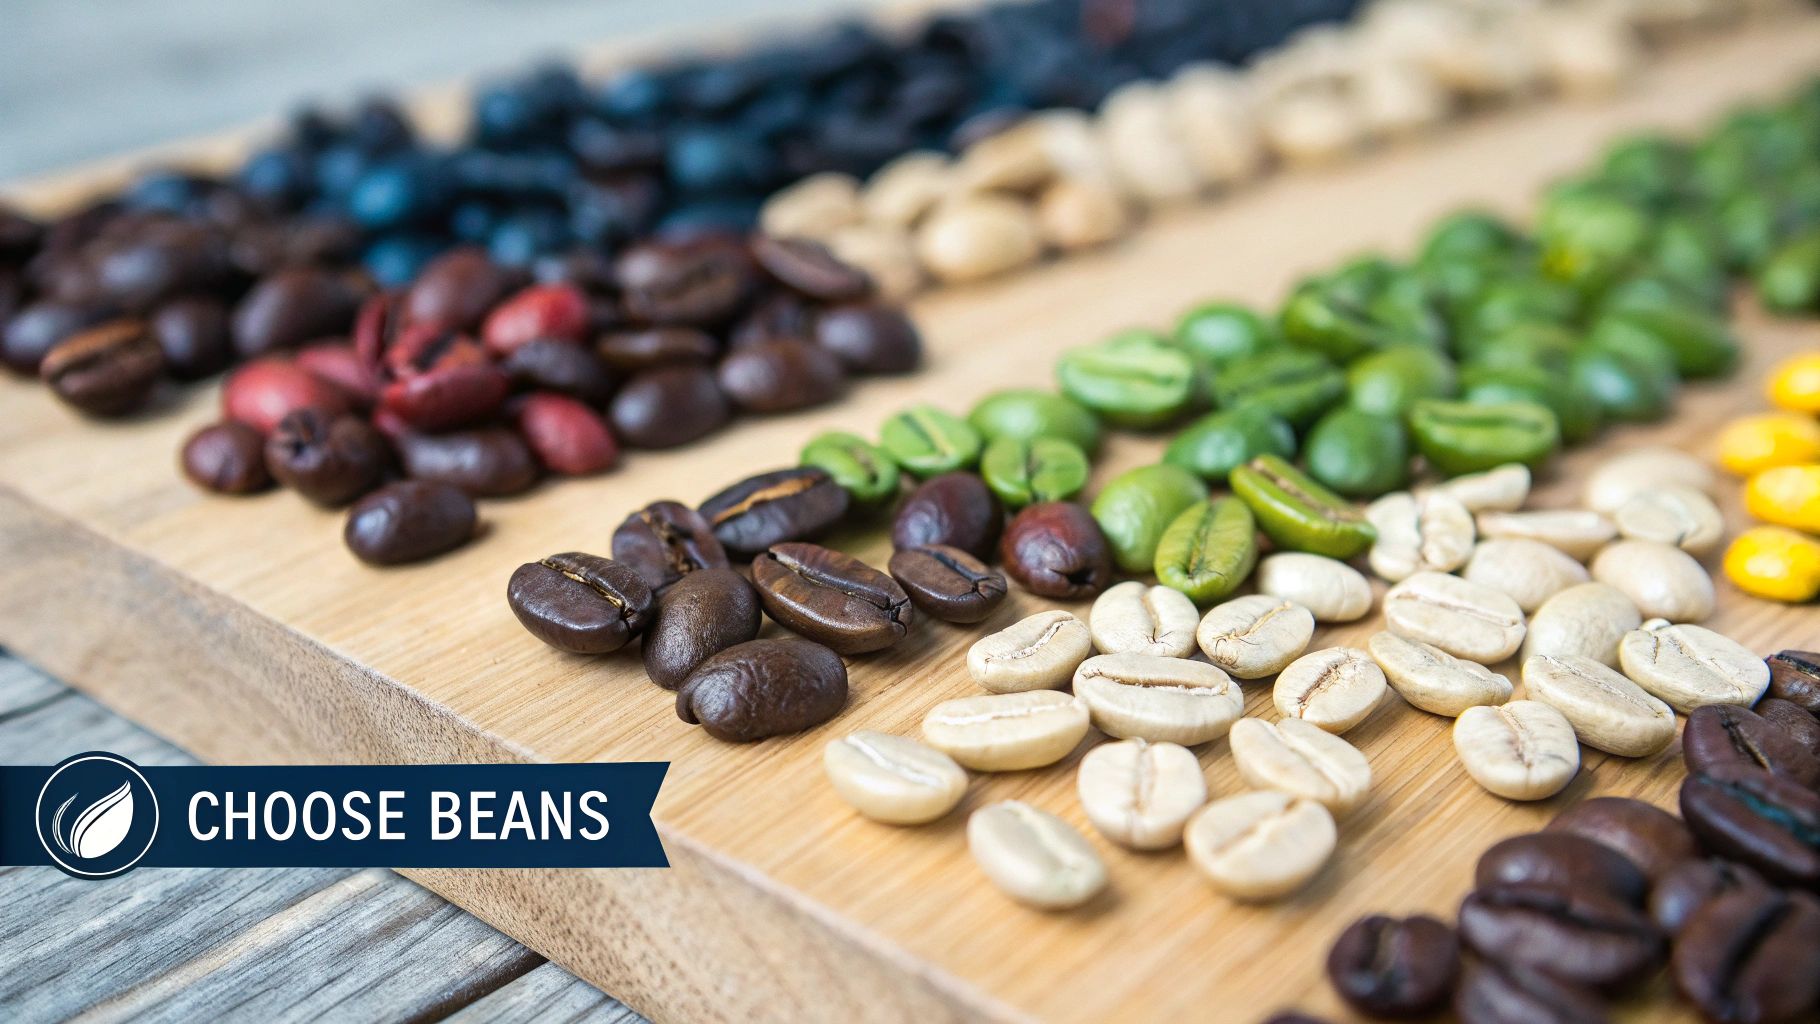
Choosing Your Perfect Beans
The world of coffee beans can feel a bit overwhelming, but it really boils down to two main camps that shape the flavour in your cup:
- Single-Origin: These beans come from a specific farm or region, showcasing the unique flavour characteristics of that area’s soil and climate. Think of them like a fine wine, offering distinct notes of fruit, flowers, or spice.
- Blends: Roasters cleverly combine beans from different regions to create a consistent, balanced, and often more approachable flavour profile. A well-crafted blend is all about harmony, making it perfect for a dependable daily brew.
Your choice just depends on what you enjoy. Are you feeling adventurous and keen to explore the bright, acidic notes of an Ethiopian Yirgacheffe? Or do you prefer the rich, chocolatey comfort of a classic espresso blend? Experimenting is half the fun.
To dig deeper, you can explore how different coffee roasting profiles Explained in our detailed guide, which will help you understand how the roast dramatically affects the final taste.
The Critical Role of Water
Here’s a fact that surprises most people: coffee is over 98% water. That means its quality is absolutely non-negotiable. Using water straight from the tap can introduce unwanted minerals and chlorine, which will easily overpower the subtle flavours in your beans.
The sweet spot for brewing temperature is between 90-96°C. If the water is too hot, it will scald the grounds, leaving you with a bitter, harsh taste. Too cool, and it will fail to extract the full flavour, resulting in a weak, sour cup.
Using filtered water is such a simple step, but it yields a dramatically cleaner and sweeter result. This small change allows the true character of your chosen beans to finally shine through.
The UK’s love for a quality brew has exploded, with approximately 98 million cups consumed daily across the country. It’s clear that a nation once famous for tea now takes its coffee very seriously, making these foundational steps more important than ever.
Choosing Your Ideal Brewing Equipment
Stepping into the world of coffee gear can feel a bit overwhelming, but finding the right brewer is far simpler than you might think. Honestly, the best kit isn’t about the price tag; it’s about what slots neatly into your daily routine, matches your taste, and suits how hands-on you want to get.
Think of it like choosing a car. Do you need a rugged 4×4 for weekend adventures, or a slick city runaround for convenience? The same logic applies to coffee. Each method gives you a completely different experience and, crucially, a different final cup. So let’s cut through the technical jargon and focus on what really matters.
For Lovers of Rich and Full-Bodied Coffee
If you crave a coffee that’s dense, bold, and has that satisfyingly heavy mouthfeel, then immersion brewing is your best bet. This is where the coffee grounds get to hang out and steep directly in the water for the entire brew time.
The most iconic example here is the French Press. It’s loved for producing that classic rich, full-bodied cup. You get a slightly silty texture because its metal filter allows more of the coffee’s natural oils and fine particles through into your mug.
- Who it’s for: The coffee drinker who loves a robust, traditional cup and doesn’t mind a little sediment at the bottom.
- Time Commitment: You’re looking at about 5-7 minutes from start to finish.
- Clean-up: It does involve scooping out wet grounds, which can be a tad messy.
For anyone just starting to brew coffee at home, the French Press is a fantastic gateway. It’s incredibly forgiving and rarely lets you down on flavour.
For Those Who Prefer a Clean and Nuanced Cup
On the other hand, if you appreciate clarity and want to taste every delicate, complex note in your single-origin beans, a pour-over dripper is the way to go. These brewers use a paper filter, which creates an exceptionally clean cup, free from any sediment or heavy oils.
The V60 is a hugely popular choice, instantly recognisable by its conical shape and the large hole at the bottom. This design puts you in complete control; your pouring speed and technique directly shape the final extraction, making it a seriously rewarding method to master.
A great pour-over highlights the unique character of your beans. It’s the perfect tool for exploring coffees with bright, floral, or fruity flavour profiles, as it lets those subtle tastes shine without being masked by heavy oils.
Comparing Popular Coffee Brewing Methods
To make things a bit clearer, here’s a quick-glance table comparing some of the most popular home brewing methods. It breaks down what you can expect from each in terms of flavour, effort, and the kind of coffee drinker it suits best.
| Method | Flavour Profile | Best For | Grind Size | Brew Time |
|---|---|---|---|---|
| French Press | Rich, full-bodied, oily, some sediment | Robust, classic coffee lovers | Coarse | 4-5 mins |
| V60 Pour-Over | Clean, bright, nuanced, highlights acidity | Exploring delicate single-origin notes | Medium-Fine | 2-3 mins |
| AeroPress | Versatile: clean like pour-over or rich like immersion | Adventurous brewers, travel, speed | Fine to Medium | 1-2 mins |
| Moka Pot | Strong, intense, espresso-like | Bold, concentrated coffee without an espresso machine | Fine | 4-5 mins |
Each of these methods has its own charm, and the “best” one really comes down to what you’re looking for in your daily cup.
For the Versatile and Adventurous Brewer
What if you want a bit of everything? The AeroPress is a modern classic for a reason, celebrated for being both incredibly versatile and portable. It uses air pressure to push water through the coffee, resulting in a brew that can be rich like a French Press or clean like a pour-over—it all depends on the recipe you follow.
Its speedy brew time (often under two minutes) and ridiculously easy clean-up have made it a firm favourite for coffee lovers on the go. This adaptability fits perfectly with the growing desire for convenient, high-quality coffee at home and away. In fact, UK consumers bought around 29.8 million kilograms of coffee for out-of-home consumption, and this figure is on the rise, showing just how much we value portable, personalised coffee.
Of course, choosing the right device is just the first step. Finding the perfect brewing accessories—like a quality grinder and a gooseneck kettle—will elevate your results to a whole new level.
Mastering Grind Size and Brew Ratio
Once you’ve sorted your beans and water, you arrive at the real heart of brewing coffee. This is where the magic happens, and it all comes down to two key variables: grind size and brew ratio.
Getting these right isn’t about following rigid rules. It’s about understanding how they work together to pull the perfect flavour from your beans. Think of it as a craft, not a science experiment.
Finding the Right Grind Size
Your grind is, without a doubt, one of the most important factors. If you want to instantly improve your coffee, the single best investment you can make is a quality burr grinder. Blade grinders are chaotic—they smash beans into uneven pieces. A burr grinder, on the other hand, mills them into uniform particles.
This consistency is everything. It ensures an even extraction, preventing that awful mix of sour (under-extracted) and bitter (over-extracted) notes from ruining your cup.
The ideal grind size is completely tied to your brewing method because it dictates how quickly water can pull flavour from the grounds. A finer grind means more surface area and a faster extraction. A coarser grind has less surface area, slowing everything down.
Here’s a simple way to think about it:
- Coarse Grind (like chunky sea salt): Perfect for brew methods with a long soak, like a French Press. The large particles stop you from over-extracting during that four-minute steep.
- Medium Grind (like granulated sugar): This is your versatile all-rounder. It works beautifully for most drip machines and pour-overs like the V60.
- Fine Grind (like table salt): You’ll need this for fast, high-pressure methods. Think Moka Pot or espresso, where water is forced through the coffee in seconds.
Getting the grind spot-on is especially rewarding when you discover the world of single-origin coffee, as the right texture will unlock those delicate, unique flavours that make those beans special.
A simple table can make matching your grind to your brewer a whole lot easier. This is a great starting point for dialling in your extraction.
| Recommended Grind Size for Brewing Methods |
| :— | :— | :— |
| Brewing Method | Recommended Grind | Visual Comparison |
| French Press | Coarse | Chunky Sea Salt |
| Drip Coffee Maker | Medium | Granulated Sugar |
| V60 Pour-Over | Medium-Fine | Caster Sugar |
| Moka Pot | Fine | Table Salt |
| Espresso | Extra-Fine | Powdered Sugar |
Once you’ve found the right ballpark for your method, you can start making small adjustments to perfect the flavour.
The Golden Brew Ratio
With your grind dialled in, it’s time to measure. Ditch the guesswork and grab a simple digital scale. This one change is the secret to getting delicious, repeatable results every single time. The industry starting point for brewing great coffee is often called the “golden ratio.”
The widely accepted starting point is a 1:16 ratio. This simply means for every 1 gram of coffee, you use 16 grams (or millilitres) of water. This provides a balanced and robust cup that serves as an excellent baseline.
But this isn’t a strict law—it’s a guide. Feel free to play with it. If you prefer a stronger, more intense brew, try a tighter ratio like 1:14. For a lighter, more delicate cup, you could open it up to 1:17.
Using a scale takes the guesswork out of the equation. It allows you to make tiny, intentional adjustments until you find the perfect recipe for your taste. This methodical approach is what turns brewing from a game of chance into a craft you can truly perfect.
A Practical Brewing Walkthrough
Alright, we’ve waded through the theory, but now it’s time to get our hands dirty. Let’s put all that knowledge into practice by brewing with two methods I absolutely love for their completely different results: the classic, immersive French Press and the clean, controlled V60 pour-over. This isn’t just a checklist; it’s about understanding the feel and flow of each step.
The Rich and Forgiving French Press
The French Press is a brilliant place to start your home brewing journey. Why? Because it’s incredibly forgiving. Its magic is in its simplicity—a full immersion brew that pulls out deep, robust flavours that are hard to mess up.
First up, add your coarsely ground coffee to the press. If you’re using a standard 1-litre French Press, a good starting point is around 60 grams of coffee. We’re aiming for a rich, full-bodied cup, and this method delivers that in spades.
Next, pour in just enough hot water—aim for about 94°C—to wet all the grounds. You’ll want about twice the weight of the coffee. This is what we call the bloom. Watch as the coffee bed bubbles and swells; that’s trapped CO2 gas escaping. This simple 30-second step is your insurance against sour notes and makes for a much more even extraction.
Once the bloom settles, pour in the rest of your water. Pop the lid on top, but—and this is important—do not plunge yet. Let it all steep for a total of four minutes. This waiting period is where the flavour develops. Too short, and you’ll get a weak brew; too long, and bitterness creeps in.
Timer’s up? It’s time to press the plunger down, but do it slowly and steadily. Rushing this part just stirs up the fine coffee particles, which can sneak past the filter and leave you with a muddy, gritty finish. Nobody wants that. Pour your coffee out immediately to stop the brewing process, and enjoy a truly satisfying cup.
The Clean and Precise V60 Pour-Over
Where the French Press is all about that deep, immersive richness, the V60 is a masterclass in precision and control. It’s a method that really lets the delicate, nuanced flavours of single-origin beans shine, which is why you’ll see it in just about every specialty coffee shop.
Start by placing a paper filter in the V60 and giving it a good rinse with hot water. This little step does two crucial things: it washes away any papery taste from the filter and, just as importantly, it preheats your brewer. A stable temperature is key for a great brew. Just make sure to toss out that rinse water.
Add your medium-fine ground coffee and tap the brewer to level the bed. I like to make a small well in the centre. Now, just like the French Press, we start with a bloom. A gentle pour of about 50-60 grams of water should saturate the grounds nicely. If your coffee is fresh, you’ll see a beautiful, lively bloom—a great sign of quality.
After a 30-second bloom, it’s time for the main pour. A gooseneck kettle is your best friend here, giving you the control you need. Pour in slow, concentric circles, trying to avoid hitting the very edges of the filter. This technique helps ensure all the coffee grounds are getting extracted evenly. Pour in pulses to keep the water level consistent without flooding the brewer. All in, you should be aiming for a total brew time of around 2.5 to 3 minutes.
The rhythm of your pour has a direct impact on the final taste. Pour too fast, and you risk a weak, under-extracted cup. Go too slow, and you can end up with a bitter, over-extracted brew. Learning to adjust your pour is how you really start to dial in the perfect flavour.
This infographic simplifies the core principles that apply to most brewing methods.
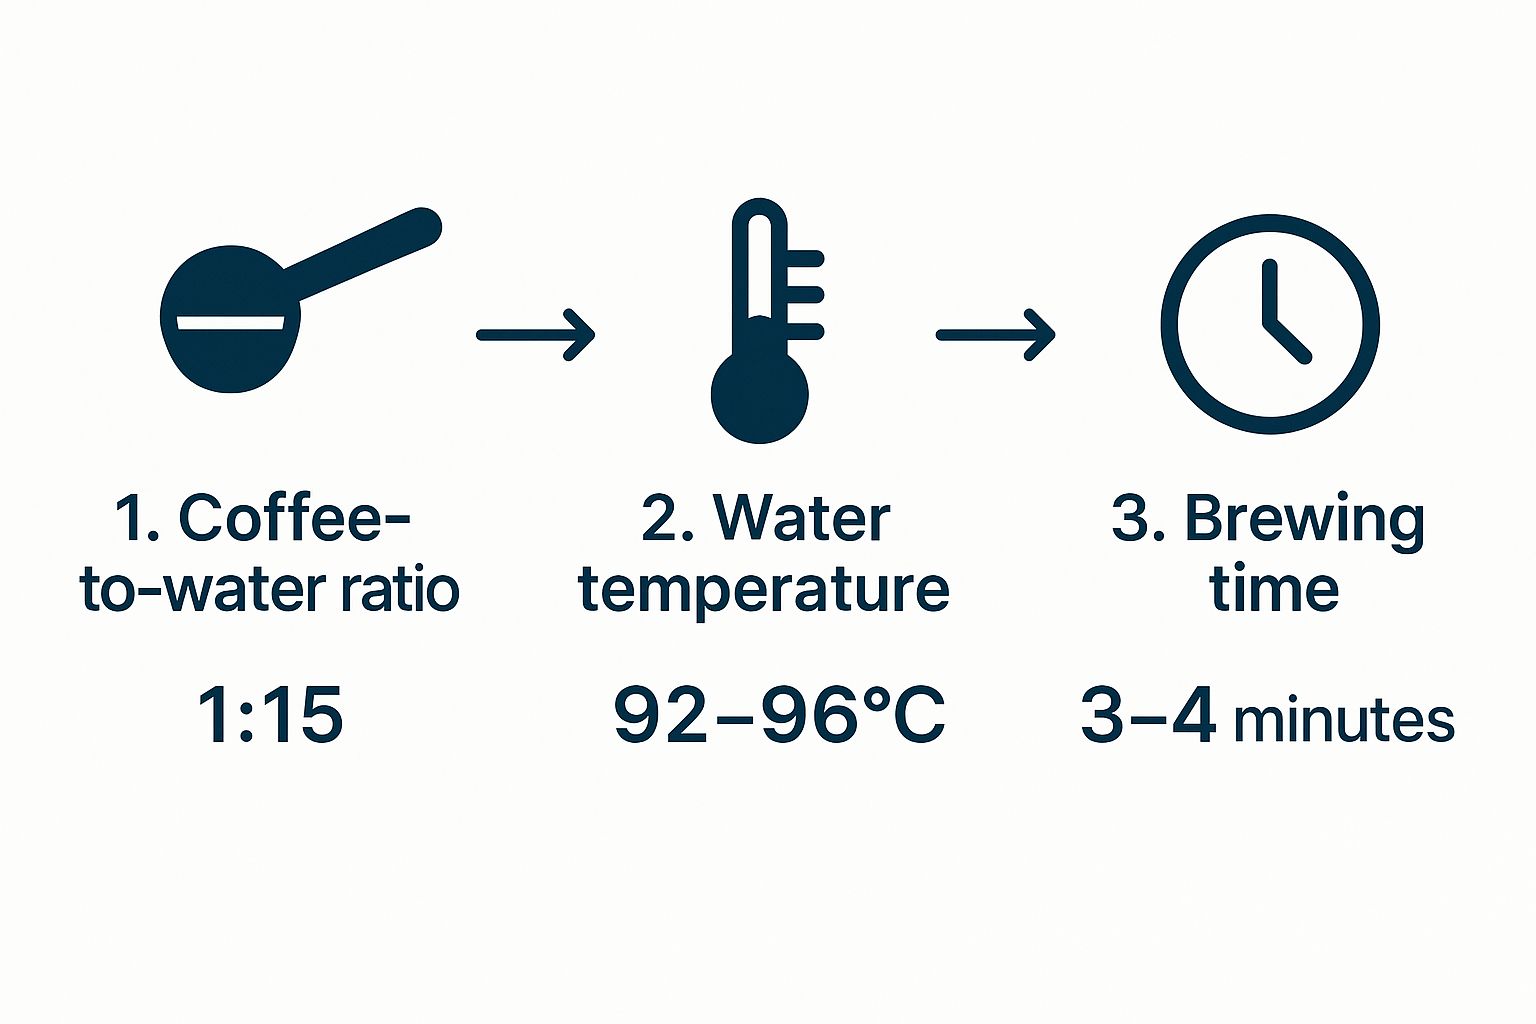
It really comes down to the foundational pillars of ratio, temperature, and time. These are your best starting points for any new coffee you try. Once you get the hang of these two very different methods, you’ll have the hands-on experience to tackle pretty much any brewing style with confidence.
Troubleshooting Common Brewing Issues

Even when you follow every step to the letter, coffee sometimes has a mind of its own. But don’t get frustrated by a disappointing cup—treat it as a clue. A bad brew is just your coffee’s way of telling you what it needs differently next time.
When things go wrong, the problem almost always boils down to one of two things: over-extraction or under-extraction. Get your head around these two concepts, and you’ll have the key to fixing pretty much any brew that comes your way.
Fixing Bitter or Harsh Coffee
If your coffee tastes unpleasantly bitter, astringent, or just a bit hollow, you’ve likely over-extracted it. This simply means the hot water has spent too much time with the grounds and started pulling out the harsher-tasting compounds. It’s a classic mistake, but thankfully, it’s an easy fix.
You just need to adjust one of three things:
- Coarsen your grind: A grind that’s too fine creates a massive surface area, causing flavour to be stripped out way too quickly. Try knocking your grinder setting a few notches coarser.
- Cut your brew time: If you’re steeping a French Press for five minutes, pull it back to four. For a pour-over, aim to finish your pour 20-30 seconds sooner and see how it tastes.
- Lower your water temperature: Water that’s boiling or close to it can literally scald the coffee. If you’re brewing at a blistering 96°C, try dropping down to 92°C to tame that bitterness.
Every brewing issue is a lesson in disguise. A bitter cup teaches you about extraction limits, while a sour one points towards grind size. Pay attention to these signals to refine your technique.
Solving Sour or Weak Coffee
On the flip side, does your coffee taste sour, unpleasantly acidic, or disappointingly weak and watery? That’s a textbook sign of under-extraction. The water simply didn’t have enough contact time or the right conditions to dissolve all the sweet, desirable flavours from the coffee.
To fix a sour brew, you need to increase your extraction—essentially, the opposite of everything we did to fix bitterness.
- Make your grind finer: This is your most powerful tool. A finer grind increases the coffee’s surface area, allowing the water to extract flavour much more efficiently.
- Increase your brew time: Give the water a bit more time to work its magic. Let that French Press steep for an extra minute or slow down the pace of your pour-over.
It’s fascinating to see how different jobs rely on that perfect brew. A survey of 20,000 UK workers revealed that journalists and media staff are the biggest coffee drinkers, getting through an average of 3.62 cups a day. Doctors and nurses aren’t far behind at 3.60 cups, needing that caffeine to power through long, high-stakes shifts. You can read more about these professional coffee habits on GCR Magazine.
By tweaking these simple variables, you can easily steer your brew away from sourness and towards that balanced, sweet cup you’re chasing. Learning to brew is all about making these small, deliberate adjustments.
Home Brewing FAQs: Your Questions Answered
Even with the best guide, a few questions always pop up when you’re getting hands-on with coffee. We get it. Think of this section as a chat with one of our baristas, tackling the most common hurdles people face when trying to nail that perfect brew at home.
What’s the single most important tool for better coffee?
Hands down, a quality burr grinder. It’s the biggest upgrade you can make to your coffee setup, period.
The moment coffee is ground, it starts losing flavour to oxygen—a process that happens shockingly fast. Grinding your beans just seconds before you brew is the only way to preserve all those delicate, aromatic compounds that make a great cup truly sing. A burr grinder works by milling the beans between two revolving surfaces, which gives you a really consistent particle size. This consistency is absolutely key for an even extraction, helping you dodge that nasty mix of bitter and sour notes that blade grinders are famous for.
Do I really need a special kettle and a scale?
Look, you can make coffee without them, but if you want consistency, they are absolute game-changers.
A digital scale is your best friend for making that perfect cup again and again. It takes all the guesswork out of measuring your coffee and water, so when you finally dial in a recipe you love, you can replicate it perfectly every single time. A gooseneck kettle, on the other hand, gives you incredible control over where your water goes and how fast it flows. This is especially vital for pour-over methods like the V60 or Chemex.
A gooseneck lets you saturate the coffee grounds gently and evenly, preventing any rough agitation that can lead to a messy, uneven extraction. It’s often the final piece of the puzzle that takes a cup from good to truly exceptional.
How do I know if my coffee beans are fresh?
Freshness is everything. The first thing to look for on any bag of coffee is a “roasted on” date. Ignore the “best before” date—it’s mostly meaningless. For peak flavour, you want to use your beans within three to four weeks of that roast date.
But there’s a fantastic visual test you can do right in your brewer: the “bloom.” It’s that magical moment when you pour the first bit of hot water over your grounds.
- Fresh coffee: Will puff up and bubble enthusiastically as it releases trapped CO2. This lively reaction is a brilliant sign that your beans are packed with flavour and aroma.
- Stale coffee: Will just sit there, looking a bit sad. You’ll see very few bubbles, if any. A flat bloom is a dead giveaway that your beans are past their prime.
Honestly, this simple test tells you more about your coffee’s potential than just about anything else.
Ready to put this knowledge to the test? At Seven Sisters Coffee Co, we source and roast exceptional single-origin beans and signature blends designed for the perfect home brew. Explore our collection and find your new favourite coffee today at https://sevensisterscoffee.co.uk.